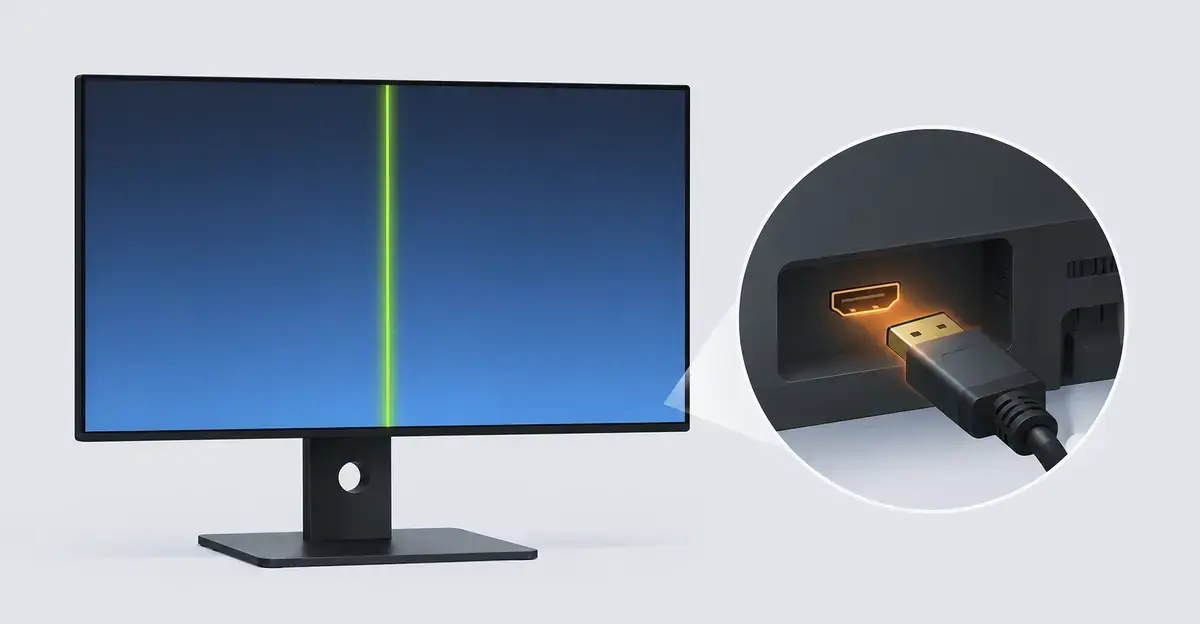
Green Lines on Screen: What Causes Them & How to Fix (2026)
A green line on screen is a visual defect where a strip of pixels stays stuck displaying green. In many cases, it can be fixed — the fix depends entirely on the cause. This guide walks you through diagnosis and repair for both laptop and external monitor green lines.
Why Your Screen Has a Green Line Right Now
A green line on screen is a vertical or horizontal strip of pixels that consistently displays green, regardless of the image being shown. The line may be one pixel wide or several millimetres thick, and it can appear anywhere on the screen — at the top, bottom, centre, or sides.
The key distinction is that these pixels are not dead — they are stuck on green. This means the green sub-pixel is receiving a constant signal while the red and blue sub-pixels remain off or at zero. In some cases, the line may flicker or shift slightly, indicating a loose connection rather than a hard failure.
Before diving into this guide, confirm you are dealing with a true green line and not a green screen tint:
| Symptom | Likely Cause | Learn More |
|---|---|---|
| One or more thin vertical green strips | Stuck green sub-pixel row or column | You are in the right place |
| The entire screen has a greenish colour cast | Graphics card issue or colour profile misconfiguration | Check GPU drivers |
| Green pixels scattered across the screen | Individual stuck pixels (green sub-pixel failure) | Dead Pixel Guide |
| Black vertical line across the screen | Dead pixel line | Black Line Guide |
This page focuses on fixed green lines — persistent strips that remain in the same position regardless of content.
Stuck Green Sub-Pixel vs Cable Damage — Which Do You Have?
Before deciding on a repair approach, you need to identify the root cause. The two most common reasons for green lines are stuck green sub-pixel columns and cable damage — and they require completely different fixes.
Stuck green sub-pixel column means the LCD panel's internal transistor controlling the green channel for an entire column of pixels has failed. The green sub-pixels in that column are permanently stuck in the "on" position. This is a panel-level failure — the panel itself must be replaced.
Cable damage means the signal travelling from the mainboard to the panel is being corrupted along the way. This can be the internal flex cable in a laptop (at the hinge) or the ribbon cable inside an external monitor connecting to the T-Con board. Cable damage is often fixable by reseating or replacing the cable — no panel replacement needed.
Quick test: Open and close the laptop lid slowly while viewing a white screen. If the green line flickers, shifts, or disappears when the lid is at certain angles, the flex cable is the culprit. If the line stays perfectly fixed regardless of lid position, you are likely looking at a stuck sub-pixel column or panel circuit failure.
The Flex Cable Problem at the Hinge (Why Laptops Break Here)
Laptop screens are particularly prone to green lines because the display flex cable passes through the hinge and experiences constant mechanical stress every time you open and close the lid.
The flex cable carries all display signals — data for every pixel column — from the mainboard to the screen panel. Over time, the internal traces in the flex cable develop micro-cracks from repeated bending. When specific traces fail, the signal to corresponding pixel columns becomes corrupted. Because the green colour channel is carried on specific traces, damage to those traces causes the green channel to dominate — producing a green line.
Common signs that your laptop has a green line caused by flex cable wear:
- The green line appears near the top or bottom edge of the screen
- It flickers when the lid is opened or closed
- The line may disappear when the laptop is gently pressed at the hinge
- The issue worsens over time as the cable deteriorates
Before seeking repair: Connect your laptop to an external monitor. If the external monitor shows no green line, the laptop's internal display panel or flex cable is the culprit. If the line appears on the external monitor too, the GPU is likely at fault.
Flex cable replacement is relatively inexpensive — typically $10–$30 for the part — and is one of the most common DIY laptop repairs.
External Monitors: T-Con Board Failure — The #1 Cause
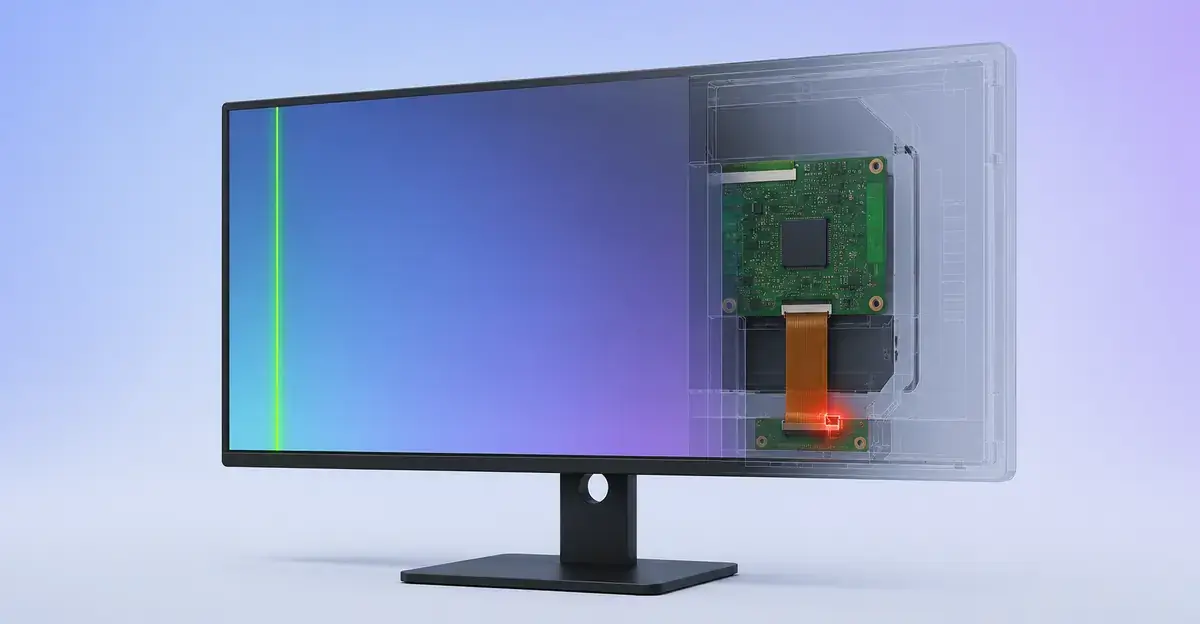
Green lines on external monitors are most commonly caused by T-Con board failure. The T-Con (timing controller) board translates the input video signal from your computer into the correct voltage signals for each sub-pixel on the LCD panel. If the T-Con board develops faults — particularly in the column driver circuitry — it sends incorrect green channel signals to specific pixel columns, producing a persistent green line.
T-Con failures are especially common in monitors older than two to three years. The symptoms are distinct:
- The green line is perfectly straight and stays in the same position
- The line is visible on all inputs (HDMI, DisplayPort, USB-C)
- The line does not flicker or shift when you move the monitor
- A different computer produces the same green line
For external monitors, try these steps before assuming hardware failure:
- Reseat the display cable (HDMI, DisplayPort, or VGA) at both ends
- Try a different cable type — for example, switch from HDMI to DisplayPort
- Test the monitor with a different computer to rule out the source device
- If the line persists, the monitor's internal hardware needs service
T-Con board replacement is a cost-effective fix — replacement boards typically cost $15–$50 depending on the monitor model, and the repair is straightforward for anyone comfortable opening the monitor casing.
Step-by-Step Fix (Organized by Diagnosis Result)
Follow this sequence based on what you observed in your diagnosis:
If the line flickers with lid movement (laptop — flex cable issue):
- Update or roll back your graphics drivers to rule out a software cause
- Gently open and close the lid several times while watching the line — if it shifts, flex cable is confirmed
- Disassemble the screen bezel and reconnect the display ribbon cable at the hinge
- If reseating does not help, replace the flex cable ($10–$30 for most models)
- If the line persists after cable replacement, the panel may be damaged
If the line stays fixed (laptop or monitor — panel or T-Con issue):
- Connect the device to a different computer or monitor to confirm it is not the GPU
- Update graphics drivers and restart
- For external monitors: replace the T-Con board ($15–$50)
- If T-Con replacement does not resolve it, the LCD panel itself is failing — replacement is the only option
If the line appears and disappears unpredictably (GPU issue):
- Update your graphics drivers to the latest version
- If the problem started after a driver update, roll back to the previous version
- Monitor GPU temperatures — overheating can cause colour artifacts
- If the line persists and worsens during gaming or GPU-intensive tasks, the GPU may be failing
What does not work:
- Pixel-fixing apps and videos — designed for individual stuck pixels, not whole lines
- Screen massage — no scientific evidence it repairs stuck pixel lines
- Software updates — hardware faults do not resolve through OS or driver updates
- Restarting or resetting — may temporarily hide the issue but it always returns
Real Case: How a Dell U2720Q User Fixed a Green Line for $15
A Dell U2720Q owner reported a thin vertical green line in the centre of the screen that appeared suddenly after moving the monitor. The line was exactly 1 pixel wide and stayed fixed in position regardless of what was displayed.
Diagnosis: Straight, fixed vertical line on all inputs pointed to either the internal ribbon cable or T-Con board. Since the monitor had been moved recently, a loose cable connection seemed most likely.
Steps taken:
- The owner opened the monitor casing (Dell U-series monitors have accessible rear covers)
- Found the ribbon cable connecting the panel to the T-Con board was partially unseated
- Reseated the cable firmly and reassembled the monitor
- The green line disappeared completely
Total cost: $0 — no parts needed, just careful cable reseating.
Key takeaway: Before spending $30–$50 on a replacement T-Con board, check that all internal cables are firmly seated. Moving a monitor can loosen connections.
MacBook Pro 2020 Owners — AMD GPU Failure Pattern You Need to Know
MacBook Pro models from 2018–2020 with the AMD Radeon Pro 5500M or 5300M GPU have a documented history of producing green lines, purple lines, and colour artifacts. This is a known hardware failure pattern — not a software issue.
How to identify this pattern:
- Green or purple lines appear and shift position on the screen
- The lines are not in a fixed column — they can move or flicker
- The issue occurs regardless of which application is running
- Connecting an external monitor shows the same lines (confirming GPU involvement)
- The problem may start intermittently and worsen over time
If you have a MacBook Pro 2018–2020 with these symptoms:
- Apple offered a free repair program for affected models — check if your serial number qualifies
- Try resetting the SMC (System Management Controller) and NVRAM as a first step
- If the lines persist, the GPU is failing and the logic board needs repair or replacement
- Third-party GPU repair services can sometimes reball or reflow the GPU chip as an alternative to full board replacement
Important: Do not ignore this pattern. On these MacBook models, green lines caused by GPU failure typically get worse over time and can eventually prevent the MacBook from displaying any image at all.
When to Replace the Panel (vs Fix the Cable)
The decision between cable repair and panel replacement comes down to three factors: cost, cause, and device type.
Replace the flex cable (DIY-friendly, $10–$30):
- Green line flickers with lid movement on a laptop
- Line appeared gradually over weeks or months
- You are comfortable opening the laptop bezel
- The rest of the screen looks healthy
Replace the T-Con board ($15–$50, moderate DIY):
- Fixed vertical green line on an external monitor
- Monitor is 2+ years old
- Line appeared suddenly after moving the monitor
- A different computer shows the same line
Replace the panel ($100–$400, professional recommended):
- Stuck green sub-pixel column confirmed (line stays fixed on all backgrounds)
- Physical damage to the screen (pressure marks, cracks)
- Multiple lines appearing or the line is growing
- Repair cost approaches or exceeds 50% of the device's replacement value
- MacBook or premium laptop where panel replacement is complex
Warranty check: If your device is still under manufacturer warranty, always pursue warranty repair first — panel replacement is free if the manufacturer covers it.
Consider professional repair or replacement when:
- The green line is in your primary viewing area and affects your productivity
- The line is growing or new lines are appearing over time
- The line flickers or shifts with lid movement — flex cable repair requires disassembly
- Your device is still under warranty — manufacturer repairs may be free
- The repair cost is less than 50% of the device's replacement value
- You have a MacBook or premium laptop where the panel replacement is complex
Related Screen Issues
Green lines are closely related to other display defects. Understanding the connections helps you find the right solution:
- Dead Pixel: Individual permanently dark or discoloured pixels — distinct from green lines
- Dead Line of Pixels: An entire line of dead pixels — directly relevant if your green line is expanding
- Black Line: Permanently dark lines across the screen — parallel issue for comparison
- LCD Bright Spots: Bright glowing areas — the opposite of lines in some ways
- Screen Test Tool: Test your screen to diagnose and track green lines
- LCD Spot Damage: Physical damage to the display panel that may cause lines
See also: Blue Spots on Screen — blue-tinted spots and lines caused by sub-pixel transistor failure, a lesser-known display defect that is related to the same type of panel circuit failure that can cause green lines.
- Orange Screen on Laptop: Persistent orange tint on your display — cable, calibration, or hardware issue
See also: Screen Flickering: Screen flickering and green lines often share the same root causes — ribbon cable damage and GPU issues can manifest as either problem.
Also see: White Line on Screen: Persistent white lines across your screen — the same flex cable damage and T-Con failures that cause green lines can also produce white lines, depending on which circuit pathway fails.
See also: Red Screen: Persistent red tint on your display — cable, calibration, or hardware issue causing the blue color channel to be lost.
Also see: Pink Screen: A persistent pink or purple tint on your display — like red and orange screens, this indicates a missing or reduced blue color channel, sharing the same cable, calibration, and hardware-related root causes.
Technical Deep Dive: How T-Con Board Failures Produce Green Lines
Understanding the internal mechanics of how a T-Con board failure produces a green line helps you make better repair decisions and communicate effectively with repair technicians.
The T-Con Board's Role in Your Display
The Timing Controller (T-Con) board is the brain of your monitor's display system. It receives the video signal from your computer through HDMI, DisplayPort, or USB-C, and translates it into the specific voltage signals needed to control each sub-pixel on the LCD panel.
Think of it as a translator: your computer sends digital image data in a standardized format. The T-Con board converts that data into analog voltage signals that tell each sub-pixel exactly how much light to allow through. For a 1920x1080 monitor, that means the T-Con board must individually control over 6 million sub-pixels — roughly 2 million red, 2 million green, and 2 million blue.
The board contains several key components:
- Input receivers — circuits that read the incoming HDMI/DisplayPort signal
- Scalers and image processors — circuits that adjust the image for the panel's native resolution
- Row drivers (gate drivers) — circuits that activate each horizontal row of pixels in sequence
- Column drivers (source drivers) — circuits that provide the color voltage signal to each vertical column of pixels
- Timing circuits — oscillators and clock circuits that synchronize everything
Why Column Drivers Fail First
Green lines specifically point to column driver failure. The column driver circuits on the T-Con board send color voltage signals to each vertical column of sub-pixels. Each column driver controls one color channel (red, green, or blue) for its entire column.
When a column driver for the green channel fails, every pixel in that column receives a constant green signal — regardless of what the image data says. The result is a vertical green line that stays fixed in the same position.
Why green specifically? In most LCD panels, green sub-pixels are the most sensitive to voltage irregularities. Green is in the middle of the visible spectrum and requires the most precise voltage control to display correctly. This makes the green channel more prone to showing artifacts when the column driver starts to degrade.
Stages of T-Con Board Failure
T-Con failures typically progress through stages:
Stage 1 — Intermittent symptoms: The green line may appear only at certain resolutions, refresh rates, or after the monitor has been running for a while. You might notice the line appears after the monitor warms up or when switching inputs.
Stage 2 — Consistent symptoms: The green line now appears regularly but may still disappear during certain screen content. The line might fade slightly on dark backgrounds and become more prominent on bright backgrounds.
Stage 3 — Permanent failure: The green line is visible on all content, all inputs, and all resolutions. At this stage, the column driver circuit has completely failed and the board must be replaced.
Catching T-Con failure at Stage 1 or 2 and replacing the board can sometimes prevent complete failure, but most users only notice the problem when it reaches Stage 3.
T-Con Board Identification and Ordering
Finding the correct replacement T-Con board is straightforward:
- Power down the monitor and disconnect all cables
- Open the monitor casing — most monitors have screws hidden under stands and rear labels
- Locate the T-Con board — it is a small PCB typically near the centre of the monitor, connected to the panel via ribbon cables
- Note the model number — it is printed on a white label on the board (e.g., "T370HGB02.0" or "M350XVN02.0")
- Search eBay and Amazon using that exact model number
Warning: T-Con boards are panel-specific. A board from a different monitor model, even if it looks physically similar, will not work correctly. The firmware on the board is programmed for the specific panel's resolution, refresh rate, and voltage requirements.
If you cannot find the exact model, try searching for "T-Con board [your monitor brand and model]" — sellers often list compatibility information.
GPU Causes: When Your Graphics Card Is the Culprit
While cable and T-Con issues cause most green lines, your graphics processing unit (GPU) can also produce this symptom. Understanding when the GPU is at fault saves you from unnecessarily replacing monitor components.
How to Tell If Your GPU Is Causing Green Lines
Key indicator: The green line appears on your external monitor but not on your laptop's built-in screen (or vice versa). If your laptop has a dedicated GPU and the line appears only on the external monitor, the GPU is sending corrupted colour data.
Test sequence:
- Connect your monitor to a different computer or laptop using the same cable
- If the line persists on the second device, your original GPU is likely at fault
- If the line disappears on the second device, the monitor or cable is the problem
Secondary indicators:
- The green line changes position or shape when you run GPU-intensive applications
- The line appears in the same location regardless of which monitor is connected
- Updating or rolling back your graphics drivers temporarily fixes the problem
- The line flickers or shifts during system stress (gaming, video rendering)
Which GPUs Are Most Likely to Cause Green Lines
Dedicated GPUs (discrete graphics):
- NVIDIA GeForce GTX and RTX series — known for driver-related colour artifacts
- AMD Radeon RX series — can produce colour lines when drivers conflict with panel EDID data
- Mobile GPUs in gaming laptops — prone to overheating, which causes signal corruption
Integrated GPUs (iGPU):
- Intel HD and UHD Graphics — rare but possible, usually indicates a failing CPU
- Apple M1/M2/M3 — extremely rare; when it happens, it is usually a hardware fault
Driver vs Hardware GPU Failure
Distinguishing between a driver issue and actual GPU hardware failure is critical:
Likely driver issue:
- The problem started after a driver update
- Rolling back to the previous driver version eliminates the line
- The line appears in the same position on all connected monitors
- The line flickers or shifts randomly
Likely hardware failure:
- The problem started without any software changes
- The line worsens over time regardless of driver version
- The GPU runs unusually hot (check with monitoring software)
- Other GPU functions are affected (slow performance, crashes, artefacts elsewhere)
If your GPU is failing:
- For desktop PCs, the GPU can be replaced relatively easily
- For laptops, GPU replacement usually means replacing the entire motherboard
- Some third-party repair services can reball or reflow a failing GPU chip as a temporary fix
Prevention: Protecting Your Screen From Green Lines
While not all green lines are preventable, understanding the common triggers helps you reduce risk.
For Laptop Users
The hinge stress problem is the primary risk factor. Every opening and closing cycle stresses the flex cable. You cannot eliminate this stress, but you can reduce it:
- Open and close the lid by the centre rather than by the corners — this distributes stress more evenly across the flex cable
- Avoid using the lid to carry the laptop — this puts extreme stress on the hinge area
- Keep foreign objects away from the keyboard before closing — earbuds, pens, and debris can press against the screen through the keyboard
- Use a protective sleeve when transporting — prevents impact damage to the screen
- Avoid extreme temperatures — heat accelerates the degradation of flex cable traces
Screen protector consideration: A tempered glass screen protector adds a layer of physical protection that can prevent impact damage from causing internal display faults.
For External Monitor Users
Cable management matters:
- Avoid tight bends in display cables — this stresses the internal conductors
- Do not route cables through areas where they can be kicked or pulled
- Use cable retention clips if your monitor has them
Environmental factors:
- Avoid placing monitors in direct sunlight — UV light degrades plastic components including ribbon cable insulators
- Maintain adequate ventilation — monitors generate heat, and excessive heat accelerates component failure
- Avoid areas with high humidity — moisture can corrode internal circuit board connections
Movement and transport:
- Power down before moving a monitor — electrical signals during movement increase the chance of cable shift
- Use the original packaging when transporting — foam inserts protect against impact
- Tighten the stand or mount securely — a wobbly monitor is more likely to fall or be knocked
Long-Term Monitoring
Know your baseline:
- Run a screen test monthly and note any changes
- Photograph your screen under uniform color backgrounds — this makes subtle changes easier to spot
- Keep records of when defects first appeared — this helps identify patterns and warranty eligibility
Early intervention:
- If you notice a single stuck pixel or a faint line that was not there before, the underlying fault may still be intermittent
- Check cable connections and reseat them proactively
- Monitor for worsening — a line that appeared suddenly and stayed is more likely to be a hard failure than a loose connection
Green Line Sub-Topics
For more specific green line issues, see these dedicated guides:
- Green Line on Laptop Screen: Comprehensive guide for laptop-specific green line problems
- Green Line at Bottom of Screen: Fix guide for bottom-edge green lines on laptops
- Green Lines on Monitor: External monitor green line troubleshooting
- Horizontal Green Line on Laptop: Fix guide for horizontal green lines
- Pink and Green Lines on Laptop: When colored lines appear together
- Windows 10 Green Lines: Windows 10-specific display solutions
Conclusion
Green lines on screen are most commonly caused by stuck green sub-pixel rows or columns, flex cable damage in laptops, or T-Con board failures in external monitors. Software fixes are ineffective — the only real solutions are hardware repair or replacement. Use the screen test tool to confirm the type of defect, check your device warranty before paying for repairs, and consider whether the repair cost is justified relative to the device's value. For laptops, flex cable reseating is often a viable DIY repair. For external monitors, T-Con board replacement is the most cost-effective solution for aging displays.