A red screen means the blue color channel in your display signal has failed — leaving only red and green to blend into a visible red or orange tint. This guide explains why that happens and gives you a step-by-step path to fix it, whether it's a loose cable you can reseat at home or a hardware issue requiring professional repair.
Red Screen on Laptop: Why It Happens and How to Fix It
Why Your Screen Is Red — and What It Says About the Blue Channel
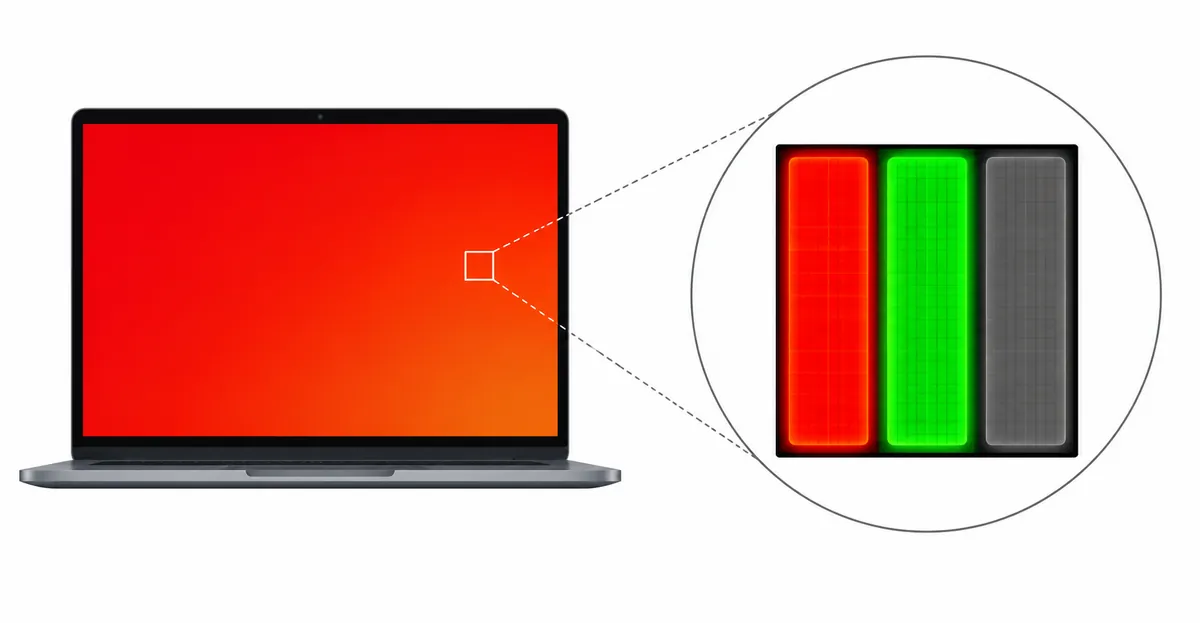
A red screen occurs when the blue channel of the display signal is lost or corrupted. In an RGB colour model, blue is the component that balances red and green. Without it, the screen displays warm tones ranging from bright red to deep orange and pink.
The key insight is that a red screen is not a red problem — it is a blue problem. The blue colour channel has either failed entirely or been severely reduced. Without blue to neutralise it, red dominates, producing the characteristic warm tint.
This is distinct from other display issues:
| Symptom | Issue Type | Learn More |
|---|---|---|
| Entire screen tinted red or orange | Red Screen | You are here |
| Thin red lines across the screen | Red Line / Column Driver Failure | Black Line Guide |
| Small red spots or dots | Sub-pixel damage | Dead Pixel Guide |
| Orange tint on specific areas | Cable or calibration issue | Orange Screen Guide |
| Screen flickering with red tint | Cable or driver issue | Screen Flickering Guide |
Cable, Driver, or Panel? — 5-Minute Self-Diagnosis
Before trying fixes, you need to know whether your red screen is caused by a cable, a driver, or the panel itself. Here is a quick self-diagnosis:
Step 1: External monitor test (laptops only)
- Connect your laptop to an external monitor with the same cable
- If the external monitor shows correct colours: the laptop's internal panel or flex cable is the issue
- If the external monitor also shows red: the graphics card or its drivers are at fault
Step 2: Cable reseat test
- Unplug and replug the HDMI, DisplayPort, USB-C, or VGA cable at both ends
- Try a different cable if available
- If the red tint disappears: the cable connection was the cause
Step 3: Software test
- Boot into Safe Mode or try a different operating system (e.g., boot from a USB drive)
- If the red tint disappears in a different OS: a software or driver issue is confirmed
- If it persists: hardware failure is confirmed
Step 4: Night Shift check (MacBook)
- Go to System Settings → Displays
- If Night Shift is enabled, turn it off
- If True Tone is enabled, turn it off
- If the red tint disappears: it was a software setting
The MacBook Flex Cable Degradation Pattern (2016–2019 Models)
MacBook models from 2016–2019 have a well-documented pattern of developing colour tints — including red and orange — due to flex cable degradation at the hinge.
Why it happens: The flex cable carrying display signals runs through the hinge. On these older MacBook models, the cable insulation degrades over time from the heat generated by the laptop's operation. The cable's colour signal traces (specifically the blue channel) are among the first to deteriorate, causing a red or pink tint that often starts at the bottom or edges of the screen.
How to identify this pattern:
- The red tint started gradually, not suddenly
- It is more visible at certain lid angles
- The tint may shift from red to orange as the cable degrades further
- You have a MacBook Pro 2016–2019 or MacBook Air 2018–2019
Repair options:
- Apple Store diagnosis — free, Apple may cover under Quality Program
- Flex cable replacement — $100–$200 through Apple or third-party
- DIY replacement — replacement cables available for $20–$50 with iFixit guides
Important: Do not ignore this pattern. Left untreated, flex cable degradation on these MacBook models can progress to complete display failure where the screen goes black.
Night Shift and True Tone — The Setting That Turns Screens Orange
Before assuming a hardware problem, check your display settings. Night Shift and True Tone are macOS features designed to reduce eye strain by shifting your screen's colour temperature toward warmer tones.
Night Shift: Automatically adjusts colour temperature based on time of day. When enabled, it shifts colours toward orange/red. This is a software feature, not a hardware failure.
True Tone: Uses an ambient light sensor to adjust the display's colour temperature to match the surrounding light. This can cause a reddish or warm tint in certain lighting conditions.
How to check and disable:
- Go to System Settings → Displays
- Look for Night Shift toggle — turn it off
- Look for True Tone toggle — turn it off
- Observe whether the red tint disappears
Windows equivalent settings:
- Night Light mode: Settings → System → Display → Night Light → Off
- Colour profile: Settings → System → Display → Advanced Display Settings → Colour Calibration
If disabling Night Shift or True Tone removes the red tint, your screen was never broken — it was a software setting.
GPU Failure: How to Tell If Your Graphics Card Is the Culprit
If your red screen persists after reseating cables and disabling Night Shift, the graphics card may be failing.
Signs that point to GPU failure:
- The red tint appears on both your laptop screen and external monitor
- The tint appeared suddenly after a system crash, driver update, or overheating event
- The red tint shifts or flickers during GPU-intensive tasks (gaming, video editing)
- You see additional artefacts — lines, pixelation, or colour banding
- Updating or rolling back the GPU driver does not resolve it
How to test GPU:
- Connect your device to a different monitor — if the second monitor also shows red, the GPU is the issue
- Run a GPU stress test (like FurMark) — if the red tint worsens under load, GPU overheating is confirmed
- Check GPU temperatures with a monitoring tool — if temperatures exceed 90°C under normal use, thermal throttling may be causing colour corruption
GPU failure is serious. Unlike cable issues, a failing GPU cannot be repaired by reseating cables. Options include:
- Laptop with dedicated GPU: the entire motherboard may need replacement
- Desktop with dedicated GPU: replace the graphics card
- MacBook: Apple Store or authorised repair for logic board repair or replacement
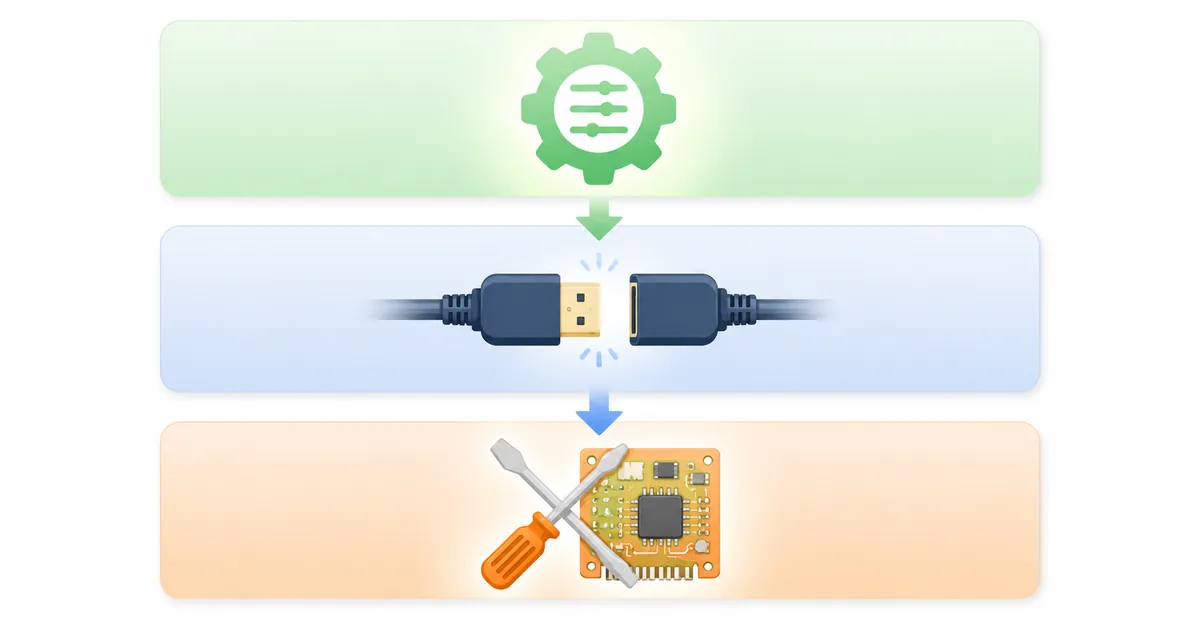
Step-by-Step Fix Sequence (Start Here)
Work through this sequence from easiest to most complex:
Level 1 — Software fixes (do these first, free):
- Disable Night Shift and True Tone (MacBook) or Night Light (Windows)
- Update your graphics drivers to the latest version
- Roll back to the previous driver version if the red tint started after an update
- Reset the display colour profile in OS settings
- Run Windows Colour Calibration or macOS Display Calibrator
Level 2 — Cable fixes (easy, low cost):
- Unplug and replug all display cables at both ends
- Try a different cable type (e.g., switch from HDMI to DisplayPort)
- Try a different port on your computer
- On laptops: open the bezel and reseat the internal flex cable at the hinge
Level 3 — Hardware fixes (moderate to high cost):
- Replace the T-Con board on external monitors ($15–$50)
- Replace the flex cable on laptops ($10–$50)
- Replace the display panel (last resort, $80–$400)
Real Case: An ASUS User's Red Screen Resolved by a $3 Cable Reseat
An ASUS laptop owner reported a bright red tint covering the entire screen that had appeared suddenly after the laptop woke from sleep mode. The screen was essentially unusable for any colour-accurate work.
Initial assumption: The panel was failing and needed replacement.
Diagnosis steps:
- Connected to external monitor — external monitor displayed correct colours. Confirmed internal hardware issue.
- Tried reseating the HDMI cable at the laptop end — red tint persisted.
- Opened the laptop bezel (4 screws around the screen) — found the internal LVDS cable connector was partially unseated from the motherboard.
- Reseated the connector firmly, reassembled the laptop.
- Red tint disappeared completely.
Total cost: $0. The cable was simply loose.
Key takeaway: A red screen from a loose internal cable can look identical to a red screen from a failing panel. Always check cable connections before assuming the panel is dead.
iPad Red Screen of Death — Recovery Steps That Actually Work
iPads occasionally develop a red screen issue — the display turns red or pink and may be accompanied by flickering or touch unresponsiveness.
Common causes on iPad:
- Software glitch — iPadOS bug causing colour profile corruption
- Flex cable wear — especially on iPad models that are frequently flexed (iPad Air, iPad Pro with Magic Keyboard)
- Display connector loose — internal connector may have worked loose from drops or impacts
- Display hardware failure — least common but most serious
Recovery steps (try in order):
- Force restart: Press and hold the top button and either volume button until the slider appears → power off → turn back on
- Reset all settings: Settings → General → Transfer or Reset → Reset → Reset All Settings (this does not delete data)
- Restore from DFU mode: Connect to a computer, put iPad in DFU mode, restore via iTunes/Finder
- If none of the above work: hardware repair or screen replacement at an Apple Store
Technical Deep Dive: How RGB Color Channels Actually Work
To understand why a blue channel failure produces a red screen, you need to understand how LCD displays generate colour. Every pixel on an LCD screen is composed of three sub-pixels: red, green, and blue. By varying the intensity of each sub-pixel, the display can produce millions of colours.
The RGB signal transmission process:
-
GPU processing: The graphics card calculates the colour value for each pixel, breaking it down into red, green, and blue intensity values (typically 0–255 for each channel)
-
Signal encoding: These values are encoded into a digital signal (HDMI, DisplayPort) or analogue signal (VGA, DVI-A) for transmission to the display
-
Panel reception: The display panel receives this signal and distributes it to the appropriate driver circuits
-
Sub-pixel activation: The column and row drivers activate each sub-pixel at the specified intensity, creating the visible image
Why blue fails first in cable degradation:
The blue channel is particularly vulnerable in flex cables for two reasons. First, the blue signal trace is typically routed on the outer edge of ribbon cables where insulation is thinnest and mechanical stress is highest. Second, blue sub-pixels in some panel designs require slightly higher voltage to achieve equivalent brightness — this makes the blue circuit more sensitive to resistance increases caused by cable wear.
The voltage sensitivity hierarchy:
| Channel | Typical Voltage | Failure Sensitivity |
|---|---|---|
| Red | 3.3V | Low |
| Green | 3.3V | Low |
| Blue | 3.3–5.0V | High |
When a cable degrades, increased resistance first affects the highest-voltage channel. For blue, this means partial or complete signal loss before red or green are affected.
Real Case Studies: Red Screen Failures in the Wild
Case 1: NVIDIA GPU Thermal Failure on a Gaming Desktop
A user with a custom gaming PC built around an NVIDIA RTX 3070 noticed a persistent red tint appearing during extended gaming sessions. The tint would start mild and intensify over 30–60 minutes of gameplay.
Diagnosis:
- Connected a second monitor — the second monitor also developed a red tint under GPU load. Confirmed GPU involvement.
- Monitored GPU temperatures using MSI Afterburner — temperatures reached 85–89°C during gaming, approaching the RTX 3070's thermal throttle threshold of 90°C.
- Tested with FurMark stress test — red tint appeared within 5 minutes of sustained load, confirming thermal throttling was corrupting the colour signal.
Solution: The GPU's thermal paste had dried out, causing temperatures to spike. Repasting the GPU with fresh thermal compound reduced peak temperatures to 72°C under load. The red tint disappeared completely.
Cost: $15 for thermal paste. Professional installation if needed: $50–$80.
Key insight: GPU overheating does not always cause a black screen or crash. Colour signal corruption is often the first sign of thermal throttling.
Case 2: MacBook Pro 2017 Flex Cable Failure Progression
A MacBook Pro 2017 owner documented the progression of their red screen issue over six months.
Month 1–2: Occasional pink tint at the bottom edge of the screen, only visible on dark backgrounds.
Month 3–4: Pink tint became constant but remained subtle enough to ignore for most tasks.
Month 5: Tint intensified to visible red, now affecting the entire lower third of the screen.
Month 6: Screen began flickering and occasionally going black when the lid was opened past 90 degrees.
Outcome: Apple Store diagnosis confirmed flex cable failure. The MacBook was covered under Apple's Quality Program, and the repair was performed free of charge.
Key insight: Flex cable degradation is progressive. Early intervention — even before the screen becomes unusable — is worth pursuing. Apple's Quality Programs often cover models from this era.
Case 3: Corrupted ICC Profile After DisplayLink Driver Update
A user running a docking station with DisplayLink adapters noticed their entire screen turned red after a Windows update. The tint was so severe that the display was essentially unusable.
Diagnosis:
- Booted into Safe Mode — red tint persisted, ruling out most user-space software.
- Connected to a direct HDMI port (bypassing the docking station) — tint remained. Ruled out docking station as sole cause.
- Checked Windows Colour Calibration — discovered the active ICC profile had been reset to a corrupted default.
- Reset colour profile to system default — red tint disappeared immediately.
Solution: Windows update had overwritten the custom ICC profile with a corrupted colour mapping. Restoring the original profile or resetting to default resolved the issue.
Cost: $0.
Key insight: DisplayLink adapters and docking stations introduce additional colour management layers that can become corrupted or conflicting. When using docking stations, keep backups of your ICC profiles.
Prevention Guide: Protecting Your Display from Red Screen Issues
Red screens are often preventable with proper care and maintenance. Here is how to protect your display:
For laptops:
-
Handle with care at the hinge: The flex cable is most vulnerable at the hinge point. Open and close your laptop by the centre of the lid, not by one corner. Avoid extreme opening angles beyond 135 degrees.
-
Use a protective sleeve: Transport your laptop in a padded sleeve to absorb shocks that could dislodge internal connectors.
-
Monitor hinge health: If you notice any resistance, creaking, or changes in screen brightness when opening the lid, investigate the hinge and cable early.
-
Keep vents clear: Heat accelerates cable insulation degradation. Ensure your laptop has adequate airflow and clean vents regularly.
-
Update drivers promptly: Keep graphics drivers updated, but avoid updating immediately after a major system update — wait a week to ensure compatibility.
For external monitors:
-
Secure cable connections: Use cable clips or cable management solutions to prevent cables from being pulled or shifted.
-
Avoid bending cables sharply: Sharp bends in HDMI, DisplayPort, or USB-C cables increase resistance and can degrade signal quality over time.
-
Use high-quality cables: Cheap cables have thinner gauge wiring and less robust connectors. Invest in certified cables, especially for 4K or high-refresh-rate displays.
-
Protect from power surges: Use a surge protector or UPS with surge suppression. Power spikes can corrupt display signal processing.
-
Ventilation: Monitors generate heat. Ensure adequate airflow around the monitor, especially if mounted in enclosed spaces.
For both:
-
Maintain backup colour profiles: Export and save your ICC profiles. If you use multiple monitors, keep a profile for each.
-
Document normal behaviour: Take note of what your screen looks like when working correctly. You will notice abnormalities faster.
-
Regular driver reviews: Every 3–6 months, check for driver updates and review any known issues with your specific GPU and display combination.
When to Stop Troubleshooting: Decision Framework
At some point, continued troubleshooting provides diminishing returns. Here is how to decide when to seek professional help or accept a repair:
Continue troubleshooting if:
- The issue is intermittent and resolves with cable reseating
- The tint only appears in specific applications (suggests software)
- You have not yet tried all software and cable fixes
- The device is under warranty
- The repair cost exceeds 50% of the device's replacement value
Stop troubleshooting and seek professional help if:
- The tint appeared after physical impact or liquid exposure
- The external monitor also shows the tint (GPU involvement)
- You have tried all software fixes including driver rollback and profile reset
- The tint is progressively worsening
- The device shows additional symptoms: lines, flickering, dead pixels alongside the tint
- BIOS or safe mode also shows the tint (confirms hardware)
The 5-minute decision test:
Ask yourself these questions:
- Does the tint appear on a second monitor? If yes, stop cable troubleshooting — GPU is involved.
- Did the tint appear suddenly after a crash, update, or physical event? If yes, hardware damage is likely.
- Has the tint been worsening over weeks or months? If yes, degradation is progressing — get a diagnosis.
- Are you seeing additional defects (lines, flickering, black spots)? If yes, multiple failures may be occurring.
- Is the device out of warranty and the repair cost likely over $150? If yes, consider replacement.
Professional diagnosis options:
- Manufacturer support: Often free for in-warranty devices. Apple, Dell, HP, and Lenovo all offer online diagnostics.
- Third-party repair shops: Typically $30–$50 for diagnosis, applied to repair cost if you proceed.
- Local electronics repair: May be cheaper for simple fixes like cable replacement on common laptop models.
iPad Red Screen of Death — Recovery Steps That Actually Work
iPads occasionally develop a red screen issue — the display turns red or pink and may be accompanied by flickering or touch unresponsiveness.
Common causes on iPad:
- Software glitch — iPadOS bug causing colour profile corruption
- Flex cable wear — especially on iPad models that are frequently flexed (iPad Air, iPad Pro with Magic Keyboard)
- Display connector loose — internal connector may have worked loose from drops or impacts
- Display hardware failure — least common but most serious
Recovery steps (try in order):
- Force restart: Press and hold the top button and either volume button until the slider appears → power off → turn back on
- Reset all settings: Settings → General → Transfer or Reset → Reset → Reset All Settings (this does not delete data)
- Restore from DFU mode: Connect to a computer, put iPad in DFU mode, restore via iTunes/Finder
- If none of the above work: hardware repair or screen replacement at an Apple Store
Related Screen Issues
Red screens share root causes with several other display colour issues:
- Orange Screen: Persistent orange tint — similar causes, often software settings first
- Pink Screen: Persistent pink or purple tint — related to the same blue channel failure
- Screen Flickering: Flickering with colour tints often shares cable causes
- Black Line: Black lines and colour tints can appear on the same device from the same flex cable issue
- Screen Test Tool: Test your screen to confirm the blue channel is missing
Conclusion
A red screen means your blue colour channel has failed — most commonly due to a loose cable, software setting, or flex cable degradation. Work through the software fixes first (disable Night Shift, update drivers), then reseat cables, then investigate hardware. MacBook owners with 2016–2019 models should check Apple's Quality Programs before paying for repair. If the red tint appears on both your screen and an external monitor, the GPU is likely failing.