Vertical lines on a monitor are among the most common display defects. A thin black (or colored) line running from top to bottom of your screen is alarming, but the cause and fix depend heavily on the source. Most cases are fixable without panel replacement.

How to Fix Vertical Lines on Monitor: Causes & Solutions (2026)
What Vertical Lines Mean
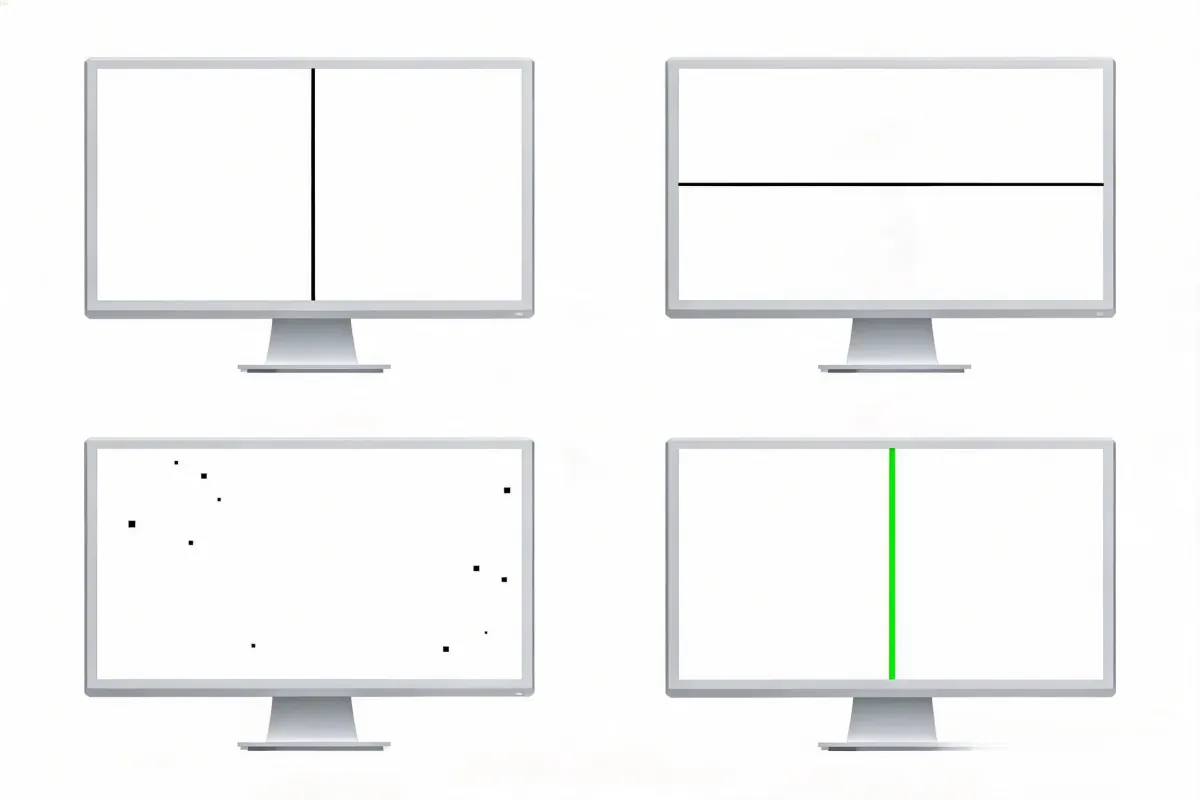
Vertical lines run from the top to the bottom of the screen. They can be thin single-pixel lines or wide bands, black, white, or colored. The key characteristic: they span the full height of the display.
The mechanism: Vertical lines indicate failures in the column electrodes — the vertical signal pathways that carry data to each pixel column. When a column electrode fails, every pixel in that column displays the same incorrect value.
Vertical vs. other defects:
- Vertical lines: Column electrode failure (this guide)
- Horizontal lines: Row electrode failure (different cause)
- Dead pixels: Individual pixel failures (not full-width lines)
- Colored lines: Color channel failures (see colored lines guide)
The Three Most Common Causes
1. Ribbon Cable Issues (Most Common)
The ribbon cable connecting the T-con board to the LCD panel carries column electrode data. When individual conductors in this cable break or degrade, specific columns lose their signal — creating vertical lines.
Why cables fail:
- Repeated opening/closing of laptop lids stresses cable at the hinge
- Heat accelerates conductor degradation over time
- Physical movement during transport can break conductors
- Poor cable routing can cause chronic stress points
The good news: Cable replacement is the cheapest fix ($15-40 for laptops).
2. T-Con Board Failures
The timing controller (T-con) board generates the precise signals that drive each column electrode. When the T-con malfunctions, specific columns receive incorrect timing signals — manifesting as vertical lines.
Signs of T-con cause:
- Lines appeared suddenly without physical trigger
- Lines are accompanied by flickering or rolling artifacts
- Multiple lines appear simultaneously
- Problem appeared after power surge or heat event
The fix: T-con board replacement ($25-80) is an established repair.
3. Column Electrode Failure (Panel-Level)
The column electrodes are embedded in the LCD glass itself. When these traces degrade or break, the result is a permanent vertical line that no cable or T-con replacement can fix.
Signs of panel-level cause:
- Lines are perfectly stable (no flickering)
- Lines appeared gradually over months
- Lines do not change with cable reseating or T-con replacement
- Panel is over 5 years old
The fix: Panel replacement ($100-400) is the only option.
The Laptop Hinge Cable Problem
Laptops are uniquely vulnerable to vertical lines from cable failure. The display cable routes through the hinges and experiences thousands of flex cycles over the device's lifetime.
The cable route: Main board → flex cable through hinge → display panel
Why hinge cables fail: Every time you open or close the lid, the cable bends slightly. Over years of use, conductors fatigue and eventually crack. The cracks may start small (causing intermittent lines) and grow worse over time.
The flex test: Slowly open and close your laptop lid while watching the screen. If the vertical lines change intensity, appear/disappear, or shift position during flexing — the cable is loose, not the panel.
How to Diagnose Vertical Lines
Step 1: Identify the line type
- Black line: Column electrode completely failed
- White line: Column electrode permanently energized
- Colored line: Color channel failure (see colored lines guide)
- Flickering line: Intermittent connection (usually fixable)
- Stable line: Permanent failure (may need panel replacement)
Step 2: Test on different devices Connect the monitor to a different computer with a different cable. If lines persist: monitor hardware. If lines disappear: graphics card or original cable.
Step 3: Cable reseat test (laptops) Open the laptop and firmly reconnect the display ribbon cable at both ends. If lines change or disappear: cable was loose.
Step 4: The lid flex test Slowly open and close the lid while watching the lines. If they respond to movement: cable issue. If perfectly stable regardless of movement: panel issue.
Fix Priority
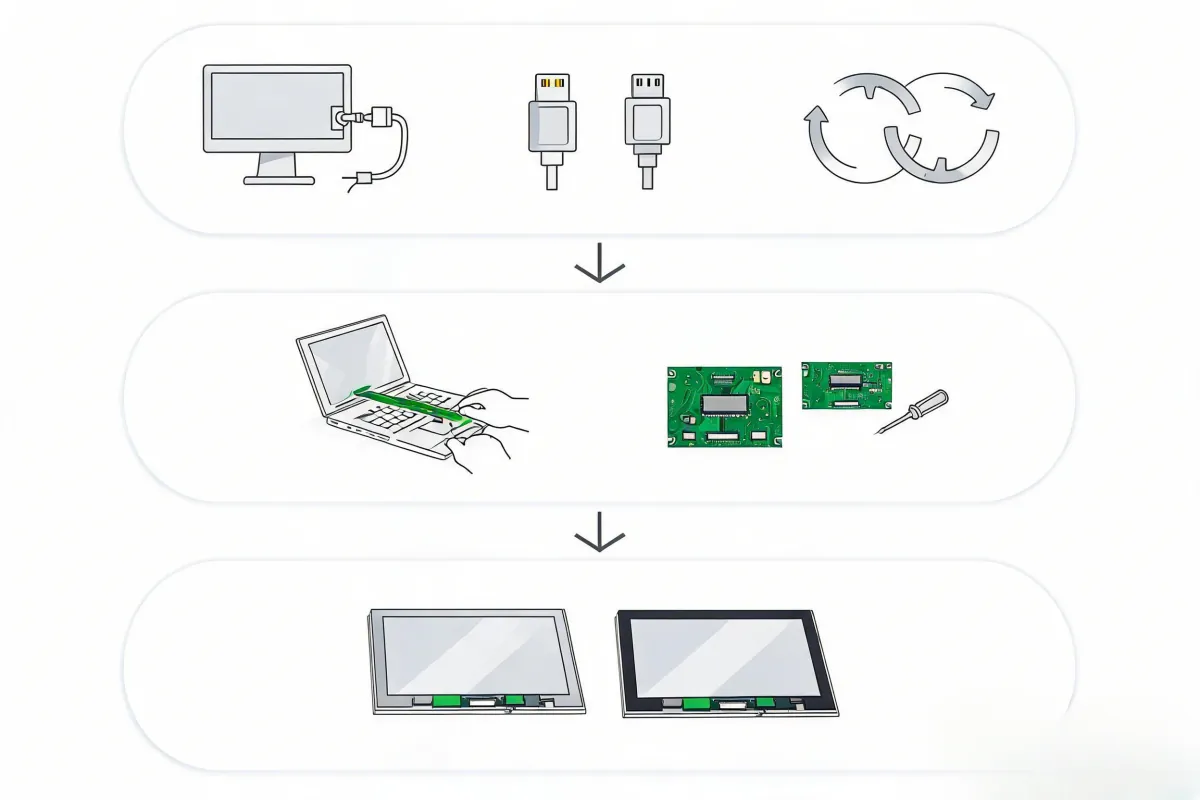
Work through fixes in order of cost:
Free fixes:
- Power cycle the monitor (unplug for 60 seconds)
- Try a different display cable
- Update or roll back graphics drivers
- Change refresh rate (try 60Hz, 75Hz, 144Hz)
Low-cost fixes ($15-80): 5. Reseat or replace internal ribbon cables 6. Replace T-con board
Expensive fix ($100-400): 7. Replace the display panel
Rule: Never pay for panel replacement until you have ruled out cables and T-con.
Field Notes: Dell U2720Q Vertical Line
A Dell U2720Q monitor developed a single thin black vertical line after 18 months of use.
Diagnosis: The line was perfectly stable (no flickering), which initially suggested panel failure. However, the Dell U2720Q had a known issue with its internal ribbon cable degrading at the panel connection point.
Solution: A $35 ribbon cable replacement resolved the issue completely. The line was not panel-level — it was a cable conductor failure that mimicked panel failure.
Lesson: Research your specific monitor model for known issues before assuming panel failure. Popular monitor models often have documented cable problems with established cheap fixes.
Field Notes: MacBook Pro 13" 2017 (A1708) Flexgate
A 2017 MacBook Pro 13" without Touch Bar (model identifier A1708) developed intermittent vertical bands at the bottom of the screen, then a complete blackout when the lid was opened past roughly 40 degrees.
Diagnosis: This matched the well-documented "Flexgate" defect described by iFixit in 2019. The flat flex cable that carries both display data and backlight power was specced about 2 mm too short by Apple. After roughly 10,000 to 20,000 lid open/close cycles, the copper traces in the cable fatigue-crack right at the bend point at the bottom of the display assembly. The first traces to fail are the backlight power line and one of the LVDS data lanes, which is exactly why the symptom starts as bottom-of-screen artifacts ("stage light" effect) and progresses to full display cutout at wider opening angles.
Repair attempts that did not work: Reseating the cable on the T-con board end only. Closing the lid past 90 degrees. Updating macOS. The fault is mechanical fatigue inside the cable itself, not a loose connector.
Solution: A third-party micro-soldering repair — splicing a revised, longer flex cable (the same part Apple silently introduced in late 2018 production). Cost was around one-fifth of an Apple-authorized display assembly replacement. The independent technician used a heated plate to separate the glued display assembly, removed the failed flex, soldered in the longer cable with strain relief, and re-bonded the assembly. The repair has held for years.
Lesson: For 2016-2017 MacBook Pro models (A1706, A1707, A1708), Flexgate is a known defect class — not a guess. Symptom shape (bottom-edge artifacts at certain angles) and confirmed model number is enough to skip cable reseating and go straight to a specialist who offers flex cable replacement. See iFixit's Flexgate write-up for the full engineering breakdown.
How an LCD Panel Is Actually Built
Vertical lines are easier to diagnose once you understand how the signals reach each pixel column.
An LCD module is built in three bonding layers between the T-con board and the active display glass.
1. The T-con (timing controller) board. This small PCB generates the precise voltage waveforms that drive every column on the panel. It receives LVDS or eDP from the GPU and outputs parallel column signals through one or two flat ribbon cables.
2. The chip-on-flex (COF) layer. In modern edge-lit panels, source driver ICs are mounted on a flexible polyimide film (TAB or COF), then bonded to the edge of the glass. The dominant COF assembly suppliers are Chipbond Technology and Stemco (formerly LG Innotek's COF division). The most common source IC designers in consumer monitors are Novatek Microelectronics (NT39530, NT39567, NT51809 family), Himax (S6C27A7, S6C2B91), Raydium (RM76320, RM76360), and Samsung System LSI.
3. The chip-on-glass (COG) layer. Each COF film is bonded to the panel's column electrodes using anisotropic conductive film (ACF) — a glue matrix full of microscopic conductive spheres. The T-con, the COF flex, and the ACF bond into the glass together form the vertical data path.
Where column lines actually start: The same place every time — in the ACF bond or the copper traces it touches. See the next section.
Three Ways the Vertical Data Path Breaks
When COG/ACF reliability studies break down consumer-monitor column failures, almost every case falls into one of three failure modes.
1. ACF delamination at the glass interface. IEEE failure analyses of LCD modules show that the ACF-to-glass interface delaminates under repeated thermal-mechanical cycling. IC warpage during operation, combined with the natural coefficient-of-expansion mismatch between the silicon driver and the glass, gradually lifts the bond. When the conductive spheres lose contact with the ITO electrode on the glass, that column stops receiving data. You see a single, very stable black or colored vertical line.
2. Open or high-resistance copper traces. The 30-50 micron copper traces inside the COF flex or the T-con-to-panel ribbon crack from fatigue — heat, bend cycling, or mechanical impact. This is the failure mode that cable replacement fixes. It is by far the most common repairable cause.
3. Contamination during ACF bonding. Factory defects that survive burn-in tend to be contamination-driven. Silicone oil or other surface residues on the flex pads prevent ACF particles from making reliable contact with the gold bumps. These failures can show up months after manufacture as columns go intermittent, then permanent.
Takeaway for diagnosis: A line that is perfectly stable, in the same place, and survives every cable reseat almost always points to either an ACF/glass bond inside the panel or a cracked glass trace. Both are panel-level and cannot be repaired — only replaced. This is the case where repair cost equations stop favoring repair.
Laptop Hinge Cable Fatigue — The Engineering
Laptop display cables are the most common source of vertical lines because the engineering margin is thin.
Why the cable fails first: A flat flexible cable (FFC) is rated for a finite number of bend cycles before the copper work-hardens and cracks. Industry-referenced figures put consumer FFC endurance at roughly 10,000 to 100,000 cycles depending on bend radius, with tighter bends failing faster.
The geometry problem: The bend radius at a laptop hinge is in the 2-4 mm range — small by cable-engineering standards. Apple's Flexgate is the textbook case: the cable was specced about 2 mm too short, which forced a tighter bend radius than rated, and the backlight + LVDS traces failed in 10,000 to 20,000 cycles (Hark Tech's repair-channel teardown). The Dell XPS 13 9340 has the same root cause — it inherited the XPS 13 Plus design with a tightly-routed display cable through the hinge (per iFixit's device page).
Where the cracks form: Always at the highest-stress point — typically right where the cable transitions from the moving lid to the stationary base, or at a clamp/bracket edge. For Flexgate, that point is at the bottom of the display assembly. For the XPS line, it is at the hinge bracket.
Why a single line appears first: Each copper trace carries one column's worth of data. The first trace to fully fracture kills one column. As more traces fatigue, you see more lines — usually widening over weeks.
Why external monitors are immune to this specific failure: No hinges, no bend cycles, no flex routing. Their vertical lines come from T-con faults, ACF delamination, or panel impact — not from cable fatigue.
Preventive Maintenance
Vertical lines from cable fatigue are largely preventable. The failure is mechanical, not mysterious.
Open the lid with two hands, or at least the palm and thumb of one hand. One-handed opening puts asymmetric stress on the left hinge and the cable routed through it. Over years, the asymmetry biases fatigue to one side.
Avoid opening past 110-120 degrees unless you need to. The cable bend radius tightens as the lid approaches fully open. Keep it in the 90-110 degree range for normal desk use.
Don't lift the laptop by the lid. A common failure pattern is a child or pet grabbing the screen. The combined weight of the lid and the impact at the hinge bracket can fatigue the cable in a single event.
Don't store the laptop open in a backpack. Vibration + an open lid = thousands of micro-bends per trip.
Let the laptop sleep before closing. A hot-running laptop that you immediately close traps heat against the cable. Heat accelerates copper work-hardening.
Cable stress relief check (annual): Open the bezel (service-manual time) and inspect the cable at the hinge bracket for any whitening of the polyimide, kinking, or visible creasing. A fraying cable before it fails is a cheap pre-emptive replacement.
Repair Cost Tiers and DIY Difficulty
Not all "vertical lines" repairs are equally accessible.
Tier 1 — Free to $20: cable reseat and software.
- Power cycle the monitor, swap input cable, update drivers, change refresh rate.
- DIY difficulty: zero. No tools.
Tier 2 — $15 to $80: replace the internal ribbon cable.
- Applies to most laptops and some external monitors with internal LVDS/eDP cables.
- DIY difficulty: moderate. Requires opening the bezel or bottom cover, handling delicate ZIF connectors, and matching the exact cable part number for your device. iFixit has free teardowns for most mainstream laptops.
- Third-party repair shops typically charge $80-180 inclusive.
Tier 3 — $25 to $80 part: replace the T-con board.
- Applies to external monitors and some laptops with discrete T-con boards.
- DIY difficulty: moderate-to-high. Must match the exact T-con board part number (e.g., Samsung BN44-00192A), confirm the LVDS/eDP connector count and pin pitch, and verify input voltage (5V vs 12V). Mismatched voltage destroys a new T-con instantly. Refurbished boards at $22-36 are acceptable for cash-strapped repairs; new OEM boards sit $45-65.
- A professional T-con swap with a 90-day warranty typically runs $150-220 in parts-and-labor.
Tier 4 — Specialized: Flexgate-style cable surgery.
- Applies to MacBook Pro 2016-2017 and similar design-flaws where the cable is integrated into the display assembly.
- DIY difficulty: high. Requires heated-plate separation of the glued assembly, micro-soldering of a replacement flex, and strain-relief routing to avoid re-failure.
- This is not a $100 job. Independent specialists quote $250-450; Apple would replace the entire display assembly for $600-800.
Tier 5 — $100 to $400: replace the LCD panel.
- The last resort. The panel itself is unrepairable for ACF/glass-trace failures.
- DIY difficulty: high for laptops (full disassembly), moderate for external monitors (usually 4 screws).
- If panel replacement costs more than 50-60% of a comparable new monitor, replace the monitor instead.
Honest rule: Stop at Tier 3 unless the device has clear value beyond panel cost (e.g., a matched professional color-calibrated display, or a laptop out of warranty with no panel-only repair path).
Using the Screen Test Tool for Warranty Claims
Before you ship a monitor or laptop for warranty service, document the defect precisely. Manufacturer support agents discount vague "there is a line" complaints. Crisp, repeatable evidence speeds up approvals.
The screen test tool cycles full-screen solid colors (red, green, blue, white, black) at your chosen resolution. Run it on the affected display and capture each color screen with a phone camera, or note the exact pixel coordinates of each column defect.
What to record for a warranty claim:
- The exact model number and serial number of the monitor or laptop.
- A photograph on each of white, black, red, green, and blue backgrounds showing the line(s).
- Whether the line position is fixed or shifts when you flex the lid (for laptops) or press gently on the bezel (for monitors).
- The line color: black (column dead), white (column permanently energized), or colored (specific sub-pixel or color-channel failure).
- Approximate on-screen width of the line in pixels and whether it spans the full height of the panel.
A defect that changes with flexing is a cable or T-con issue and is almost always in-warranty. A perfectly stable line in the same place across all color tests, with no response to flexing, is consistent with panel-level ACF or column-electrode failure. Manufacturers treat these differently — panel failures are often excluded from standard warranty beyond the first year, while T-con or cable faults are commonly covered as repairable defects. The screen test gives you the evidence either way.
Repair or Replace? A Decision Framework
When the diagnosis says "panel-level failure," the question becomes whether to repair at all.
Repair makes sense when:
- The display is a matched multi-monitor setup where one panel needs to match the others.
- The display is a calibrated reference monitor with no current equivalent on the market.
- The laptop is otherwise in good condition and panel-only replacement is available.
- The repair cost is under 50-60% of an equivalent replacement.
Replacement makes sense when:
- The panel is older than 5 years (other components are also aging).
- The repair quote approaches the cost of a new unit with a fresh warranty.
- The defect is ACF/glass-trace level, where replacement panel has its own reliability unknowns.
- The user needs a longer warranty than the repair shop offers.
For most consumer monitors under $400, replacing the unit is the rational choice once the diagnosis confirms a panel-level fault. For laptops and professional monitors, the calculation depends heavily on the specific machine.
Putting It All Together
The fastest path from "I see a vertical line" to a real fix is a short diagnostic sequence:
- Identify the line type — black, white, colored, flickering, stable. Stable lines are panel-level until proven otherwise; flickering lines are cable or T-con until proven otherwise.
- Test the display on different hardware and cables. If the line disappears, stop — it was the cable or source.
- For laptops, perform the lid flex test. If the line responds to flexing, the cable is the cause and a $15-50 cable replacement is the realistic fix.
- For external monitors, reseat the LVDS/eDP ribbon cable between the T-con and the panel. If the line disappears, oxidation or a loose connector was the cause.
- If none of the above resolves it, you are looking at either an ACF/glass-trace failure inside the panel or a failed T-con IC. Decide repair-versus-replace using the cost tiers above.
- Before sending the device for service, run the screen test tool across all five solid colors and capture the line. Send the photos with the warranty claim.
If the line is stable, in the same place across every solid color, and unaffected by flexing or reseating — the panel itself is the fault. Most consumer displays under 5 years old are still covered by manufacturer warranty for T-con and cable defects, but not for panel-level failures. Confirm before paying for any out-of-warranty repair.
Related Monitor Line Problems
- Monitor Lines Problem Hub: Overview of all line types
- Colored Lines on Monitor: Green, red, purple, and pink lines
- Horizontal Lines on Monitor: Lines running left to right
- White and Static Lines on Monitor: White and flickering lines
- Black Line on Screen: Thin black lines
- Dead Line of Pixels: A row of dead pixels
Conclusion
Vertical lines on a monitor are hardware-related. The most common causes are ribbon cable problems (especially in laptops), T-con board failures, and column electrode failures in the LCD panel. Start with the free fixes (cable swap, driver update, power cycle), then work toward cable reseating and T-con replacement. Panel replacement is the last resort and the most expensive option. For laptops, always perform the lid flex test before assuming panel failure — cable replacement is far cheaper than panel replacement. Use the screen test tool to accurately document the vertical line's characteristics.
Related Articles from the Blog
- How to Fix a Broken Screen Protector (and When to Replace It): A cracked screen protector cannot be repaired — only replaced. How to remove a broken one safely without damaging the real screen.
- Best Laptop for Coding and Programming (2026): MacBook Pro M5 Pro, MacBook Air M5, Dell XPS 16, ThinkPad X1 Carbon, and ROG Zephyrus G16 ranked by use case for software developers.
- Best JBL Studio Monitors in 2026: JBL nearfield, install, and live-sound monitors ranked by use case, with modern equivalents for the discontinued LSR series.