Pressure marks on an LCD screen are fixed bright, dark, or cloudy blotches that appear after the panel was squeezed, poked, sat on, closed onto an object, or compressed in a bag. Unlike a single dead pixel or a software glitch, the defect lives in the physical stack—liquid crystals, polarizers, diffuser films—so it stays glued to one place while content changes. This guide focuses on actionable fix and remove paths for LCD (not OLED) panels, including touch screens and LCD TVs. For the wider cross-device map covering MacBook Pro, iPad, and phone pressure damage language, start with our pressure damage screen hub, then return here for the mark-first repair ladder.
Pressure Marks on LCD Screen: How to Fix and What Actually Removes Them
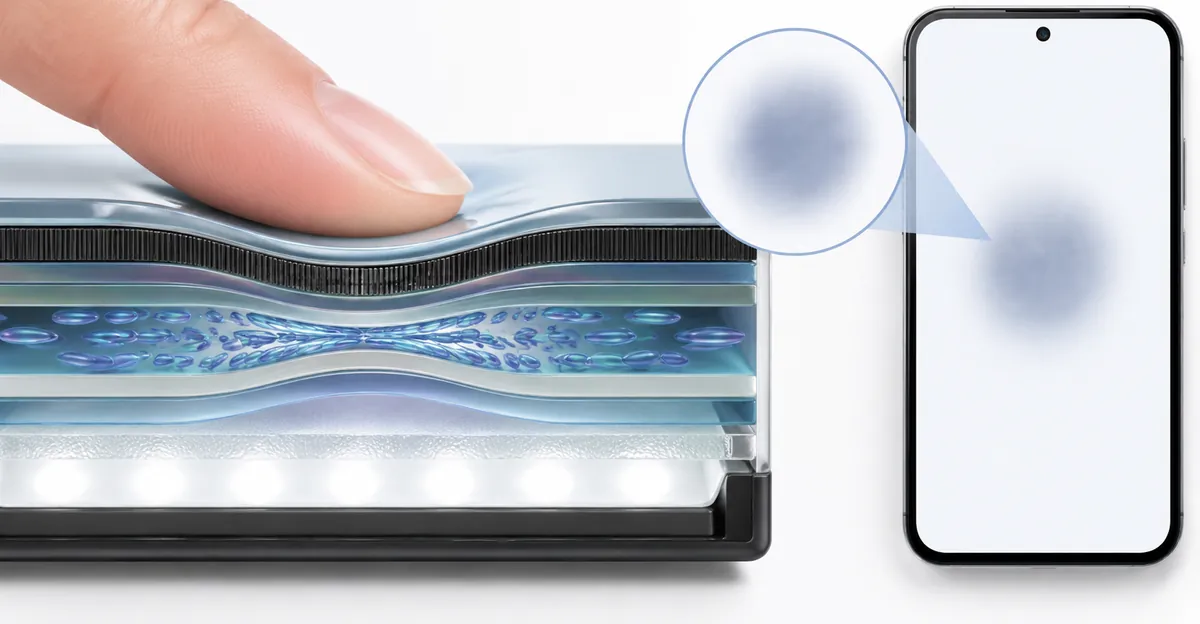
Pressure marks on an LCD screen show up because modern TFT panels keep the liquid-crystal cell gap only a few micrometers thick. Modest local force can misalign that gap, crush a light-diffusing film, or permanently distort a polarizer while the outer glass still looks fine. Industrial display makers describe the same family of faults as pressure spots, white patches, cloudy mura, or haloed indentation marks. Consumer warranties usually call them accidental physical damage, not a manufacturing pixel policy claim.
This article is procedure-first. You will learn how the mark looks, how to fix pressure marks on an LCD screen without making them worse, how touch panels differ from glass-only myths, what “remove” realistically means, and how LCD TV mounting pressure changes the checklist. Spot-type taxonomy lives on LCD spot damage; notebook-only depth lives on pressure spots on laptop screen.
What Pressure Marks on an LCD Screen Look Like
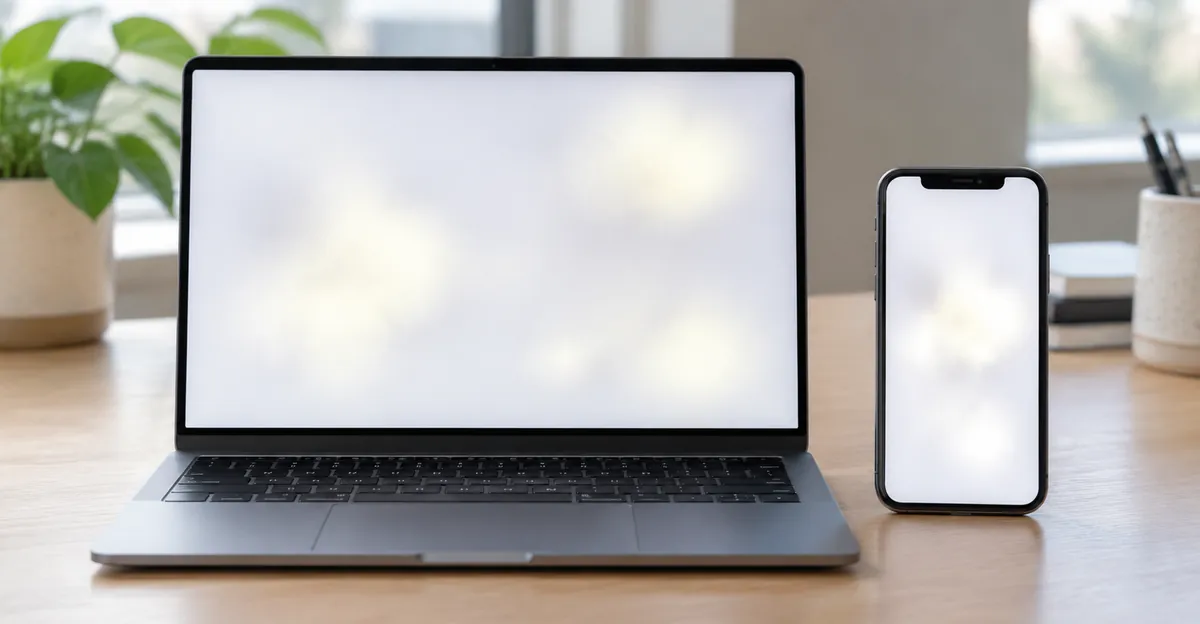
Pressure marks on an LCD screen are irregular patches—not neat one-pixel dots. Typical visuals include a soft dark bruise, a bright oval that glows on dark backgrounds, a cloudy pale area often called mura, faint rainbow fringing at off-axis angles, or a haloed contrast change near an edge where a bezel or screw compressed the stack. The mark stays in the same panel coordinates when you switch apps, videos, or solid colors. Dirt moves when you wipe; pressure marks do not.
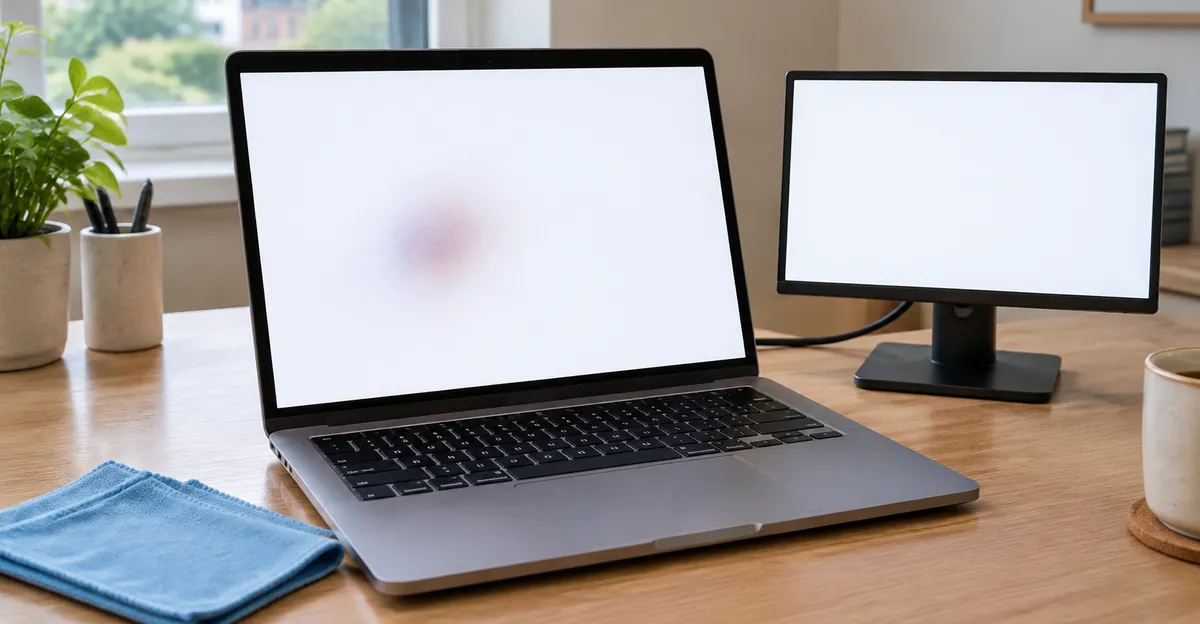
Three quick separations keep you from buying the wrong fix. First, clean once with a dry or barely damp microfiber cloth—spray cleaner on the cloth, never the glass, and use light linear strokes. Second, cycle solid white, black, red, green, and blue (our Screen Test works when fullscreen is allowed). A physical bruise remains fixed while content changes. Third, capture a screenshot on a phone or laptop, or drive an external monitor from a notebook. If the defect vanishes off-device, chase software, GPU, or cable output before blaming the panel.
| What you see | Likely layer | Moves with wipe? | In screenshots / external display? | Realistic next step |
|---|---|---|---|---|
| Soft dark or bright blotch after squeeze | LC cell gap / diffuser | No | No (panel only) | Observe if fresh; else panel quote |
| Single sharp black/white grid dot | Subpixel / stuck pixel | No | No | Dead pixel workflow |
| Edge glow that shifts with brightness | Backlight bleed | No | No | LCD bright spots |
| Mark also on HDMI monitor | GPU / OS / cable | N/A | Yes | Drivers, cable, port—not LCD mark |
| Grease that slides when wiped | Surface contamination | Yes | No | Clean only |
Display suppliers note that VA-type LCD modes often show pressure marks more readily than IPS or TN under the same force because of alignment sensitivity. Higher ambient temperature may soften how a mark looks without repairing the cell gap—cooling brings the artifact back. That is why “warm it with a hair dryer” folklore is a false cure and a real risk of adhesive or polarizer damage.
Case sketch — closed-lid debris: A thin laptop is shut on a USB receiver. Within seconds a bright oval appears opposite the keyboard bay. Solid-color tests keep the oval fixed; screenshots are clean; an HDMI monitor is fine. That triad is textbook LCD pressure marking, not a driver bug. Massaging the spot enlarges it. The durable fix is panel replacement—the same conclusion repeated across repair communities and panel makers.
If the blotch is large, ink-like, or spreading into lines, cross-check black spot screen patterns as well. Pressure can leave either bright or dark damage depending on whether the diffuser was crushed (light concentrates) or liquid crystals no longer twist correctly (light is blocked). Timing matters: a mark that appeared within minutes of a known squeeze is almost never “just aging backlight.”
How to Fix Pressure Marks on LCD Screen
How to fix pressure marks on lcd screen is a sequence, not a single trick. Use this ladder every time before you spend money or follow a viral video.
1. Stop the mechanism. Remove trapped objects under a laptop lid, loosen crushing cases, stop stacking weight on the set, and stop pressing the glass to “check” whether the spot is still there. Continuing force turns a small bruise into a larger dead zone.
2. Classify with solid colors. Clean lightly. Run white, black, and RGB fields. Confirm the mark is fixed on the panel and absent from screenshots or an external display when those checks apply. Bleed and bright-edge glow belong with bright-spot guides; single grid dots belong with dead-pixel guides.
3. Observe only if the mark is hours to a couple of days old and still soft. Power down, leave the device at stable room temperature, and apply no flex for 24–72 hours. Panel makers and industrial guides sometimes extend that window to about a week for very minor elastic cases. Partial fading can happen; full recovery is uncommon once a sharp or bright permanent spot has set. Industrial LCD notes put DIY success near zero for moderate or severe deformation.
4. Document and quote. Photograph the defect on white and black fields, note the model, and write one sentence about the pressure event. Ask repair shops for panel or display-assembly pricing and compare that quote to replacing the whole device. Consumer panel work commonly lands in a few hundred dollars depending on size and labor—exact numbers vary by region and model—so do the math before authorizing work.
5. Replace the panel or assembly when the mark is permanent and bothers you. Layer-level DIY is not a consumer repair. Polarizer swaps exist in specialist industrial contexts; they are not a living-room tutorial. Pixel-fixer loops and SMC/NVRAM-style resets cannot regenerate a crushed cell gap.
What will not work (and often worsens damage): vigorous rubbing, coin or card scraping, hair dryers, freezer tricks, suction cups meant for car dents, repeated lid flex tests, and long RGB “stuck pixel” apps. Heat can soften adhesives and create new mura. Suction and massage further displace internal layers—repair blogs that track white-patch outcomes repeatedly warn that these DIY moves turn a manageable bruise into a total panel loss.
Warranty and insurance. Manufacturing defects without a pressure story may fall under pixel policies. Accidental compression usually needs accidental-damage coverage or out-of-pocket service. Retailer return windows sometimes help if damage appears immediately after unboxing and packaging stress is plausible—photograph everything before the window closes.
When living with it is rational. A small mark outside the primary viewing area on a low-value device can be cheaper than a panel. Reassess if the defect grows, flickers, or is joined by touch failure or chassis swell. Battery swell is a safety stop—power down and service immediately.
For laptop-specific causes (bags, keyboard covers, hinge flex), keep using this ladder, then read the notebook-focused pressure spots on laptop screen page for lid-clearance detail.
How to Fix LCD Pressure Marks on Touch Screen
How to fix lcd pressure marks on touch screen starts with a split you must not blur: image bruise versus touch layer failure. A pressure mark that changes what you see lives in the LCD (or OLED) image stack. A dead zone, ghost tap, or drifted coordinate with a normal picture points more toward the digitizer, connector, protector interference, or mounting pressure on the touch sensor. Many modern phones and tablets use laminated assemblies where glass, digitizer, and LCD are bonded—so shops quote a full display assembly even when only one layer failed.
Diagnostic split for touch devices
| Symptom after squeeze / bag / sit-on | Points toward | Glass-only repair enough? |
|---|---|---|
| Fixed bright/dark blotch; touch still accurate | LCD / panel layers | No |
| Image fine; one corner dead to touch | Digitizer, film, mount pinch, connector | Maybe (model-dependent) |
| Cracked outer glass; image and touch perfect | Cover glass / digitizer path | Sometimes on non-laminated models |
| Blotch + ghost taps in same region | Stack stress; often full assembly | Usually no |
Run the same solid-color and screenshot checks as on non-touch LCDs. Then walk a finger slowly across a grid or keyboard app. If touch works everywhere but the blotch remains, do not pay for a “glass polish” or protector swap expecting the image bruise to vanish. If touch fails in a strip while the picture looks clean, remove a thick tempered protector once to rule out edge lift, reseat the device in its case, and only then authorize digitizer or assembly work.
Do not massage a touch LCD. Finger pressure on a soft bruise is how users enlarge pressure marks while “checking” them. Mobile panel datasheets often rate one-time point loads well below everyday poke habits; exceeding that threshold crushes liquid-crystal pockets or distorts polarizer stacks. Repair write-ups that confirm mechanical breach emphasize that software luminance cycling has zero restorative effect after the layers are physically deformed.
Case sketch — tablet in a backpack: A tablet rides under a water bottle. A cloudy white patch appears near center; touch still registers taps on that patch. Solid colors keep the cloud fixed; screenshots omit it. The owner tries warm compress folklore overnight—no change, and the patch edges look slightly larger. Correct path: stop force, document, quote a laminated display assembly, compare to device replacement. Glass-only pricing would have been wasted spend.
Foldables and some industrial handhelds add crease and chassis-flex paths beyond classic slabs; treat those as pressure-adjacent but confirm with a shop that knows the hinge stack. For iPad-class devices and MacBook-style lids, the cross-device pressure damage screen article maps product-specific clearance warnings; this section stays on the touch-LCD mark decision tree.
How to Remove Pressure Marks on LCD Screen
How to remove pressure marks on lcd screen is the question searchers type when they hope the blotch is temporary dirt or a reversible “dent.” Honest answer up front: true internal pressure marks are usually not removable without replacing the LCD module. Cleaning removes surface films. Time without stress sometimes reduces the visibility of mild elastic deformation. Neither equals a guaranteed home removal method.
What “remove” can mean in practice
- Surface only — Grease, lotion, or adhesive haze can mimic a cloudy patch. Microfiber plus a little distilled water or isopropyl on the cloth (not sprayed on the panel) clears it. If the mark survives cleaning, stop scrubbing harder.
- Elastic reflow window — Fresh, soft marks occasionally look softer after 48–72 hours powered off, or up to about a week in industrial guidance for minor cases. Sources that track white patches still report that full disappearance is uncommon, and that moderate or severe cell-gap distortion does not self-heal.
- Shop-level polarizer or module work — Specialist industrial refurbishment sometimes replaces polarizers or entire modules. That is not a consumer suction-cup tutorial, and it is rarely cheaper than a standard panel swap on phones, laptops, or TVs.
- Panel replacement — The permanent remove path cited across manufacturer-oriented and repair guides when the mark is fixed and bothersome.
Myth table — removal claims vs reality
| Claimed remove method | What it actually does | Risk |
|---|---|---|
| Massage / rub with cloth or card | Adds more local force | Spreads bruise, dead pixels |
| Hair dryer / heat gun | Softens adhesives; temporary look change | New mura, warping, glue failure |
| Freezer / cold pack | Changes temporary appearance | Condensation, coating stress |
| Suction cup “dent pull” | Pulls stack unevenly | Larger delamination |
| RGB / stuck-pixel apps | Cycles subpixels electrically | No effect on crushed gap; wasted time |
| Solvent poured on glass | Attacks coatings | Permanent haze, voided warranty |
Industry write-ups that summarize consumer outcomes often state that the vast majority of confirmed internal pressure cases end in full panel replacement—DIY “removal” attempts are the main way a small mark becomes a write-off. Treat any video that promises a five-minute erase as entertainment, not procedure.
If your goal is cosmetic improvement on a mark that is already weeks old and sharp-edged, skip the observation window and go straight to quote-versus-replace math. Observation only buys time for fresh soft marks. Spending that week rubbing the panel is the opposite of removal strategy.
When the blotch is actually a white spot from backlight film damage rather than a classic bruise shape, the remove path is still usually module-level—but classify first with solid colors so you are not mixing taxonomies.
How to Remove Pressure Marks on LCD TV Screen
How to remove pressure marks on lcd tv screen needs an extra mounting check that phones and laptops rarely need. Large LCD/LED TV panels can show cloudy or bright patches not only from finger pokes during cleaning or moves, but also from ongoing mechanical pinch: over-tightened wall-mount hardware, a twisted stand, missing floating gaskets, over-torqued bezel screws, or cables trapped behind the cabinet pushing the chassis.
TV-specific ladder
- Safety and power. Unplug if you will move the set. Never push on the center of the glass to tilt or carry the TV—lift from the chassis and stand points the manufacturer specifies.
- Relieve mounting stress. Confirm the set is level. Loosen and reseat wall brackets to factory torque guidance. Check that all stand screws are snug, not forced. Look behind for pinched HDMI or power cables. Edge-halo marks after a DIY mount job are classic frame-compression patterns described in industrial LCD mounting notes—those cases sometimes need both a remount and a panel swap if the LC cell was already crushed.
- Classify the cloud. Run a solid white and solid black input (built-in test pattern, USB media, or a known-good source). A pressure mark stays put while content changes. Backlight or diffuser faults can look similar; if the cloud shifts with brightness in a soft gradient from an edge, compare bright-spot guidance before you assume poke damage.
- Short observation only for fresh soft marks. Leave the TV upright, unstressed, at room temperature for 48–72 hours. Mild transport-related unevenness sometimes settles when the panel is no longer under strain. Do not massage, press with a cloth, or “push the cloud out.”
- Quote panel versus replace the set. Panel cost on mid-size living-room TVs often approaches or exceeds the value of a current replacement set. Manufacturer warranties almost never cover accidental compression. Accidental-damage insurance or retailer damage-on-arrival claims need photos and timestamps.
Case sketch — wall-mount over-torque: After a weekend mount, a pale cloudy band appears along one vertical edge. White field keeps the band fixed; other inputs look the same. A technician finds missing rubber isolation and screws driven hard into the chassis. Remounting stops new stress, but the LC cell damage remains—module replacement is required. Lesson: torque tools and gaskets prevent marks; they do not erase ones already baked into the panel.
TV myths deserve a clean break. Videos that “fix vertical lines with a toothbrush” sometimes target loose ribbon or T-con contacts for certain line faults—not a pressure bruise in the glass sandwich. Applying that ritual to a blotch after someone leaned on the set is how you turn a localized mark into a larger dead zone. Carry and clean habits matter more than any remove trick: soft microfiber, cleaner on the cloth, no pressure on stubborn spots, and no remotes or game controllers pressed into the glass on a media console.
If your set is OLED rather than LCD, pressure response differs (encapsulation and burn-in paths). This page stays LCD-focused; use the pressure-damage hub when you need multi-technology context, then return here for LCD TV mounting and remove language.
Diagnose Before You Repair
Skipping diagnosis is how people buy pixel apps for crushed panels or glass-only jobs for laminated LCD bruises. Spend ten minutes here before any quote.
Protocol (any LCD)
- Photograph the mark on a solid white field and a solid black field.
- Wipe once with microfiber; note whether anything moved.
- Fullscreen white → black → red → green → blue. Mark whether the defect stays fixed.
- Screenshot (phones/tablets/laptops) or external display (laptops/desktops).
- Write the pressure story in one sentence (object in lid, bag crush, poke while cleaning, wall-mount day, etc.).
- Stop testing if lines spread rapidly, touch becomes unsafe for unlock, or the image is unreadable—back up and service.
Use the Screen Test tool when a browser can go fullscreen. It does not repair anything; it only makes classification honest.
| Check result | Interpretation | Next action |
|---|---|---|
| Mark gone after wipe | Contamination | Clean schedule; done |
| Mark fixed on colors; clean screenshots | LCD pressure mark | Observe if fresh; else panel quote |
| Mark in screenshots / other display | Not panel bruise | Software / GPU / cable path |
| Touch dead, image clean | Digitizer / mount / protector | Touch-path repair tree |
| Touch + image bad in same zone | Stack damage | Full assembly quote |
Repair-versus-replace decision aid (exclusive checklist)
Score each row 0 or 1, then total:
| Factor | Score 1 if true |
|---|---|
| Mark in primary viewing area | |
| Mark growing or developing lines | |
| Device still under accidental-damage plan | |
| Panel quote < 40% of replacement device price | |
| You need the device daily without external display option |
- 0–1: Living with a peripheral mark can be rational.
- 2–3: Get at least one written panel quote before deciding.
- 4–5: Prioritize covered repair or replacement; delay usually does not improve the optics.
This scoring is a decision aid, not a lab certification. Shops still need to inspect hinges, cables, and frames—especially when a “new” replacement panel shows pressure marks from adhesive high spots or over-torqued bezels after install. Installation-induced marks are a known failure mode: debris or warped frames create constant pinch points. Demand a remount or part swap from the installer rather than starting DIY heat rituals on a brand-new module.
Prevention for LCD and Touch Panels
Prevention is cheaper than every panel quote in this article.
Laptops and convertible LCDs
- Clear the keyboard before closing—no pens, dongles, earbuds, paper stacks, or camera covers.
- Use sleeves that do not crush the lid; avoid overstuffed backpacks with bottles pressing the shell.
- Skip thick keyboard covers unless the vendor states lid clearance is safe.
- Open from the chassis, not by pinching glass.
Phones and tablets (touch LCD)
- Avoid sit-on and overstuffed bag scenarios.
- Cases should absorb edge hits without bending the frame into the panel.
- Clean with microfiber and minimal pressure; spray on the cloth.
- Do not pry at glass center with fingernails.
LCD TVs and monitors
- Carry by the chassis; never push the panel face to tilt.
- Keep shipping foam until mounts are complete; follow torque specs; use floating gaskets where specified.
- Keep remotes and controllers from pressing into the glass on a console.
- Teach guests not to poke the screen.
Shared habits
- Photograph new devices on first unboxing if you may claim packaging damage.
- For shared or industrial handhelds, train light wipe pressure—over-pressure cleaning is a documented failure mode.
- Optical bonding and thicker cover glass reduce risk in purpose-built displays; consumer retrofit options are limited—protection is mostly behavioral.
Cross-link habit: when a mark appears, classify here, then jump to LCD spot damage for spot-type taxonomy or the pressure damage screen hub for MacBook, iPad, and multi-device paths.
Conclusion
Pressure marks on an LCD screen are physical. A squeezed laptop lid, sat-on tablet, poked monitor, or over-torqued TV mount can all leave fixed blotches that software cannot heal. How to fix pressure marks on an LCD screen means stop the force, classify with solid colors and screenshots, allow a short observation window only for fresh soft marks, then choose panel replacement, accidental-damage coverage, or living with a peripheral bruise. How to fix LCD pressure marks on a touch screen adds the digitizer-versus-panel split so you do not buy glass-only service for an image bruise. How to remove pressure marks on an LCD screen—or on an LCD TV screen—almost never means massage, heat, or suction; it means honest cleaning, optional brief rest, remounting when the frame is pinching, and panel replacement when the cell gap is already crushed.
Run a quick Screen Test to document what you see, then compare quotes before the defect spreads. For device-by-device pressure damage context beyond LCD marks, continue with pressure damage screen.