A pressure damage screen problem is a fixed visual defect—dark blotch, bright patch, cloudy mura, rainbow bruise, or line cluster—that appears after the panel was squeezed, sat on, closed onto an object, or compressed in a bag. Unlike a single dead pixel or a software glitch, pressure damage changes the physical layers inside the display. This guide explains how that failure works, how it shows up on MacBook Pro, iPad, laptop, TV, and phone screens, and which “fixes” are myths versus real repair paths.
Pressure Damage Screen: Causes by Device & What You Can Fix
Pressure damage screen defects are common because modern panels are thin. The liquid-crystal cell gap in a typical TFT LCD is only about 3–5 micrometers—orders of magnitude thinner than a human hair. Modest local force can misalign that gap, crush a diffuser film, or crack OLED encapsulation while the outer glass still looks fine. Manufacturers and repair shops rarely label the fault “pressure damage” in warranty menus; they describe blotches, lines, white spots, or physical LCD damage. Your job is to connect the timing of a squeeze or closed-lid event with a mark that stays glued to one place on the panel.
This article is mechanism-first and device-specific. Symptom pages such as LCD spot damage and black spot screen classify what you see. Here you decide whether pressure caused it, whether anything can heal, and what to do on each device class before you pay for a panel.
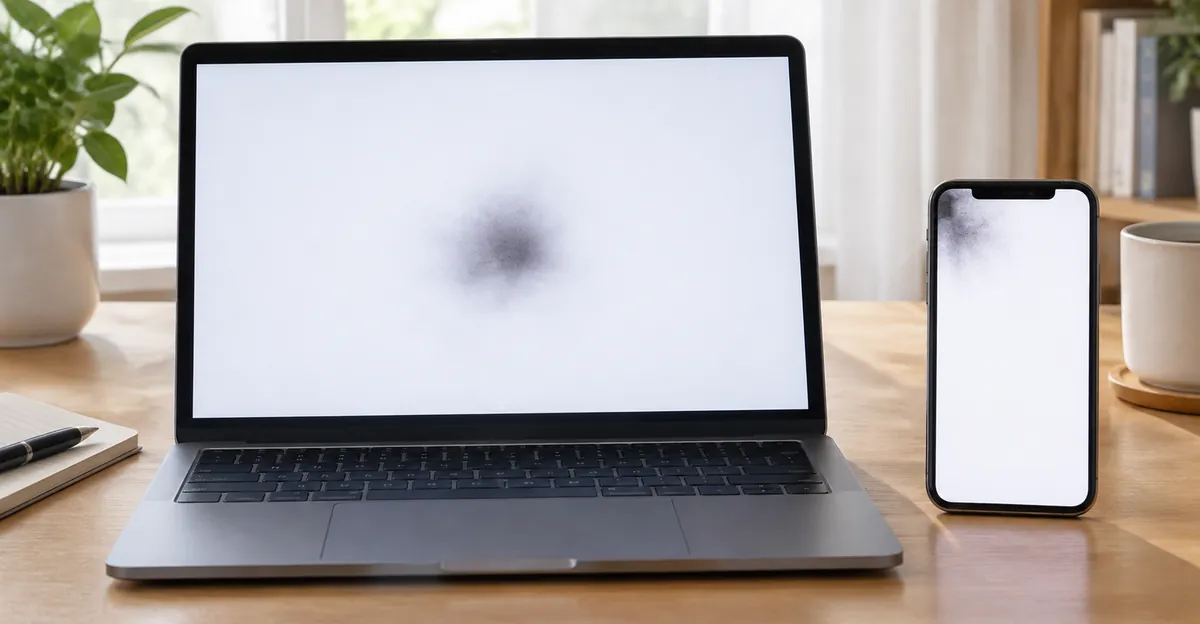
What Pressure Damage on a Screen Actually Is
A pressure damage screen failure means external force deformed layers inside the display stack. On LCD and LED-backlit panels that stack usually includes a backlight or edge LEDs, light-guide and diffuser films, polarizers, a TFT glass substrate, a liquid-crystal layer a few micrometers thick, a color filter, and cover glass or plastic. Compress one region and light no longer travels evenly: you get a bright pressure spot where the diffuser is crushed, a dark bruise where liquid crystals no longer twist correctly, or a soft cloudy patch often called mura.
OLED and similar emissive panels fail differently. Force can crack the thin encapsulation that keeps oxygen and moisture away from organic emitters. The result may start as a yellowish or dim region and progress toward a dead black island. Glass can remain intact; the damage is still hardware.
| Pattern after pressure | Likely layer | Software / pixel fixer helps? | Typical next step |
|---|---|---|---|
| Soft dark blotch >2 mm, irregular edge | LC alignment / cell gap | No | Observe 24–72 h, then panel replace if persistent |
| Bright / white patch on dark UIs | Diffuser / backlight stack | No | Panel or backlight path service |
| Colored line cluster from a press point | Panel, TAB bonds, or flex path | No | Assembly diagnose; often full display |
| Single sharp black/colored pixel | Dead or stuck subpixel | Stuck only, sometimes | Dead pixel workflow |
| Mark also in screenshots / external monitor | GPU / OS / cable | Yes (drivers, cable) | Not panel pressure damage |
Three checks separate pressure damage from lookalikes. First, clean gently with a microfiber cloth—dirt moves; pressure marks do not. Second, cycle solid white, black, red, green, and blue (our Screen Test works when fullscreen is allowed). A physical bruise stays in the same panel coordinates while content changes. Third, capture a screenshot or drive an external display on a laptop. If the defect vanishes off-device, chase software or GPU output before blaming the panel.
Industrial LCD references note that VA panels often show pressure marks more readily than IPS or TN under the same force because of alignment sensitivity. Higher ambient temperature may soften how a mark looks without repairing the cell gap—cooling brings the artifact back. That is why “warm the screen with a hair dryer” folklore is a false cure and a real risk of adhesive or polarizer damage.
Case sketch — closed-lid debris: A user closes a thin laptop on a USB receiver. Within seconds a bright oval appears opposite the keyboard bay. Solid-color tests keep the oval fixed; screenshots are clean; an HDMI monitor is fine. That triad is textbook laptop screen pressure damage, not a driver bug. Massaging the spot enlarges it. The durable fix is panel replacement, documented across repair communities and panel makers alike.
If you only remember one rule: treat a fixed post-pressure mark as hardware until proven otherwise, and never add more force to “work it out.”
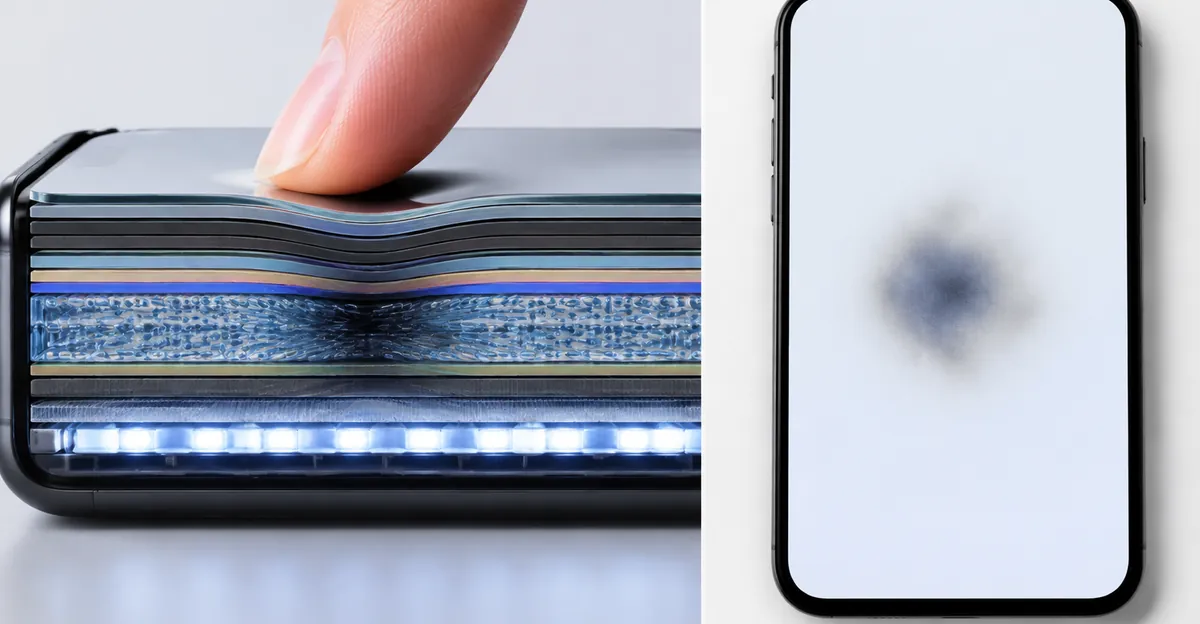
Pressure Damage MacBook Pro Screen
Pressure damage MacBook Pro screen issues are especially common because Apple designs MacBook displays and top cases with very tight clearance. Apple itself warns that covers or material left between the display and top case can damage the display when the lid closes. A camera cover, thick keyboard protector, palm-rest cover, cable end, or hard crumb can concentrate enough force to bruise internal layers without cracking the outer glass. Packed bags and flexed lids produce the same family of defects: dark blotches, bright patches, colored distortion, or line clusters fixed to one place on the built-in display.
MacBook Pro screen pressure damage is usually permanent once the liquid-crystal cells, polarizers, or backlight stack are deformed. macOS settings, SMC/NVRAM resets, and browser pixel tools cannot regenerate those layers. A practical permanence test: look at the Apple logo, startup options, or recovery screen before the desktop loads. A blotch or line visible at that stage cannot be an ordinary app overlay. If the mark is absent from screenshots taken on the Mac but present on the built-in panel—and an external monitor looks normal—the display assembly is the suspect.
Do not press around the mark, flex the lid repeatedly to “check if it changes,” heat or chill the panel, or run long pixel-fixer loops on a physical-looking bruise. Those steps waste time and can enlarge damage. Use remaining working time to back up, photograph the defect under a solid white field, and switch to an external display if the built-in screen is hard to trust.
Coverage reality matters. Standard Apple limited warranty excludes accidental damage from handling. AppleCare+ for Mac can cover accidental damage from handling with service fees that depend on whether damage is screen-only (Tier 1) or involves additional qualifying damage (Tier 2)—Apple’s published plan documents list U.S. fees in that structure, but Apple must inspect the machine and quote the final amount. Independent shops may replace a display assembly for less on older models; on recent MacBook Pros the upper display is a tightly integrated assembly (panel, backlight path, cameras, and lid), so quotes stay high.
Case sketch — thumb on the bezel: An iFixit Answers thread describes colored lines appearing after a user pushed the open lid with a thumb on the glass. The outer glass looked intact; the LCD behind was cracked. The accepted path was full display-assembly replacement, not a software tweak. That pattern matches what AppleMagazine and screen-diagnostics sites describe for pressure damage MacBook Pro screen failures: glass intact, image broken, assembly swap required.
If your MacBook shows a soft spot without a clear pressure story, still rule out manufacturing pixel policy versus physical abrasion. Dell and other PC vendors explicitly list pressure marks as accidental damage in some pixel policies; Apple similarly treats handling damage as out-of-warranty unless an ADH plan applies. Document first, then request an estimate rather than guessing from forum prices.
iPad Screen Pressure Damage
iPad screen pressure damage often follows bag compression, a bent chassis, sitting on the tablet, a rigid case that flexes the glass, a drop that looks “fine” until a white spot blooms, or pressing too hard while cleaning or gaming. Typical visuals include a fixed white or bright spot (sometimes discussed as a mura-style backlight bruise), a black blotch, colored line clusters, an internal-looking crack under intact glass, or touch dead zones and ghost taps when the digitizer stack is stressed.
Touch changes raise urgency. If taps miss or ghost in the damaged region, back up through iCloud or a computer while the screen still responds. Do not keep re-pressing the area to “test” it. Soft temporary liquid-crystal displacement sometimes improves over hours to a few days if all force is removed; permanent internal deformation does not. Heat, massage, and suction-cup folklore have a high rate of making spots larger—especially on laminated assemblies.
Repair economics depend on whether the model uses a fused (laminated) display. On most modern iPad Air, iPad Pro, iPad mini 4 and later, and recent full-size iPads, glass and LCD/OLED are bonded. A white pressure spot in the LCD almost always means full display-assembly replacement, not a cheap glass-only job. Older non-fused generations can sometimes separate glass from LCD, but pressure damage still lives in the LCD—so glass-only service will not clear a white or black bruise in the image layer.
AppleCare+ may reduce accidental-damage fees; without it, out-of-warranty assembly pricing can approach a large fraction of a used iPad’s value. Independent shops may quote 20–40% less than Apple on some models, with variable part quality. Compare quotes against replacement, especially for older generations still selling cheaply refurbished.
Cross-check glowing defects against white spot and LCD bright spots guides when the mark is bright on dark wallpapers. Use this section when the timeline clearly includes pressure, bend, or bag squeeze—the mechanism page you are reading—not only the color of the spot.
Laptop Screen Damage from Pressure
Laptop screen damage pressure failures are the everyday cousin of MacBook cases: backpacks, airplane seat pockets, stacked books on a closed lid, pens left on the keyboard, hinge flex, and picking the machine up by the panel. TryGetInfo and similar repair guides cite uneven loads on the order of a few kilograms concentrated through a closed lid as enough to leave permanent marks on many consumer LCDs. Keyboard imprints—repeated small marks mirroring key tops—appear when debris or raised keys press the panel during travel.
Symptoms include bright spots on dark backgrounds, dark patches on light backgrounds, cloudy bruises, and sometimes line clusters after a closed-lid event. ScreenDetect-style diagnostic advice is consistent: compare plain backgrounds, avoid flexing and heating, back up, and use an external monitor to prove the GPU path is clean. A browser test cannot repair a crushed diffuser or misaligned cell gap; it only classifies the pattern.
| Laptop pressure scenario | Common visual | First safe action | Realistic fix |
|---|---|---|---|
| Object on keyboard when lid closed | Localized bright/dark oval | Remove object; stop closing on debris | Panel replacement if mark persists |
| Heavy bag / books on closed lid | Broad cloudy bruise | Stop stacking; photo + solid-color test | Panel replacement |
| Tight sleeve / hard shell squeeze | Edge or corner blotch | Loosen case; external monitor | Panel or bezel inspection |
| Hinge / corner lift flex | Lines that change with lid angle | Minimize lid cycles; backup | Panel, cable, or hinge-path service |
| Aggressive cleaning pressure | Soft patch under wipe path | Switch to light microfiber only | Often permanent; replace if central |
For notebook-only symptom language, see pressure spots on laptop screen. That page stays inside laptop spots; this section places laptop screen damage pressure in the wider cross-device pressure-damage map and ties it to TV/phone decisions later.
Cost bands vary widely: commodity HD panels may be modest; premium 4K, OLED, touch, and gaming panels can make repair irrational versus a new machine. Always weigh battery health and age. Living with a corner bruise is rational if it misses your primary viewing area and is not spreading. Spreading ink-like patches, unreliable touch on convertible lids, or lines that worsen with every lid open deserve a hard stop and a quote.
Manufacturing defects that appear without force in the first weeks sometimes fall under warranty pixel or panel policies. True pressure history—especially photos of the object that was trapped—usually moves the claim into accidental damage. Be honest with support; fighting a clear closed-lid story rarely pays.
Can Pressure Damage a TV or Phone Screen?
Yes on both. A new TV is not immune: putting pressure on a new TV screen can damage it because the panel is already at finished thickness when it leaves the factory. Finger pokes while mounting, straps across the face in shipping, leaning the set face-down on a table edge, or over-tightening wall-mount hardware against the chassis can leave blotches or crack internal layers. OLED and QD-OLED sets are especially unforgiving of point loads; LCD/LED TVs show classic bright or dark pressure marks and, after severe flex, line clusters from stressed TAB bonds or panel edges.
Phones fail under pocket compression, sitting on the device, rigid cases that twist the frame, drops that transfer force into the display stack, and hard cleaning presses. Samsung and other OEMs note that gradual pressure can leave front glass intact while damaging the screen underneath—exactly the pattern users call “pressure damage.” Temporary shadows may fade; permanent black, white, or yellowing patches need assembly replacement. Foldables add crease and flex risks beyond classic slabs.
TV-specific myths deserve a clean break. Videos that “fix vertical lines with a toothbrush” sometimes target loose ribbon or T-con contacts for certain line faults—not a pressure bruise in the glass sandwich. Applying that ritual to a blotch after someone leaned on the set is how you turn a localized mark into a larger dead zone. For LED TV pressure damage, the honest flowchart is: confirm fixed location → remove force → optional short observation window → panel quote vs replace the set.
Phone and TV both benefit from the same diagnostic discipline as laptops: solid-color fields, screenshot check (phones), alternate input or another display when available, and documentation for warranty or insurance. Carrier or manufacturer accidental-damage plans sometimes cover drops and pressure events with a deductible; standard limited warranties usually do not.
How to Fix Pressure Damage (and What Won’t Work)
Readers searching how to fix pressure damage LED TV screen, how to fix pressure damage TV screen, or how do I fix laptop screen pressure damage want a sequence, not folklore. Use this ladder.
1. Stop the mechanism. Remove trapped objects, loosen crushing cases, stop stacking weight, stop pressing the glass to “check” it.
2. Classify. Clean lightly. Run solid colors. Screenshot / external monitor. Decide: surface dirt, stuck/dead pixel, backlight bleed, or pressure bruise. Bleed and bright-edge glow belong with LCD bright spots; single grid dots belong with dead pixel.
3. Observe only if the mark is hours to a couple of days old and still soft. Power down, leave at stable room temperature, no flex for 24–72 hours (some guides mention up to about a week for very minor elastic cases). Partial fading can happen; full recovery is uncommon once a sharp or bright permanent spot has set.
4. Document and quote. Photos on white and black fields, serial/model, and a one-sentence pressure history help shops and insurers. Ask for panel or display-assembly pricing and compare to device replacement.
5. Replace the panel or assembly when the mark is permanent and bothers you. Layer-level DIY is not a consumer repair. Polarizer swaps exist in specialist industrial contexts; they are not a home tutorial for a living-room TV or a daily-driver phone.
What will not work (and often worsens damage): vigorous rubbing, coin or card scraping, hair dryers, freezer tricks, suction cups meant for dents, repeated lid flex tests, and long RGB pixel-fixer loops aimed at stuck subpixels. Pixel fixers cannot restore a crushed cell gap. Heat can soften adhesives and create new mura.
Warranty and insurance. Manufacturing defects without a pressure story may be covered under pixel policies. Accidental compression usually needs AppleCare+/ADH, carrier insurance, or out-of-pocket service. Retailer return windows sometimes help if damage appears immediately after unboxing and packaging stress is plausible—photograph everything before the return window closes.
When living with it is rational. Small marks outside the primary viewing area on a low-value device, or a TV watched mainly for sports where a corner bruise is ignorable, can be cheaper than a panel. Reassess if the defect grows, flickers, or is joined by touch failure or chassis swell (battery swell is a safety stop—power down and service immediately).
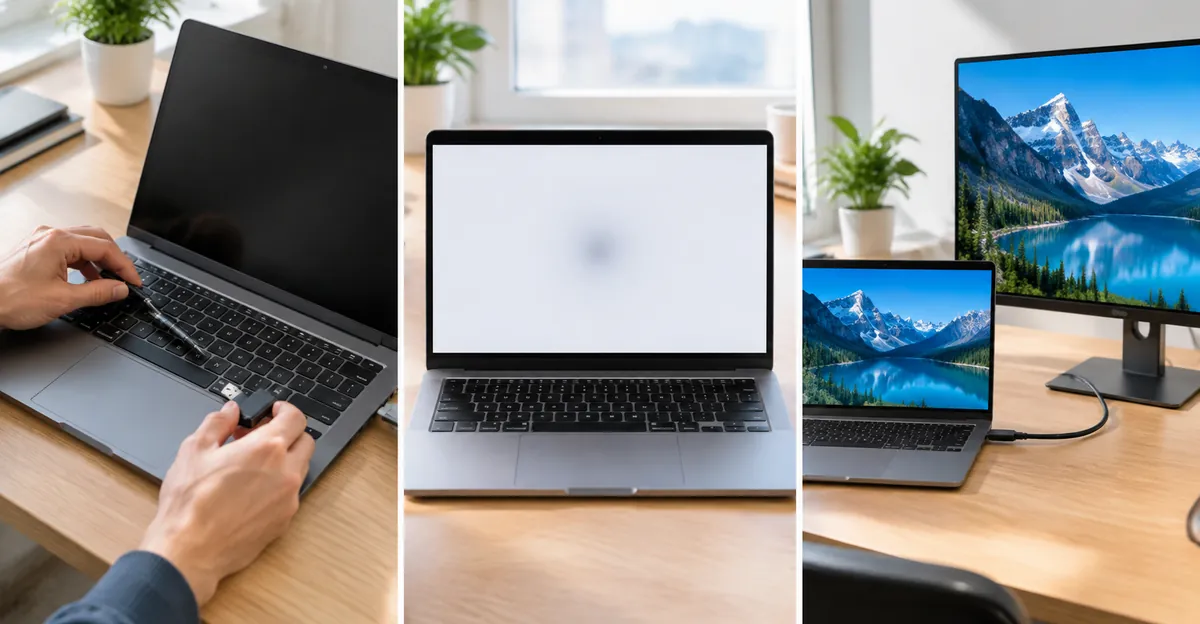
Prevention Checklist Across Devices
Prevention is cheaper than every panel quote in this article.
Laptops and MacBook Pro
- Clear the keyboard and palm rests before closing—no pens, dongles, earbuds, paper stacks, or camera covers.
- Use a sleeve that does not crush the lid; avoid overstuffed backpacks with bottles pressing the shell.
- Do not stack books or another laptop on a closed machine.
- Open and lift from the chassis center, not by pinching the panel glass.
- Prefer thin keyboard covers only if the vendor states lid clearance is safe; when unsure, skip them.
iPad and phones
- Avoid sit-on and overstuffed bag scenarios; use cases that absorb edge hits without bending the frame.
- Clean with microfiber and minimal pressure; spray cleaner on the cloth, not the glass.
- Do not pry with fingernails at the glass center.
TVs and monitors
- Carry by the chassis; never push on the center of the panel to tilt the set.
- Keep shipping foam until wall mounts are complete; check mount hardware torque specs.
- Teach kids and guests not to poke the screen; use a soft remote caddy so remotes are not pressed into the glass on a media console.
Shared habits
- Photograph new devices on first unboxing if you will claim packaging damage.
- For industrial or medical handhelds, over-pressure cleaning is a documented failure mode—train staff on light wipe pressure.
- Optical bonding and thicker cover glass reduce risk in purpose-built displays; consumer devices rarely offer that retrofit—protection is behavioral.
Cross-link habit: when a mark appears, start here for mechanism and device paths, then jump to LCD spot damage for spot-type taxonomy or pressure spots on laptop screen for notebook-only depth.
Conclusion
Pressure damage screen defects are physical. A squeezed MacBook Pro, compressed iPad, backpack-crushed laptop, poked TV, or sat-on phone can all show fixed blotches, bright patches, or lines that software cannot heal. Confirm the mark is on the panel, stop adding force, allow a short observation window only for fresh soft marks, then choose panel replacement, accidental-damage coverage, or living with a peripheral bruise. Avoid rub-and-heat myths. Prevention—especially clearing laptop keyboards and never leaning on TV glass—remains the only reliably cheap fix.