How to Fix Screen Ghosting: Shadow Trails, Overdrive, and Tests
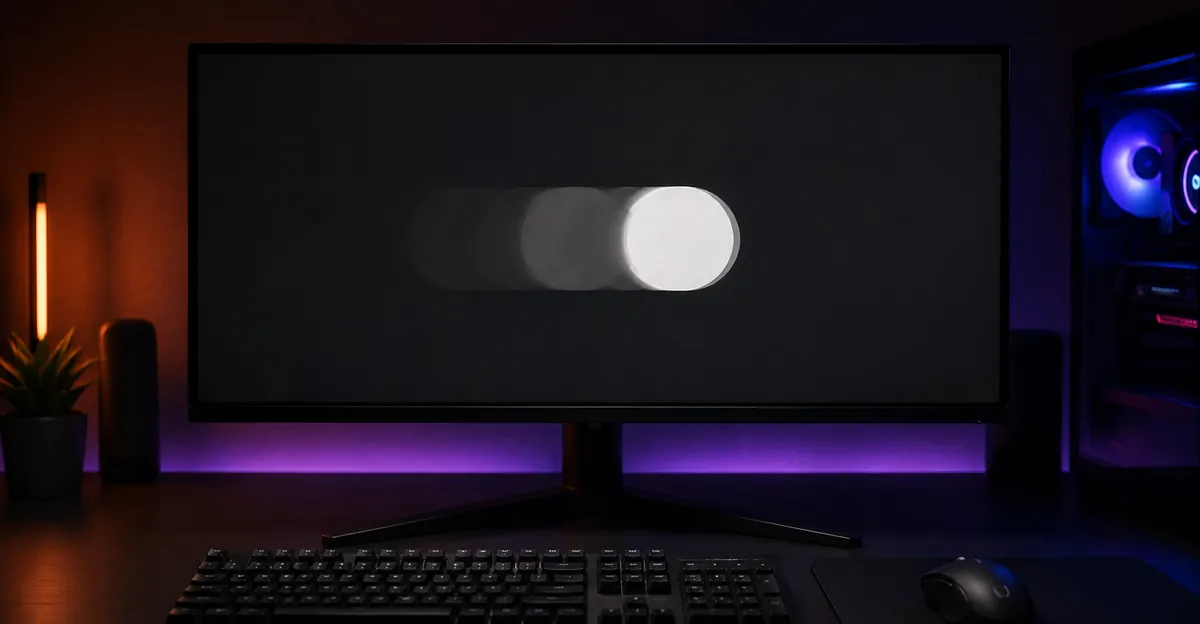
Searching how to fix screen ghosting usually means you see faint trails behind the cursor, a game character, or scrolling text. That is slow pixel response failing to keep up with motion — not a dead pixel, not burn-in, and usually not a permanent panel fault. This guide is the full how to fix screen ghosting path: confirm the artifact type, tune overdrive, lock refresh rate, then validate with a UFO test.
How to Fix Screen Ghosting (Short Answer)
How to fix screen ghosting: enable and tune Overdrive / Response Time in the monitor OSD, set Windows to the panel’s native refresh rate, update GPU drivers, use DisplayPort or HDMI 2.0+, and enable G-Sync or FreeSync if you use VRR. Retest after each change on testufo.com/ghosting. Stop raising overdrive when bright halos (inverse ghosting) appear on the leading edge.
| What you see | What to do |
|---|---|
| Dark trails only during motion | Raise overdrive one step; retest UFO |
| Bright halos on leading edge | Lower overdrive — that is inverse ghosting |
| Shadow stays still with no motion | Cable / signal issue — not the ghosting fix path |
| Trails only in dark VA scenes after all tuning | Likely inherent black smear; upgrade panel type |
The sections below explain causes, diagnosis, and the full step order so you do not chase the wrong problem.
What Is Monitor Ghosting
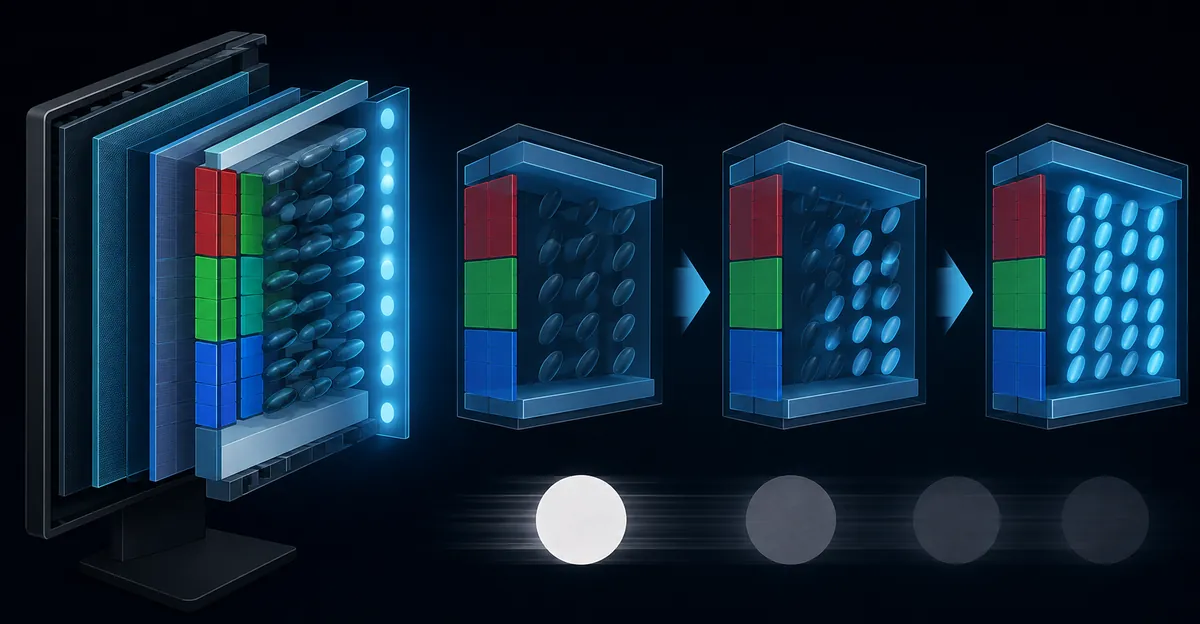
Monitor ghosting (also called a ghost image on screen or monitor image ghosting) is a motion artifact where pixels change color too slowly, leaving a faint duplicate of the previous frame visible behind moving objects. The ghost image is not a second object on screen — it is residual color from the last pixel state bleeding into the current frame.
Liquid-crystal displays work by twisting sub-pixels to filter backlight through color filters. Each twist takes measurable time. That transition is called gray-to-gray (GtG) response time. When GtG exceeds the time window between frames, the old color lingers while the new image has already moved on. You see a dark or colored trail — the monitor trail — following motion.
Ghosting is most visible in high-contrast motion: white text scrolling on black, a bright crosshair moving over a dark map, or a racing car against a light sky. It is temporary. When motion stops, the screen returns to normal. That distinguishes ghosting from burn-in, where artifacts persist permanently.
Ghosting is also distinct from general monitor blur. Blur makes the entire image soft or fuzzy at all times. Ghosting only appears during movement and produces directional trails, not uniform softness. If everything looks out of focus even when static, blur is the more likely diagnosis.
Ghosting vs Monitor Shadow vs Blur vs Burn-In
Users often describe ghosting as a monitor shadow or computer monitor shadowing, but not every shadow on a monitor is ghosting. The fix depends on which type you have.
| Symptom | Motion Required? | Permanent? | Primary Fix |
|---|---|---|---|
| Monitor ghosting (motion trails) | Yes — trails follow moving objects | No — clears when motion stops | Overdrive / Response Time setting |
| Static monitor shadow (signal duplicate) | No — fixed offset at all times | No — but persists until cable fixed | Replace or reseat display cable |
| Image persistence (retention) | No — visible without motion | No — fades over minutes to hours | Display varied content, reduce static UI time |
| Burn-in | No — visible on all content | Yes — permanent panel damage | Panel replacement or mitigation only |
| Monitor blur | No — entire image soft | No | Resolution, sharpness, cable, or panel focus |
If you are unsure which category fits, read our guide on shadow on a computer monitor. It walks through the OSD isolation test that separates static signal shadows from motion ghosting in under a minute.
The OSD isolation test in brief: Open your monitor's built-in menu while the artifact is visible. If the menu draws cleanly over the shadow, the panel is fine and the signal chain (cable, dock, GPU output) is the problem. If trails appear only during motion and the menu itself looks sharp, you have ghosting — an internal panel response issue fixed through overdrive, not cable replacement.
Afterimage on a monitor during fast motion is ghosting. Afterimage that persists hours after you closed a static window is image retention or burn-in — a completely different repair path.
What Causes Monitor Ghosting
Slow pixel response is the root cause, but several configuration and hardware factors make ghosting worse or better.
Panel Technology and Response Time
Panel type is the single biggest predictor of ghosting severity. Manufacturers quote best-case GtG numbers (often measured at maximum overdrive), but real-world performance varies by transition color and temperature.
| Panel Type | Typical Real-World GtG | Ghosting Tendency | Best Use Case |
|---|---|---|---|
| OLED / QD-OLED | ~0.03 ms | Near zero | HDR, dark rooms (accept burn-in risk) |
| Fast IPS | 1–4 ms | Low | Gaming, color work, general use |
| TN | 1–5 ms | Low to moderate | Competitive FPS, budget gaming |
| VA | 4–12 ms (asymmetric) | High in dark transitions | Movies, contrast-heavy content |
Source: Blur Busters, Micro Center, PixelTest.net.
VA panels are especially prone to black smearing — slow transitions from very dark to mid-tone colors. This is an inherent characteristic of VA liquid crystal alignment, not a defect. Overdrive reduces but cannot fully eliminate VA dark-scene smearing. IPS panels offer a better balance for most users; TN panels are fastest but sacrifice color and viewing angles.
Cold LCD panels respond more slowly. Ghosting may be worse for the first 30–60 minutes after power-on until the panel reaches operating temperature. Blur Busters documents this effect in strobe tuning — cold panels show more strobe crosstalk and ghosting than warmed-up panels.
Overdrive Disabled or Set Too Low
Overdrive (also called Response Time, Trace Free on ASUS, AMA on BenQ, or Overdrive on Acer) applies higher voltage to push pixels through transitions faster. With overdrive off or set too low, dark trails appear behind all motion. This is the most common fixable cause of excessive ghosting on otherwise capable panels.
Refresh Rate Mismatch
Refresh rate and response time are different metrics. A 144 Hz monitor refreshes every 6.9 ms; a 240 Hz monitor every 4.2 ms. If pixel GtG exceeds the frame window, trails appear regardless of refresh rate. However, running a refresh rate higher than your GPU can consistently deliver, or higher than the panel handles well, can make ghosting worse. Many monitors ship at 60 Hz by default even when they support 144 Hz or higher — always confirm native refresh rate in Windows display settings.
Misconfigured refresh rates can also cause related issues like screen flickering alongside motion trails.
Cable and Signal Chain Issues
While static shadows usually indicate cable problems, a degraded signal can also cap available refresh rate. If your maximum refresh rate does not appear in Windows, the bottleneck is often the cable or port, not the monitor. Use DisplayPort 1.4 or HDMI 2.0+ with a certified cable for high-refresh setups.
G-Sync, FreeSync, and Driver State
Variable refresh rate (G-Sync, FreeSync, VESA Adaptive-Sync) synchronizes frame delivery with the panel refresh window, reducing tearing and judder-related artifacts. Disabled VRR on a monitor designed for it can contribute to motion clarity problems. Outdated or corrupted graphics drivers occasionally affect display timing — update drivers after confirming overdrive and refresh rate settings.
Panel Age and Picture Modes
Older panels develop slower response over time. Some monitors also include picture modes (Cinema, Reader, Eco) that intentionally slow pixel transitions for color accuracy or power savings. Switch to Standard or Game mode before diagnosing ghosting.
How to Diagnose Ghosting on Your Monitor
Work from free software tests to hardware checks. Stop as soon as you identify the problem type.
Step 1: Run the UFO ghosting test. Open testufo.com/ghosting at your monitor's native refresh rate. Dark trails behind the UFO indicate ghosting. Bright halos on the leading edge indicate too much overdrive (inverse ghosting). This confirms which problem you have before changing settings.
Step 2: Confirm native refresh rate. In Windows, go to Settings, System, Display, Advanced display. Select the highest refresh rate your monitor supports. If only 60 Hz appears, check cable and port compatibility next.
Step 3: Scroll test. Open a document with white text on a black background (or invert colors). Scroll quickly. Visible gray trails behind the text confirm motion ghosting.
Step 4: Use our screen test tool. Our free screen test tool displays fast-moving patterns designed to reveal ghosting and motion blur. Compare results across different overdrive settings while running the test.
Step 5: OSD isolation test. Open the monitor menu during the artifact. Clean menu over a trailing shadow means signal-path fault (see shadow guide). Trails only during motion with a sharp menu means ghosting — proceed to overdrive tuning.
Step 6: Test at different refresh rates. Drop to 60 Hz temporarily. If ghosting improves significantly, the panel struggles at higher refresh rates and you may need a lower overdrive setting or a faster panel for your target Hz.
How to Fix Screen Ghosting Step by Step
Most people searching how to fix screen ghosting can clear the trails with free settings changes. Work through these steps in order.
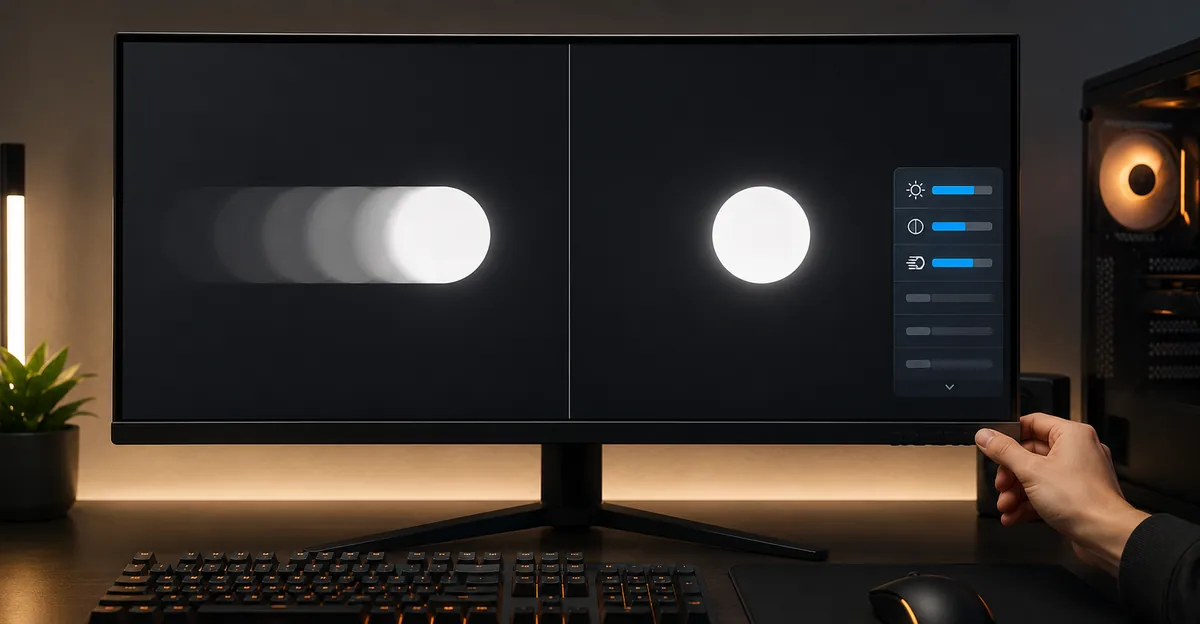
Step 1: Enable and tune overdrive. Open your monitor OSD. Find Overdrive, Response Time, Trace Free, or AMA under Gaming or Picture settings. Start at Normal or Medium. Open testufo.com/ghosting and cycle through each level. Keep the highest setting that produces clean trails without bright coronas on the leading edge.
Step 2: Set native refresh rate. Confirm Windows uses your monitor's maximum supported refresh rate. A refresh rate reset after sleep, driver reinstall, or firmware update is a common hidden cause of motion problems.
Step 3: Update graphics drivers. Install the latest driver from NVIDIA, AMD, or Intel. If ghosting appeared after a recent update, try rolling back one version.
Step 4: Swap the display cable. Use a short, certified DisplayPort 1.4 or HDMI 2.0+ cable. Connect directly to the GPU, bypassing docks, KVM switches, and passive adapters. This ensures full bandwidth for high refresh rates.
Step 5: Enable G-Sync or FreeSync. Turn on adaptive sync in both the monitor OSD and your GPU control panel. Match the VRR range to your typical frame rates.
Step 6: Adjust in-game settings. Lower motion-heavy effects if ghosting persists after hardware tuning. Reduce unnecessary frame rates above what your panel handles cleanly.
Step 7: Test with Blur Busters UFO after each change. Re-run testufo.com/ghosting after every adjustment. Compare dark trail length and corona visibility. Document the setting that produces the cleanest result at your daily refresh rate.
If ghosting only appears at the lowest overdrive setting and worsens at higher settings with bright halos, your panel needs middle-ground tuning — not maximum overdrive. If ghosting persists at all overdrive levels on a VA panel in dark scenes, that is likely inherent black smear rather than a settings fault.
Overdrive Settings and Inverse Ghosting
Overdrive is the primary tool against ghosting, but excess overdrive creates its own artifact: inverse ghosting (also called corona or overshoot). The pixel overshoots its target color, ripples back, and leaves a bright halo on the leading edge of motion — often worse than the original dark trail.
Blur Busters documents this trade-off on testufo.com/ghosting: low overdrive causes dark ghosting trails; high overdrive causes bright coronas. The goal is the compromise setting in between.
| Overdrive Level | Visual Result | When to Use |
|---|---|---|
| Off | Heavy dark trails behind all motion | Avoid for desktop or gaming |
| Low | Reduced dark trails, still visible | Color-accurate work, photo editing |
| Medium (Normal) | Clean trails, minimal leading halo | Sweet spot for most IPS panels |
| High | Faint leading halo on high-contrast edges | Fast-paced gaming if Medium is insufficient |
| Extreme / Ultra | Visible bright coronas, edge ringing | Avoid — often worse than original ghosting |
Manufacturers use different names for the same feature. ASUS labels it Trace Free; BenQ uses AMA (Advanced Motion Acceleration); Acer and many others use Overdrive or Response Time. Blur Busters measured ASUS VG278H at 120 Hz and found Trace Free 60 balanced ghosting visibility with corona visibility — zero ghosting with only a faint corona.
Some monitors offer only two or three overdrive presets, limiting your ability to find the sweet spot. Monitors with more granular control (or a single well-tuned preset across all refresh rates) deliver better motion clarity with less manual tuning.
Temperature note: Cold panels respond slower and may need lower overdrive to avoid overshoot. Warm up the monitor for 30–60 minutes before final overdrive tuning if you notice ghosting varies after power-on.
Best Settings for Gaming Without Ghosting
Competitive gaming exposes ghosting more than any other use case. These settings minimize trails without introducing inverse ghosting.
Refresh rate: Run at your panel's native maximum if your GPU can sustain it. A 144 Hz panel at 144 Hz gives a 6.9 ms frame window; at 60 Hz that window expands to 16.7 ms, which can reduce visible trails on borderline panels but sacrifices motion smoothness.
Overdrive: Use the highest level that passes the UFO test without coronas at your gaming refresh rate. Re-test if you switch between 60 Hz (console) and 144 Hz (PC) on the same monitor — optimal overdrive often differs by refresh rate.
Adaptive sync: Enable G-Sync or FreeSync to eliminate tearing without the input lag penalty of traditional V-Sync. Note that most monitors cannot run backlight strobing (ULMB, LightBoost) simultaneously with VRR — enabling both can worsen motion artifacts.
Panel choice for gaming: Fast IPS is the safest all-around choice for motion clarity and color accuracy. TN remains viable for budget competitive setups. VA offers superior contrast but accepts dark-scene smearing. OLED eliminates ghosting but introduces burn-in risk for static HUD elements.
Picture mode: Use Game or Standard mode, not Cinema or Eco. Game modes typically enable faster pixel transitions and disable processing that adds latency.
When to Upgrade Your Monitor
Settings fix most ghosting on panels with adequate response time. Upgrade when settings cannot reach acceptable motion clarity for your use case.
Upgrade signals:
- Ghosting persists at all overdrive levels on an IPS or TN panel — the panel may be aging or poorly tuned
- VA black smear in dark scenes genuinely impairs your gaming or work — IPS or OLED is the real fix, not more overdrive
- Your panel's real-world GtG exceeds the frame window at your target refresh rate (e.g., 10 ms GtG on a 240 Hz panel)
- Overdrive at any usable level produces unacceptable inverse ghosting — the scaler tuning is poor
When settings are enough:
- Ghosting appeared after a driver update or refresh rate reset — configuration fix
- Trails disappear at Medium overdrive — no hardware change needed
- Ghosting is minor and only visible in specific test patterns, not during normal use
Budget upgrade path: look for monitors with verified GtG measurements from reviewers like TFT Central or Blur Busters, not just marketing "1 ms" claims. Real-world GtG is often 2–3 ms slower than advertised best-case numbers.
Related Guides
- Monitor Problems Hub — Overview of all monitor display issues
- Shadow on a Computer Monitor — Static shadows, motion ghosting, and image persistence explained
- Monitor Blur — General fuzziness distinct from motion trails
- Screen Flickering — Refresh rate and sync issues
- Dead Pixel — Individual stuck or dead pixels
Conclusion
How to fix screen ghosting is almost always settings work, not a repair shop visit: slow pixel response made visible during motion is not permanent damage. Start with the overdrive or Response Time setting, confirm your native refresh rate, and validate each change with the Blur Busters UFO ghosting test. Static shadows that do not require motion are a different problem with a different fix path.
Run our free screen test tool to check your display for ghosting, dead pixels, and color issues in one session.
Sources
- Blur Busters LCD Overdrive Artifacts FAQ: blurbusters.com/faq/lcd-overdrive-artifacts/
- Blur Busters UFO Ghosting Test: testufo.com/ghosting
- Micro Center Monitor Ghosting Guide: microcenter.com/site/mc-news/article/what-is-monitor-ghosting.aspx
- PixelTest.net Monitor Ghosting Explained: pixeltest.net/en/blog/monitor-ghosting-explained