LCD bleeding and green dots on screen are two distinct display issues that often appear together on the same monitor. LCD screen bleed (backlight bleed) is a universal property of LCD technology — every LCD panel has some degree of backlight bleed. This guide focuses primarily on LCD bleeding, covering monitors, laptops, and mobile devices including iPhone XR and iPhone X models that use LCD displays.
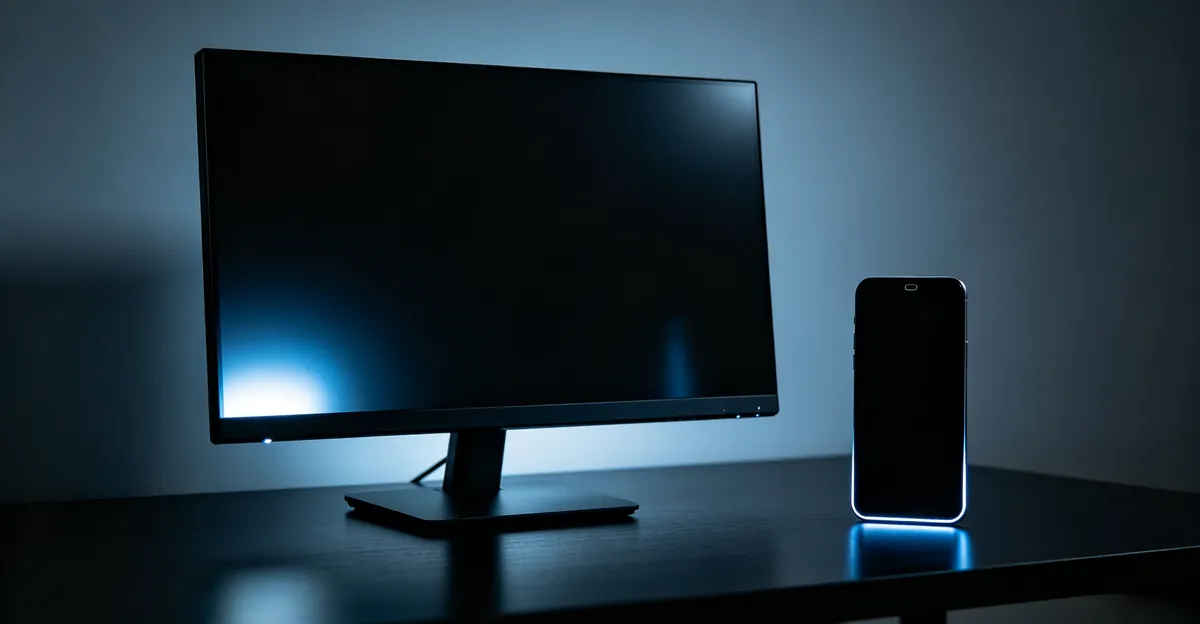
LCD bleeding is visible when displaying dark content — dark scenes in movies, games, or productivity apps with dark mode — and appears as bright white or bluish-white patches at the screen perimeter. Both are diagnosable at home, and while LCD bleeding cannot be fully eliminated, several practical fixes can reduce its visibility.
This guide explains the physics of both issues, how to distinguish them, the realistic fix options, and when to seek professional repair versus live with the cosmetic defect.
What Is LCD Bleeding
LCD bleeding (officially called backlight bleed) occurs when light from the backlight unit escapes at the edges or corners of the LCD panel instead of being properly diffused across the screen. It is visible when displaying dark content — dark scenes in movies, games, or productivity apps with dark mode — and appears as bright white or bluish-white patches at the screen perimeter.
How LCD panels work: Every LCD monitor uses a backlight positioned behind the liquid crystal layer. The backlight (LED strips in modern monitors) shines through the LCD layer, which modulates the light to produce images. The edges of the panel are sealed with optical films and gasket materials to prevent light from leaking around the perimeter. Manufacturing tolerances mean this seal is rarely perfect — and even premium monitors have some edge glow.
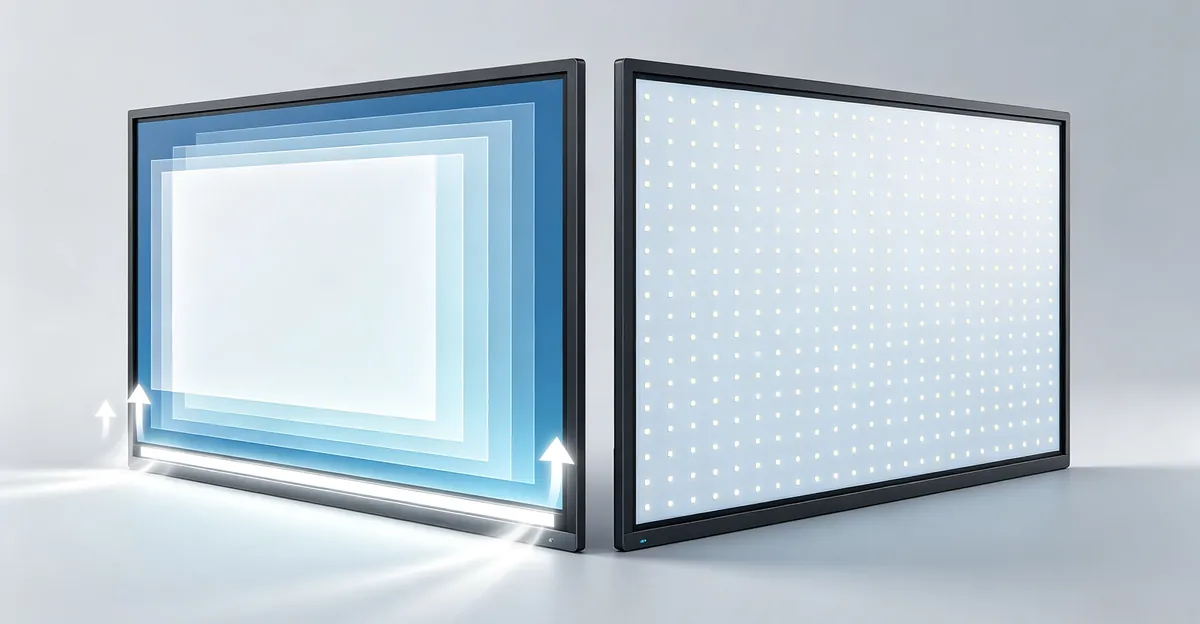
PixelTest.net describes the two architectural variants: edge-lit designs place LED strips along one or more panel edges with a light-guide diffuser spreading illumination across the screen, while direct-lit designs distribute LEDs in a grid directly behind the panel. Edge-lit monitors are more susceptible to edge bleed; direct-lit monitors have more uniform brightness but are less common in consumer displays.
The key distinction: LCD bleeding is a backlight system issue, not an LCD pixel issue. The pixels themselves are fine — it is the light behind them that is escaping.
What Causes LCD Bleeding
1. Manufacturing Tolerances (Universal)
Every LCD panel has some degree of backlight bleed due to the physics of sealing a light source inside a sealed optical stack. The optical films, light-guide plates, and gasket materials must work together precisely, and even minor variations in assembly cause light leakage. This means some amount of LCD bleeding is normal and accepted across the industry.
2. Over-Tightened Bezel Screws
A very common cause of excessive LCD bleeding: the screws holding the monitor frame press too firmly against the panel, compressing the optical stack and creating uneven pressure at the edges. This is particularly common on monitors that have been shipped long distances — the vibration loosens or tightens screws unpredictably.
3. Shipping Vibration and Physical Shock
Long-distance shipping subjects monitors to vibration, drops from shelf height, and temperature cycling. Any of these can shift the optical stack, loosen mounting clips, or create micro-cracks in the seal — all of which allow more light to leak at the edges. Many users report new monitors developing noticeable bleed after delivery that was not present during in-store inspection.
4. Aging and Heat Degradation
Over many years, the adhesive holding the optical stack together degrades, especially in warm environments (above 30°C / 86°F). The light-sealing gasket materials can dry out and crack, and the diffuser sheet can shift slightly. Aging monitors commonly develop worse backlight bleed than they had when new.
5. Panel Type (IPS vs. VA vs. TN)
IPS (In-Plane Switching) panels are the most susceptible to a related issue called IPS glow — a shimmering purple or gray-white glow at the corners that changes with viewing angle. IPS glow is inherent to IPS technology (the liquid crystal molecules shift light differently at angles) and is different from backlight bleed. VA panels generally have less bleed but worse black levels. TN panels have the least bleed but the worst color accuracy and viewing angles.
6. High Brightness Settings
Backlight bleed becomes more visible at higher brightness levels. A monitor that looks clean at 50% brightness may show obvious bleed at 100% brightness. This is not causing the bleed — it is revealing what was always there.
Edge-Lit vs. Direct-Lit Backlight Comparison
The two primary backlight architectures used in LCD displays directly affect how prone a device is to edge bleeding:
Edge-lit designs place LED strips along one or more edges of the panel, using a light guide plate to spread illumination across the screen. This architecture allows for thinner displays and lower power consumption but is inherently more susceptible to edge bleeding because light must travel horizontally across the panel. Most consumer monitors, laptops, and the iPhone XR use edge-lit backlights.
Direct-lit designs distribute LEDs in a grid directly behind the entire panel, providing more uniform illumination from the start. While these displays are thicker and consume more power, they have superior brightness uniformity and less edge bleeding. Professional-grade monitors for medical imaging or color-critical work typically use direct-lit backlights.
| Feature | Edge-Lit Backlight | Direct-Lit Backlight |
|---|---|---|
| LED Placement | Along panel edges | Full array behind panel |
| Brightness Uniformity | Lower (depends on light guide quality) | Higher (inherent) |
| Edge Bleed Susceptibility | Higher | Lower |
| Display Thickness | Thinner (5-15mm) | Thicker (15-30mm) |
| Power Consumption | Lower | Higher |
| Typical Use | Consumer displays, phones, laptops | Professional monitors, TVs |
| Examples | iPhone XR, most budget monitors | High-end gaming monitors, medical displays |
For users experiencing LCD bleed, understanding your device's backlight type sets realistic expectations — edge-lit devices will always have more noticeable edge glow than direct-lit equivalents.
What Causes Green Dots
1. Stuck Green Pixel
A stuck pixel is a single sub-pixel whose thin-film transistor (TFT) driver circuit is jammed in the permanently-on state. When a green sub-pixel is stuck on, it produces a bright green dot that is visible against any background. Stuck pixels are sometimes recoverable with pixel-reviver software.
2. Failing Green Sub-Pixel Driver Circuit
A more serious hardware fault: the driver circuit controlling the green channel on one or more adjacent pixels has failed, permanently over-driving the green output. This appears as a cluster of green dots or a greenish area rather than a single dot. Driver circuit failures do not respond to pixel-reviver software and require professional repair or panel replacement.
3. Internal Green-Tinted Dust
A particle trapped between the LCD glass layers with a greenish color tint appears as a small green dot. Internal dust is not fixable without panel disassembly and re-lamination — which voids the warranty and risks further damage.
LCD Bleeding on iPhone XR and iPhone X
Apple's iPhone XR and iPhone X models are particularly associated with LCD bleed reports, though for different reasons. The iPhone XR uses a 6.1-inch Liquid Retina LCD display, while iPhone X uses a 5.8-inch Super Retina OLED — but earlier production runs and refurbished units with LCD replacement panels do show bleeding issues. Understanding why these models are prone to LCD bleed helps users determine if their device's bleed level is normal or excessive.
Why iPhone XR Is More Prone to LCD Bleed
The iPhone XR's Liquid Retina LCD is an edge-lit display with LEDs positioned along the bottom edge of the panel. Light is distributed upward through a light guide plate to illuminate the entire screen. This design enables the device's slim profile and competitive pricing, but it also makes edge bleeding more common than in direct-lit alternatives.
Several factors make iPhone XR LCD bleed more noticeable than on other LCD phones:
-
Edge-lit architecture: Like most modern smartphones with slim bezels, the XR positions LEDs along the screen edges, making some edge glow inherent to the design.
-
LCD panel supplier variation: Apple sources LCD panels from multiple suppliers (primarily LG and Japan Display). Panels from different production batches show varying bleed characteristics — some units ship with minimal bleed while others show obvious corner glow.
-
Slim bezel design: The thin bezels leave less room for gasket materials that help contain backlight, increasing the likelihood of light leakage at the edges.
-
Higher pixel density: The 1792×828 resolution on a 6.1-inch screen packs more pixels per inch, but the underlying backlight architecture remains the same, concentrating any edge bleed into a more visible artifact.
iPhone X LCD vs. OLED Considerations
The iPhone X uses an OLED display rather than LCD, but two scenarios bring LCD bleed into the iPhone X discussion:
-
Refurbished or replacement screens: Third-party repair shops often install aftermarket LCD panels in iPhone X units as a cheaper alternative to OEM OLED. These LCD replacements frequently show visible backlight bleed.
-
Early production units: Some original iPhone X units from 2017-2018 reportedly showed OLED-related artifacts that users sometimes confuse with LCD bleed, including slight color shifts at viewing angles.
For genuine iPhone X OLED screens, issues like burn-in or color shift are more common than LCD bleed. If your iPhone X shows symptoms consistent with LCD bleeding (edge glow on dark backgrounds), the device likely has a third-party LCD replacement rather than the original OLED panel.
Identifying Excessive iPhone LCD Bleed
To determine whether your iPhone's bleed is within normal tolerances or excessive:
- Open the Settings app and set brightness to maximum
- Open a dark image or app (Settings > Wallpaper > choose a dark option works well)
- Wait 30 seconds in a dim room for the display to stabilize
- Note the location, intensity, and area of any visible light patches
Normal iPhone LCD bleed appears as a slight uniform glow at the edges or corners, only visible at maximum brightness in dark conditions. Excessive bleed shows up as bright concentrated patches in normal room lighting, making dark UI elements like the keyboard or status bar appear noticeably discolored.
How to Diagnose LCD Bleeding and Green Dots
Step 1: Dark room test. Turn off all room lights. Display a pure black image (#000000). Observe from your normal viewing distance. Any bright white or bluish-white patches at the edges or corners are backlight bleed. Rate the severity:
- Minor: only visible in near-total darkness, not distracting during normal use
- Moderate: visible in a dim room, occasionally distracting
- Severe: obvious in normal room lighting, distracting during movies and dark-mode apps
Step 2: Viewing angle test. Move your head left, right, up, and down. If the brightness of the edge glow changes with angle, it is IPS glow (angle-dependent). If it stays consistent, it is backlight bleed (angle-independent).
Step 3: Brightness test. Set brightness to 30%, 50%, and 100%. Backlight bleed becomes more apparent at higher brightness. If the bleed is only visible above 70% brightness, it is likely within normal tolerances.
Step 4: Screw inspection. With the monitor off and unplugged, look at the back panel. If bezel screws are very tight, loosening them slightly by a quarter turn may reduce bleed.
Step 5: Green dot test. Display a pure white screen. Any green dots will be visible as bright green points. Then display a pure black screen — stuck green pixels will disappear against the black background. Green dots that remain visible on black are hardware faults (driver circuit or internal dust).
Step 6: Pixel reviver test. Run JScreenFix for 60 minutes on any green dot. If the dot disappears, it was a stuck pixel. If it remains, it is a permanent hardware fault.
How to Fix LCD Bleeding
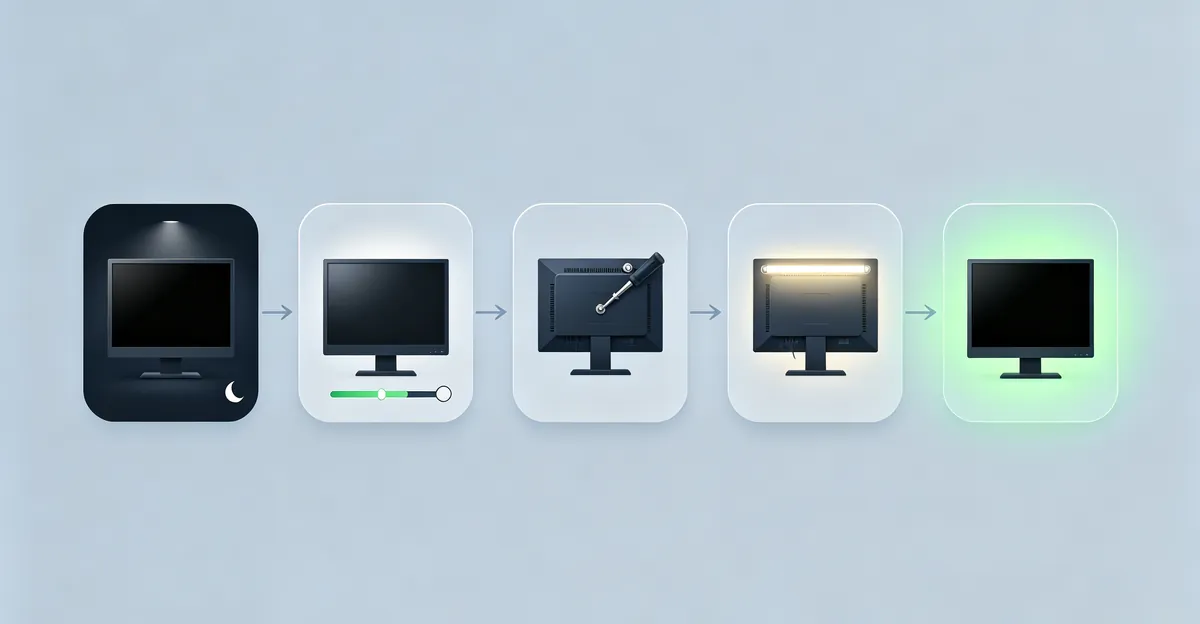
Fix 1: Reduce Brightness
The simplest and most effective method. Lower your monitor brightness to 50 to 70% — most users work fine in this range. Backlight bleed is a high-brightness phenomenon: lower brightness reduces the contrast between the leaked light and the intended black level.
Fix 2: Loosen Bezel Screws
With the monitor off and unplugged:
- Locate the screws on the back panel (usually 4 to 8 visible screws)
- Loosen each screw by a quarter turn (counter-clockwise)
- Do not fully remove the screws
- Turn the monitor on and test with a black screen
- If bleed improves, leave the screws loose
- If bleed worsens or nothing changes, tighten them back to their original position
This fix works when over-tightened screws were the cause. It has zero effect on bleed that is inherent to the panel's manufacturing tolerances.
Fix 3: Localized Pressure (Temporary)
With the monitor on displaying a black image:
- Use a soft microfiber cloth
- Apply gentle pressure to the bleeding area from behind the panel
- Hold for 30 to 60 seconds
- Check the bleed again
This redistributes the optical stack slightly and can provide temporary improvement. The effect may wear off over days or weeks as the components settle back.
Fix 4: Bias Lighting
Place an LED bias light strip behind the monitor. This raises the perceived ambient brightness of the room, reducing the contrast between the leaked backlight glow and the room — making the bleed less visually distracting. Recommended: 6500K (neutral white) for daylight use, or 2700K to 3000K (warm) for evening use.
Fix 5: Manufacturer Warranty or Retailer Return
When to use: The bleed is severe and the monitor is new or within warranty.
- Document the bleed with photos in a dark room
- Contact the manufacturer if within warranty period
- Most manufacturers replace panels with severe backlight bleed under their standard warranty
- New monitors with severe bleed qualify for retailer return within 14 to 30 days
Fix for iPhone LCD Bleed (XR and Replacement Panels)
iPhone LCD bleed requires a different approach than monitors because iPhones use adhesive seals and precision-engineered assemblies that cannot be safely adjusted at home:
Safe adjustments:
- Lower screen brightness to 70-80% (Settings > Display & Brightness)
- Enable True Tone and Night Shift to reduce backlight intensity
- Use dark mode apps and wallpapers to minimize the contrast between bleed and content
- Avoid applying pressure to the screen or case edges, which can worsen internal misalignment
What NOT to do:
- Do not attempt to loosen screws or disassemble the device — iPhones use proprietary Pentalobe screws and delicate flex cables that require specialized tools
- Do not apply pressure to the screen surface — unlike monitors, phones cannot be safely manipulated from behind
- Do not use software "pixel repair" tools, which are designed for stuck pixels, not backlight issues
When to seek Apple Support:
- The bleed is severe enough to affect daily use (visible in normal lighting)
- The device is within the standard 1-year warranty or AppleCare+ coverage (2-3 years)
- The bleed appeared suddenly after a drop or impact (may indicate internal damage covered by AppleCare+ with deductible)
Apple's official position is that minor edge glow is within manufacturing specifications for LCD devices. However, severe cases — where bright patches cover more than 5-10% of the screen area or remain visible in bright ambient lighting — typically qualify for display replacement under warranty.
How to Fix Green Dots
Fix 1: Pixel Reviver (Stuck Pixels Only)
- Run JScreenFix for 20 to 60 minutes on the affected area
- If the green dot disappears after cycling, it was a stuck pixel — problem solved
- If it remains after 60 minutes, it is a hardware fault — move to Fix 3
Fix 2: Gentle Pressure (Stuck Pixels Only)
- Turn the monitor on so the pixel is actively driven
- Place a soft microfiber cloth over the green dot
- Apply gentle pressure with a fingertip for 5 to 10 seconds
- Check and repeat up to 5 times
Fix 3: Professional Repair (Permanent Hardware Faults)
When to use: The green dot does not respond to pixel reviver and is clearly a driver circuit fault.
- Contact the manufacturer if within warranty
- Out-of-warranty: T-con board replacement ($25 to $80 for parts + labor) for external monitors
- For laptops: internal display cable replacement ($50 to $200 depending on model)
- Panel replacement is the last resort if T-con and cable do not resolve the issue
LCD Bleed Repair: DIY vs. Professional Service
Understanding when to attempt DIY fixes versus seeking professional repair can save time, money, and prevent accidental damage. This decision depends on the severity of the bleed, the device type, and whether it's under warranty.
Severity Assessment: Three-Tier Classification
Minor bleed (DIY fixes sufficient):
- Visible only in total darkness at maximum brightness
- Covers less than 5% of screen area
- Does not interfere with normal viewing tasks
- Common in edge-lit consumer displays and considered within manufacturing tolerances
Moderate bleed (DIY worth attempting, warranty evaluation recommended):
- Visible in dim room lighting at 70%+ brightness
- Affects 5-15% of screen area, usually concentrated at corners
- Occasionally distracting during dark scenes in movies or games
- May improve with brightness reduction and bezel adjustments
Severe bleed (professional repair or replacement required):
- Visible in normal room lighting at 50% brightness
- Covers 15%+ of screen area with bright concentrated patches
- Significantly impacts usability for dark UI themes and media consumption
- Indicates manufacturing defect or internal damage requiring panel service
DIY Fix Decision Tree
Follow this decision path to determine your best course of action:
-
Is the device under warranty or within retailer return period?
- Yes → Document the issue with photos and pursue warranty replacement first. DIY attempts may void coverage.
- No → Proceed to step 2.
-
Is the device a desktop monitor with accessible rear panel?
- Yes → Safe to attempt brightness reduction, bezel screw adjustment, and bias lighting (Fixes 1-4).
- No (laptop, phone, all-in-one) → Only attempt brightness and software adjustments. Do not disassemble.
-
Did the bleed worsen suddenly after a drop or transport?
- Yes → Likely internal misalignment. Professional repair needed; DIY unlikely to help.
- No (present since purchase or gradual increase) → Manufacturing tolerance or aging. DIY fixes may reduce visibility.
-
Is the bleed severe (visible at 50% brightness in normal lighting)?
- Yes → DIY fixes will not sufficiently reduce it. Evaluate professional repair cost vs. replacement.
- No → Proceed with DIY methods and reassess after 1-2 weeks.
Cost Comparison Table
| Solution | Typical Cost | Success Rate | Risk Level | Best For |
|---|---|---|---|---|
| DIY: Brightness reduction | $0 | 70% (reduces visibility) | None | Minor to moderate bleed |
| DIY: Bezel screw adjustment | $0 | 40% (works if over-tightening was cause) | Low (reversible) | Monitors only, moderate bleed |
| DIY: Bias lighting | $15-30 | 60% (perceptual improvement) | None | Moderate bleed, home theater use |
| Retailer return/exchange | $0 | 100% (new unit) | None | Within return window (14-30 days) |
| Manufacturer warranty | $0-50 shipping | 90% (if approved) | None | Within warranty, severe bleed |
| Professional repair: Re-sealing | $100-200 | 50% (temporary) | Medium (disassembly) | Out-of-warranty, moderate bleed |
| Professional repair: Panel replacement | $200-600 | 100% (new panel) | Low | Severe bleed, high-value device |
| Device replacement | $150-2000+ | 100% | None | Severe bleed, out-of-warranty, old device |
When Professional Repair Makes Sense
Professional repair is worth considering when:
- The device is a high-value item ($500+) and the bleed significantly impacts usability
- The repair cost is less than 40% of replacement cost
- DIY methods failed to reduce bleed after consistent attempts
- The device is a laptop or all-in-one where disassembly requires specialized tools
- Multiple issues exist (bleed + dead pixels + color shift) indicating broader panel failure
Professional repair rarely makes economic sense for:
- Budget monitors under $300 (repair cost often exceeds replacement)
- Devices older than 5 years (limited remaining lifespan)
- Minor bleed that does not affect practical use
- Phones (screen replacement typically costs 50-70% of used device value)
iPhone-Specific Repair Considerations
For iPhone XR and iPhone X LCD bleed:
- AppleCare+ coverage: Display damage (including severe backlight issues) incurs a $29 service fee, significantly cheaper than out-of-warranty repair ($199-279).
- Third-party repair risks: Aftermarket iPhone displays often have worse backlight uniformity than the original. Using unauthorized repair also voids any remaining Apple warranty.
- Trade-in value impact: Devices with visible screen defects receive 20-40% lower trade-in valuations. If planning to upgrade soon, warranty repair preserves resale value.
When Hardware Repair Is Needed
Seek professional repair or replacement when:
- LCD bleeding is severe and visible in normal room lighting after trying brightness reduction and bezel adjustment
- Multiple green dots appear simultaneously (driver circuit failure affecting a cluster)
- A green dot persists after 60 minutes of pixel reviver and does not respond to gentle pressure
- The issue appeared after physical damage (drop, impact, liquid spill)
Cost expectations:
- Retailer return: free (new monitors, within return window)
- Manufacturer warranty replacement: free (within warranty)
- T-con board replacement: $25 to $80 + $95 to $140 labor
- Display cable replacement (laptop): $50 to $200
- Panel replacement: $200 to $600 (usually not economical for monitors under $400)
Prevention Tips
Backlight bleed cannot be fully prevented, but you can minimize worsening:
- Do not over-tighten bezel screws when assembling or adjusting a monitor
- Transport monitors in their original foam packaging
- Avoid placing heavy objects on top of a monitor
- Keep monitors away from heat sources (above 30°C / 86°F accelerates degradation)
- Use surge protection — power surges can damage the backlight driver circuits
For green dots: avoid pressing on the screen surface and handle laptops carefully to prevent internal cable flex at the hinge.
Related Guides
- White Spots on Screen: Bright spot defects vs. backlight bleed
- Black Dots on Screen: Dead pixel and dark spot defects
- Green Tint: Screen-wide green color problems
- Green Lines: Green line artifacts vs. green dot defects
- Screen Flickering: Flickering and refresh rate issues
- Yellow Screen: Yellow tint and color temperature problems
- Screen Test Tool: Run the black-white test for bleed diagnosis
Conclusion
LCD screen bleed is a universal property of LCD technology — some amount is normal and cannot be permanently eliminated. The severity varies by backlight design (edge-lit displays like iPhone XR are more prone than direct-lit monitors), manufacturing quality, and age. Reduce its visibility by lowering brightness, loosening bezel screws on monitors, and adding bias lighting. For mobile devices like iPhone XR and iPhone X, software adjustments and warranty service are the only safe options.
New devices with severe bleed qualify for retailer return or warranty replacement. For older devices, the DIY vs. professional repair decision depends on severity, device value, and repair cost. Minor bleed affecting less than 5% of the screen area is within normal tolerances and best managed through brightness optimization and perceptual adjustments like bias lighting.
Use our free screen test tool to display pure black screens in a dark room and assess your device's backlight bleed situation accurately. For related display issues, see our guides on white spots on screen, black dots on screen, and green tint.