Black dots on a monitor screen are most commonly dead pixels — individual pixels whose electronics have permanently failed. They appear as tiny, permanent black spots that stay dark on any background. A dead pixel cannot be fixed by software, pressure, or any other home remedy; the only solutions are warranty replacement, panel replacement, or learning to live with the defect.
This guide explains what causes black dots, how to distinguish dead pixels from dust and debris, what manufacturer warranty policies actually cover, and how to decide between repair, replacement, and tolerance.
What Are Black Dots on a Monitor
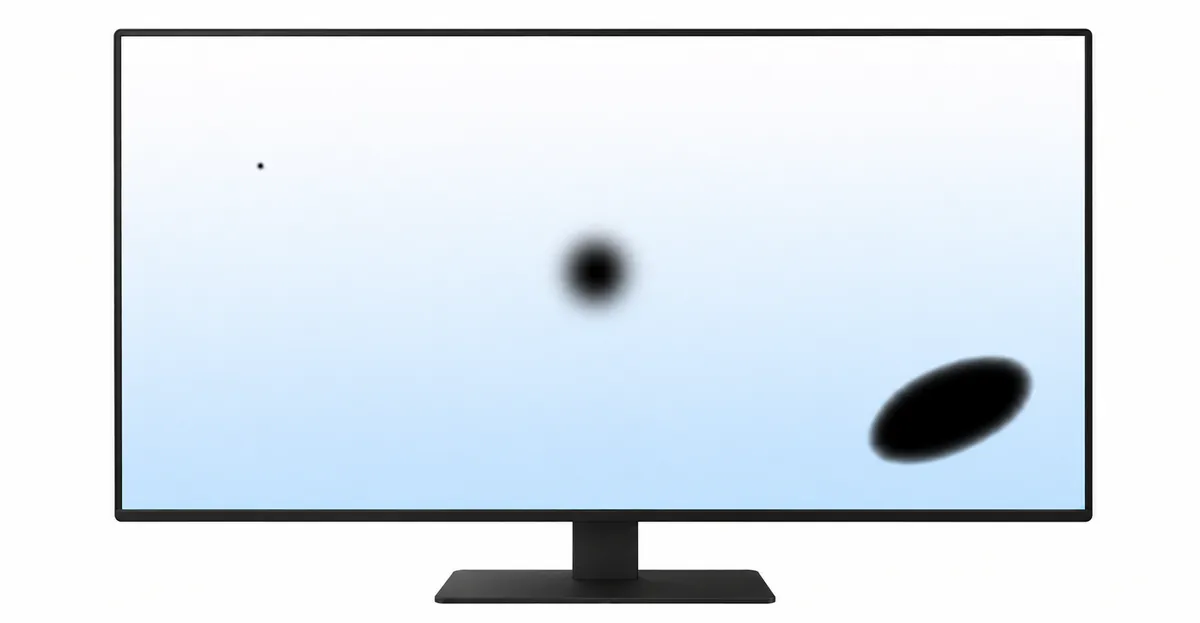
A black dot on a monitor screen is a single pixel-sized dark spot that remains permanently dark on any content you display. Unlike a smudge or a stuck pixel (which glows), a black dot produces no light at all. The Dell Display Pixel Guidelines define this as a Dark or Dead Pixel: all three RGB sub-pixels are permanently turned off, and the pixel cannot be repaired through any software or physical intervention.
How LCD pixels create color: Every visible pixel on an LCD monitor is actually three sub-pixels — one red, one green, one blue — controlled by individual thin-film transistors (TFTs). The TFT receives a voltage telling it how much light to let through the liquid crystal layer. When all three sub-pixels in a pixel are working, they combine to produce any visible color. When all three TFTs fail simultaneously, no light passes and the pixel appears as a pure black dot against any background.
The three categories of black dots:
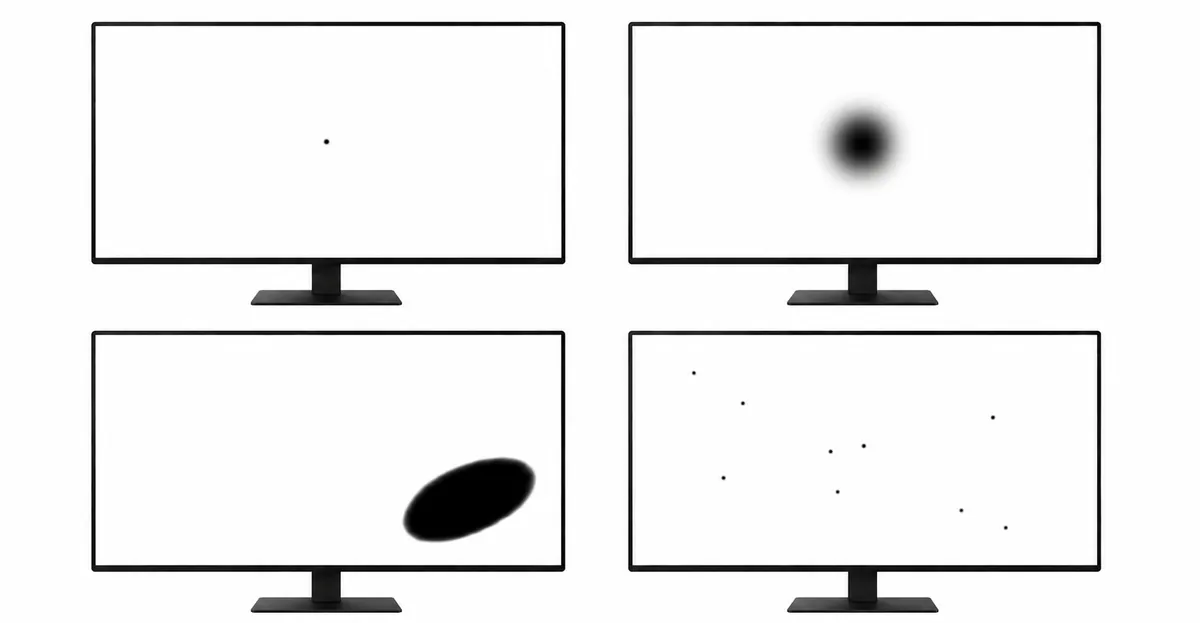
- True dead pixel: All three sub-pixels have failed. Appears as a pure black dot on white and colored backgrounds, invisible on black backgrounds. Permanently unfixable.
- Dead sub-pixel: One or two of the three sub-pixels have failed. Appears as a dark colored dot (dark red, dark green, dark blue) rather than pure black. Still permanently unfixable.
- Internal debris: A dust particle trapped between the LCD glass layers. Appears as a soft gray or black smudge that stays visible on most backgrounds including black. Cannot be cleaned from outside the panel.
What Causes Black Dots
1. TFT Transistor Failure (Most Common)
The thin-film transistor controlling a sub-pixel can fail electrically due to manufacturing defects, heat stress, age-related degradation, or a microscopic defect in the TFT array. Once the transistor fails, the sub-pixel it controls is permanently off. When all three sub-pixels in a single pixel fail at the same time (often correlated because they share control circuitry), you see a pure black dot.
Dell explicitly classifies these as Dark or Dead Pixels and notes that they cannot be fixed through any means. The TFT is a physical electronic component, and when it fails the pixel is electrically disconnected from the panel — there is no software workaround that can reconnect it.
2. Sub-Pixel Defects
Sometimes only one or two of the three sub-pixels fail. The result is a dark colored dot rather than pure black — for example, a dark red dot if only the green and blue sub-pixels have failed (leaving red dominant), or a dark blue dot if red and green failed. These are still dead pixels, still permanently unfixable, and still count toward the manufacturer's pixel policy threshold.
3. Internal Debris and Dust
Dust particles or manufacturing debris trapped between the LCD glass layers appear as black or gray spots on the screen. They differ from dead pixels in two ways: they are usually slightly larger than a pixel (often several pixels wide), and they remain visible on a black background (where dead pixels vanish). Internal debris cannot be cleaned without disassembling the panel — which voids the warranty and risks further damage. Most manufacturers treat trapped debris as a defect eligible for replacement if it occurs within the warranty period.
4. Stuck-Off Pixels (Rare)
A pixel can occasionally become stuck in the off state, appearing as a small black dot. Unlike a true dead pixel, the TFT is still functional but the liquid crystal layer is frozen in its dark state. Stuck-off pixels can sometimes be revived with the same color-cycling techniques used for stuck-on pixels — running JScreenFix or a similar pixel-reviver tool for 20 to 60 minutes over the affected area. Success rate is low but non-zero. The TechLoy monitor test guide notes that gentle pressure with a soft, slightly damp cloth over the pixel can also help unstuck stuck pixels.
5. Electrostatic Discharge Damage
A strong electrostatic discharge to the screen can damage one or more TFTs, creating dead pixels in the affected area. This is more common in dry environments and on laptops that are frequently transported. ESD damage typically appears as a cluster of dead pixels rather than a single isolated dot.
6. Physical Impact Damage
A sharp localized impact (a finger poke, a child hitting the screen, dropping something on the panel) can crack the TFT array beneath the glass. Impact damage usually appears as a cluster of dead pixels in a small area, often accompanied by visible white pressure spots if the diffuser is also damaged. Impact damage is permanent and requires screen replacement.
7. Aging and Long-Term Degradation
LCD panels degrade slowly over many years of use. As the TFT array ages, individual transistors can fail. Dead pixels that appear years after purchase are usually age-related — the panel has simply reached the end of its reliable service life for some of its sub-pixels.
How to Diagnose Black Dots
The diagnostic process distinguishes dead pixels from other causes and determines whether the issue is fixable.
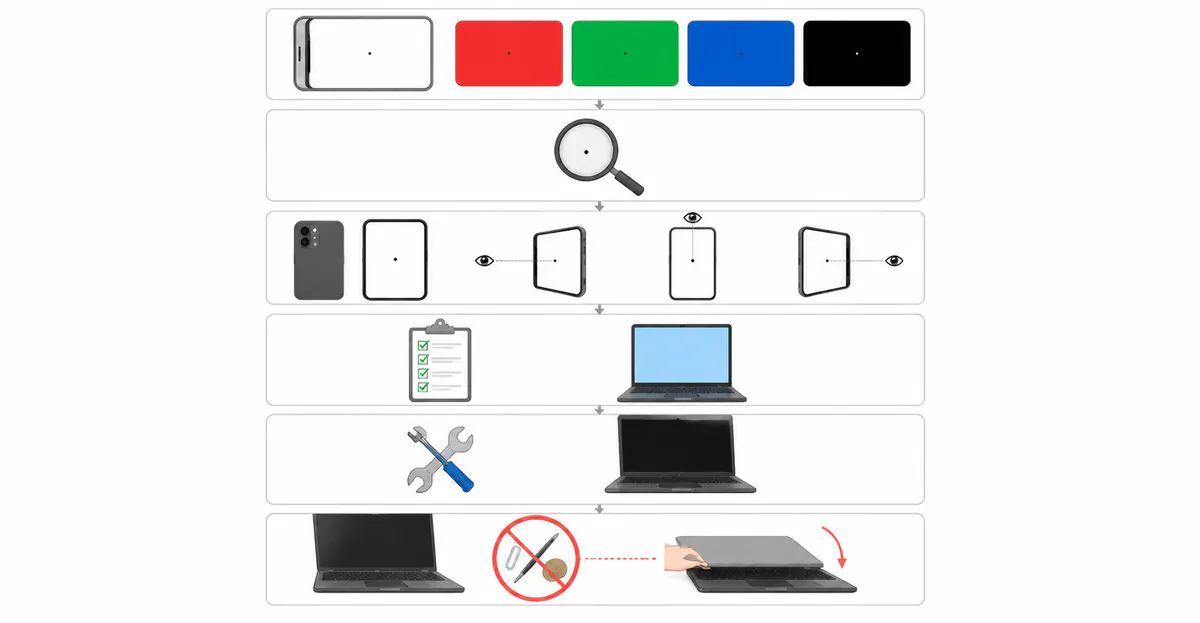
Step 1: Clean the screen first. Use a microfiber cloth to clean the panel surface. Many reported "dead pixels" turn out to be dust on the screen surface, which is easily wiped away.
Step 2: Display pure white (#FFFFFF). Open a full-screen white image or use the screen test tool. Black dots stand out clearly against white. Count each one and note its approximate location (center, top-left, bottom-right, etc.).
Step 3: Display pure black (#000000). Open a full-screen black image. Dead pixels vanish (they are already black). If your black dot is still visible against black, it is not a dead pixel — it is internal debris, a stuck-off pixel, or a stuck-on pixel viewed at an extreme angle.
Step 4: Display pure red, green, and blue (#FF0000, #00FF00, #0000FF). Against red, dead green or blue sub-pixels appear as darker dots. Against green, dead red or blue sub-pixels appear as darker dots. Against blue, dead red or green sub-pixels appear as darker dots. This isolates whether you have single sub-pixel failures versus full pixel failures.
Step 5: Display pure gray (#808080). Tints, patches, and banding are easiest to spot on gray. Any single dead pixel is less obvious on gray but uniformity problems become clearer.
Step 6: Test on a second computer with a different cable. If the black dots appear identically on a second computer with a different cable, the monitor hardware is at fault. If the dots disappear, the issue was driver-related (rare but possible after a bad driver update).
Step 7: Take a macro photograph with a phone. If a black dot is large enough to photograph clearly with a phone camera held close to the screen, it is likely larger than a single pixel and is probably internal debris rather than a dead pixel.
How to Fix Black Dots
Fix 1: Pixel Reviver Software (Stuck Pixels Only)
When to use: The black dot might be a stuck-off pixel rather than a true dead pixel. Pixel reviver tools work only on stuck pixels, not on dead pixels.
- Open JScreenFix (free web tool) or use a dedicated pixel-fixing app
- Position the color-cycling window directly over the affected pixel
- Run the color cycle for 20 to 60 minutes
- Check the pixel after each cycle — if it returns to normal color, it was stuck
- A dead pixel will not respond to this treatment
JScreenFix success rate for stuck pixels is roughly 60% within the first hour of cycling. Success drops sharply after 24 hours of continuous cycling without result. The Dell pixel guidelines explicitly warn against DIY pixel-fixing software for dead pixels — it does not work and may waste time.
Fix 2: Gentle Pressure (Stuck Pixels Only, Risky)
When to use: You suspect a stuck pixel and software fixes have not worked.
- Turn the monitor on so the pixel is actively being driven
- Place a soft, slightly damp microfiber cloth over the affected pixel
- Apply very gentle pressure with a fingertip for 5 to 10 seconds
- Release and check the pixel
- Repeat 3 to 5 times maximum
The TechLoy test guide and TeamViewer both describe this technique with the warning that excessive pressure creates more dead pixels. Apply only enough force to feel slight resistance — not enough to bend the panel.
Fix 3: Manufacturer Warranty Claim
When to use: The dead pixel count exceeds your manufacturer's pixel policy threshold, and the monitor is within its warranty period.
- Locate your monitor model's pixel policy document (Dell, LG, ASUS, Samsung, HP, and BenQ all publish these)
- Count your dead pixels and confirm the count meets the policy threshold
- Contact the manufacturer's support with your serial number, purchase date, and defect count
- Most premium monitors (Dell UltraSharp, LG UltraFine, Apple Pro Display XDR) have a zero bright-defect policy for the first 1 to 3 years
- Standard consumer monitors typically require 5 or more dead pixels before warranty replacement
Fix 4: Retailer Return
When to use: The monitor is new (within 14 to 30 days of purchase) and has any dead pixels that bother you.
- Most major retailers (Amazon, Best Buy, Newegg) accept returns within 14 to 30 days for any reason
- Return the monitor immediately rather than waiting for warranty service
- Repack the monitor in its original foam — return shipping damage voids the return
- Buy a replacement from a different batch — same model, different manufacturing run, different dead pixel lottery
Retailer return is almost always faster than manufacturer warranty for new monitors. The original manufacturer's warranty is the secondary fallback if the return window has closed.
Fix 5: Live With It (Acceptable Cases)
When to use: The dead pixel count is within manufacturer tolerance, the monitor is out of warranty, and the dead pixel is not in a visually critical area.
- Most users cannot see a single dead pixel during normal use unless the screen displays a uniform color and the pixel is in the user's central gaze area
- Dead pixels near the edges or corners rarely affect usability
- A dead pixel is not a sign that more will appear — most panels with a few dead pixels stay stable for years
A single dead pixel on a 4K monitor occupies roughly 1/8,294,400 of the screen area. If it sits in a non-central area, most users never notice it during normal work.
When Hardware Repair Is Needed
Seek professional repair or replacement when:
- The dead pixel count exceeds the manufacturer's published pixel policy threshold
- Multiple dead pixels are clustered together (suggesting broader panel damage)
- Black dots are accompanied by other symptoms (flickering, lines, color tint)
- The monitor is premium or professional grade (Apple Pro Display, Dell UltraSharp, Eizo ColorEdge) where dead pixels affect color-critical work
Cost expectations:
- Retailer return: free (within return window)
- Manufacturer warranty replacement: free (within warranty period, if pixel policy threshold met)
- Out-of-warranty panel replacement: $200 to $600 depending on panel size and grade
- New monitor replacement: $150 to $2,000 depending on resolution and panel quality
For monitors under $300 new, replacement is almost always more cost-effective than panel repair. For professional monitors over $1,000, warranty or insurance coverage may apply.
Prevention Tips
Dead pixels cannot be prevented — they are mostly random TFT failures inherent to LCD manufacturing. You can minimize the risk of additional dead pixels by:
- Avoid pressing on the screen surface — apply pressure only with a soft microfiber cloth for cleaning
- Keep the monitor in a stable temperature environment (15°C to 30°C) — extreme heat accelerates TFT degradation
- Use a surge protector — power surges can damage TFTs across the panel
- Transport monitors in their original foam packaging — impact damage is the most common preventable cause of new dead pixel clusters
- Clean with a dry or slightly damp microfiber cloth only — never spray cleaners directly on the panel
Related Guides
- Dead Pixel: Comprehensive guide to identifying and testing dead pixels
- LCD Bright Spots: The opposite problem — bright white spots on a dark screen
- White Spots on Screen: White spot causes and fixes
- Black Spot: General black spot troubleshooting
- Screen Test Tool: Run the dead pixel test on your monitor
Conclusion
Black dots on a monitor are dead pixels, which are permanent hardware failures that cannot be repaired through any home method. Distinguish dead pixels from dust using a white-then-black screen test, and from stuck pixels using pixel reviver software. If the dead pixel count exceeds the manufacturer's pixel policy threshold and the monitor is within its warranty period, claim a replacement. If it is new, return it to the retailer. For a small number of out-of-warranty dead pixels, most users find that learning to live with the defect is more practical than panel replacement.
Use our free screen test tool to test your monitor for dead pixels and other display defects. The tool runs the white-black-red-green-blue-gray test sequence automatically and helps you count defects accurately.