Screen tearing is the horizontal split that cuts through a moving image when your graphics card and monitor are not updating in step. It is a timing problem, not cracked glass and not a stuck pixel. This guide shows what screen tearing looks like, how to run a screen tearing test, how to fix and stop it on Windows PCs and gaming monitors, and what to change in Outer Wilds and Geometry Dash when those titles tear specifically.
Screen Tearing: What It Looks Like and How to Fix It
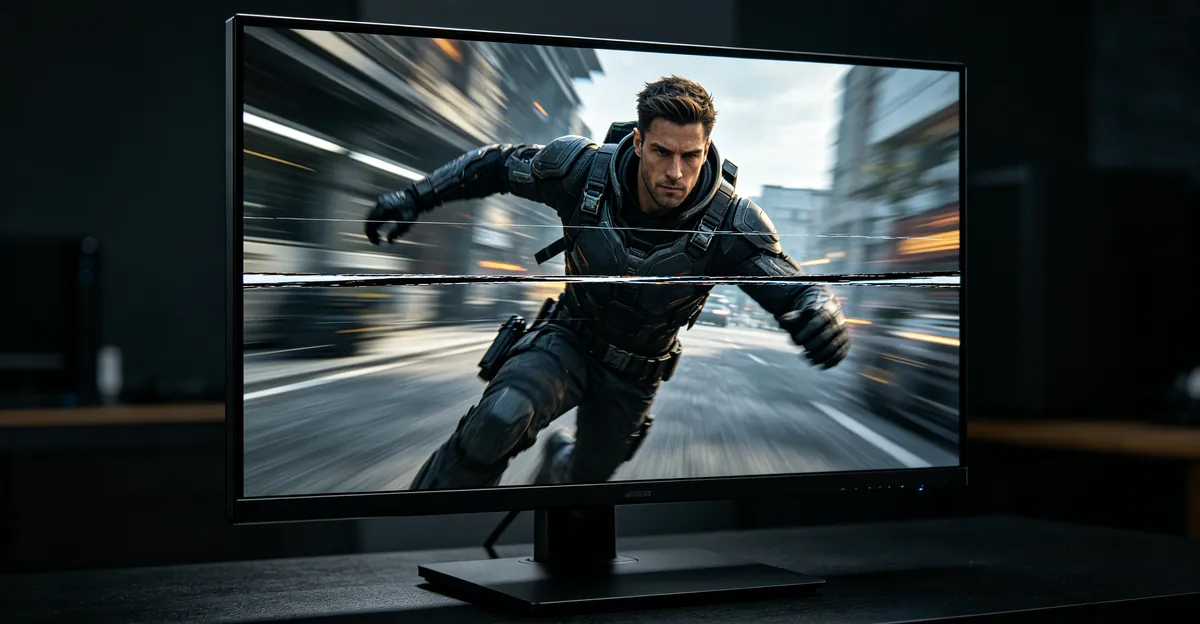
What Does Screen Tearing Look Like
Screen tearing looks like a clean horizontal break across the picture. During camera pans, mouse sweeps, or fast scrolling, the upper portion of the frame shows one moment in time while the lower portion shows the next. Characters, walls, and HUD elements appear sliced. The tear line often drifts up or down as frame rate and refresh rate drift apart. Dell describes the same pattern: horizontal artifacts when GPU frame output and monitor refresh fall out of sync, most obvious in fast motion.
When motion stops, the split usually vanishes. That single fact separates tearing from permanent panel defects. If a cloudy blotch stays fixed after cleaning and remains visible on solid white and black, you are looking at physical monitor stains and pressure marks, not tearing. Tearing is also not monitor ghosting. Ghosting leaves soft trails behind moving objects because pixels change color slowly. Tearing leaves a sharp cut between two complete frames. Screen flickering is a brightness or timing pulse across the whole panel, not a single horizontal seam.
| Artifact | Visual cue | Motion required? | Clears when idle? | Typical fix path |
|---|---|---|---|---|
| Screen tearing | Sharp horizontal split between frames | Yes — strongest during pans | Yes | Sync (VRR / V-Sync) + FPS cap |
| Monitor ghosting | Soft trail behind moving objects | Yes | Yes | Overdrive / response time |
| Screen flickering | Whole-panel brightness pulsing | Sometimes | Varies | Drivers, refresh rate, cable |
| Pressure mark | Fixed cloudy bruise | No | No | Not a sync fix — panel damage path |
| Monitor blur | Soft focus everywhere | No | No | Resolution, sharpness, cable |
Photograph or screen-record a fast pan if you need proof. A phone video of the monitor often captures the tear line more clearly than a software screenshot, because a screenshot usually dumps a single framebuffer without the scanout mismatch your eyes see. Once you recognize the horizontal split, you can stop chasing dead pixels and move to sync settings.
Why Computer Screens Tear
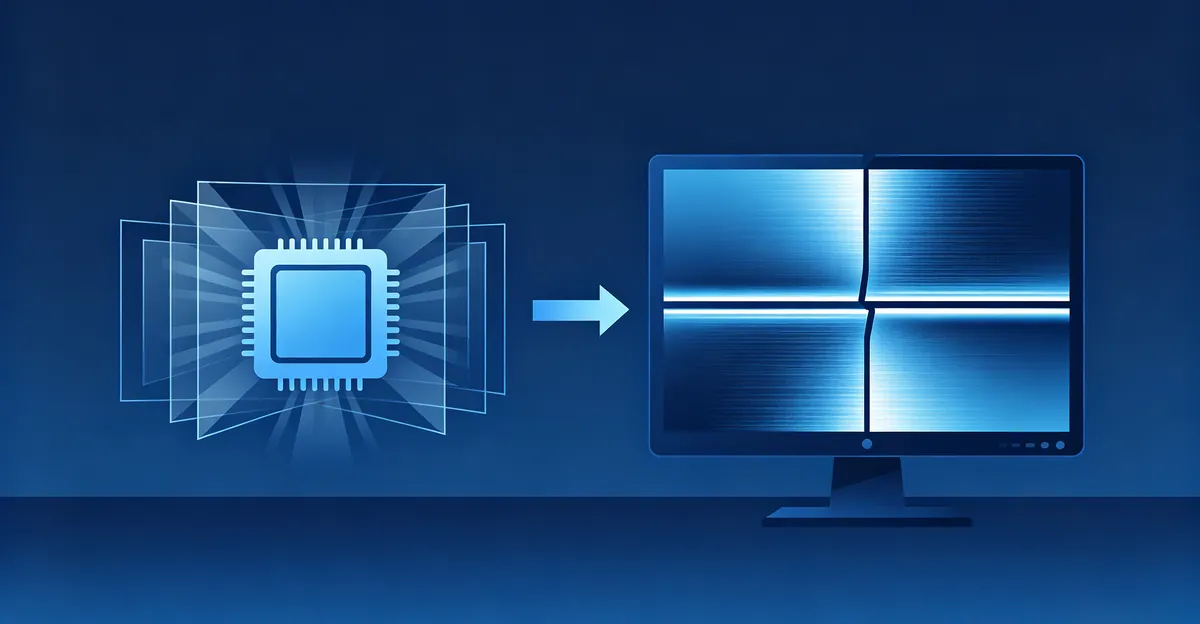
Computer screen tearing happens when the GPU finishes frames at a different rate than the display refreshes. The monitor draws the image from top to bottom. If a new frame arrives mid-scan, the panel paints the bottom of the old frame and the top of the new one in the same refresh. You see parts of two frames at once. That is the entire mechanism.
Uncapped frame rates amplify the problem. A GPU pushing 200 FPS into a 60 Hz or 144 Hz panel without synchronization will hand over frames mid-scan repeatedly. V-Sync forces the GPU to wait for the next refresh and eliminates that split, but classic double-buffered V-Sync can add input lag or cause stutter when FPS drops below refresh. Adaptive sync technologies reverse the relationship: NVIDIA G-Sync and AMD FreeSync let the monitor refresh when a frame is ready, within a supported range, so the panel rarely shows a partial frame.
Other amplifiers appear in everyday PC setups. Windows set to a non-native refresh rate, a cable that cannot carry the advertised Hertz, outdated GPU drivers, and games that ignore the driver sync path all recreate the mismatch. Background apps that spike GPU load create uneven frame pacing, which can make tear lines jump even when average FPS looks fine. Multi-monitor desktops sometimes run one panel at the wrong rate after sleep or cable swaps. Matching each display to its native mode before blaming the game removes a large share of “mystery” computer screen tearing.
Laptops add another variable: hybrid graphics. If a title renders on the discrete GPU but the internal panel is driven through an integrated path with aggressive power limits, frame delivery becomes irregular. Setting the game to high-performance GPU mode and locking the internal display to its highest supported refresh rate in Windows Display settings reduces that class of tear. External monitors on USB-C docks need a link that actually negotiates the chosen Hertz; otherwise Windows silently falls back and tearing returns.
How to Fix Screen Tearing
How to fix screen tearing on a Windows PC follows a short order of operations. Dell’s practical checklist aligns with what GPU vendors recommend: secure the cable, set native refresh, update drivers, then enable sync and frame caps.
Step 1 — Confirm signal and native refresh. Reseat HDMI, DisplayPort, or USB-C at both ends. Open the monitor OSD and confirm the correct input. In Windows, go to Settings → System → Display → Advanced display and select the panel’s native refresh rate. An incorrect Hertz setting can make tearing worse even when games look “high FPS.”
Step 2 — Update graphics drivers. Install the current NVIDIA, AMD, or Intel package from the vendor. Outdated drivers are a common cause of display timing bugs that present as tearing or unstable VRR.
Step 3 — Prefer variable refresh rate when available. On the monitor OSD, enable FreeSync, Adaptive-Sync, or G-Sync Compatible. In Windows Graphics settings, turn Variable refresh rate on for that display when the option exists. In the NVIDIA Control Panel, enable G-Sync for full screen (and windowed if you use borderless). In AMD Software, enable FreeSync for the display. VRR synchronizes refresh to frame delivery and cuts tearing with far less lag than classic V-Sync alone.
Step 4 — Cap FPS three to five frames below max refresh. Examples: 141 FPS on 144 Hz, 237 FPS on 240 Hz. Guides that tune G-Sync and FreeSync correctly treat this cap as mandatory. Hitting the refresh ceiling hands control back to traditional V-Sync behavior and reintroduces the lag players blame on adaptive sync. Cap in-game, with the driver frame limiter, or with a tool such as RivaTuner when the game lacks a clean limiter.
Step 5 — Set the sync trio. With VRR active: driver Vertical Sync On, in-game V-Sync Off, FPS capped below refresh. Driver V-Sync acts as a backup only when FPS somehow exceeds the VRR window; inside the window it does not behave like old always-on V-Sync. Without VRR hardware: enable standard V-Sync for tear-free casual play, or Adaptive Sync / Fast Sync (NVIDIA) or Enhanced Sync (AMD) when FPS stays far above refresh and you need lower lag than full V-Sync.
Step 6 — Match resolution and close GPU hogs. Use the monitor’s native resolution. Close browsers and overlays that spike GPU usage. Restart once after major driver or VRR changes so Windows and the OSD agree.
| Method | Stops tearing? | Input lag | Needs VRR monitor? | Best when |
|---|---|---|---|---|
| G-Sync / FreeSync + FPS cap −3 to −5 | Yes, in VRR range | Very low | Yes | Gaming with compatible GPU + panel |
| Driver V-Sync On (no VRR) | Yes | Higher | No | Single-player, video, casual play |
| Adaptive / Fast / Enhanced Sync | Mostly at high FPS | Moderate | No | FPS far above refresh |
| FPS cap alone | Reduces, may not eliminate | Low | No | Partial fix or VRR assist |
| Higher Hz only | Makes tears less obvious | Low | No | Incomplete without sync |
How to stop screen tearing long term is the same stack kept healthy: current drivers, correct Hertz, VRR trio when hardware allows, and no uncapped FPS with sync disabled. A faster GPU alone does not stop tearing if the monitor still paints mid-frame. Pair the GPU with sync settings or a frame limiter.
Quick fix checklist
- Native resolution and refresh rate in Windows.
- Cable reseated; prefer DisplayPort for high Hz desktop monitors.
- GPU driver current.
- FreeSync / G-Sync on in OSD and control panel.
- FPS capped 3–5 below max refresh.
- In-game V-Sync Off with VRR; driver V-Sync On.
- Retest with a fast pan or dedicated tear test pattern.
Screen Tearing Test
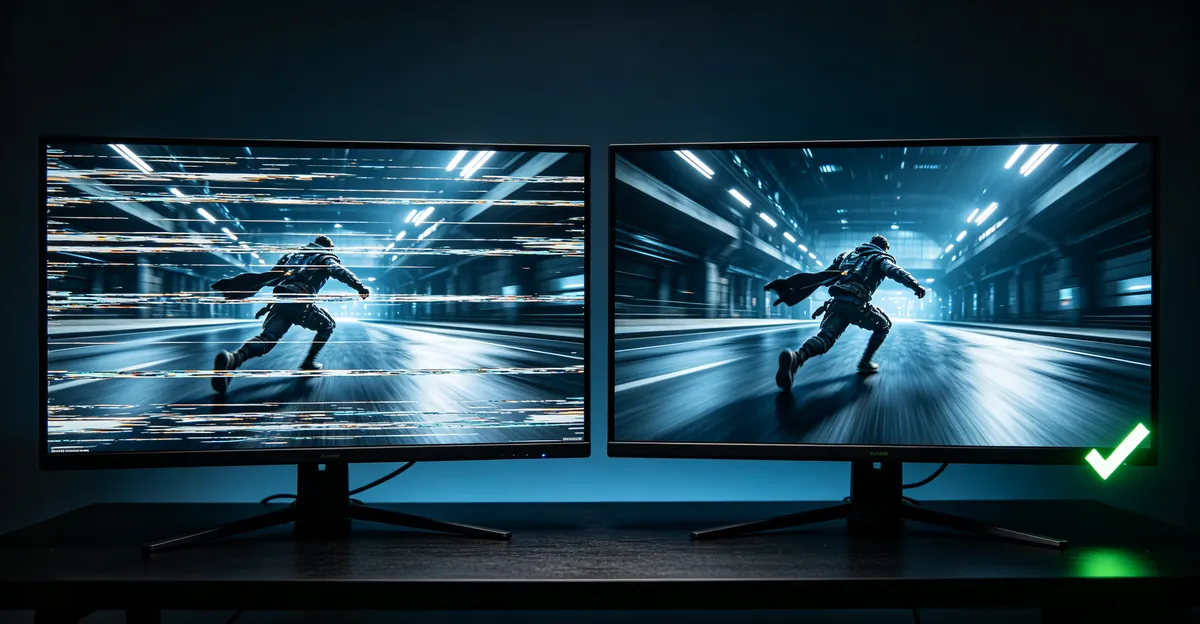
A screen tearing test proves whether the artifact is real timing mismatch or something else. Start with solid-color and motion checks on a free screen test tool so you can rule out stuck pixels, tint, and static stains before blaming sync. Then introduce motion.
Desktop motion test. Open a full-screen browser page with a high-contrast vertical stripe pattern or a rapidly scrolling document. Sweep the mouse or scroll quickly. A tear appears as a horizontal discontinuity that jumps between frames. Repeat with V-Sync or VRR toggled so you can see the line disappear when sync engages.
In-game camera pan. In any 3D title, stand still and yaw the camera left and right at a steady speed with V-Sync Off and FPS uncapped. Note where the horizontal seam sits. Cap FPS to refresh, then enable VRR. The seam should vanish or shrink to rare edge cases near the VRR limits.
Overlay FPS + refresh verification. Enable an FPS counter (in-game, Steam, NVIDIA, or AMD). Confirm FPS is not wildly above refresh without sync. Confirm Windows still reports the expected Hertz after the game launches — some titles change display mode and leave you on 60 Hz after exit.
Cable and multi-monitor isolation. Move the same content to another port or another monitor. If tearing follows the PC configuration (same sync settings) rather than one panel, the fix is software sync. If only one monitor tears while running below its rated Hertz, suspect the cable or the OSD refresh lock.
What a good test rules out. Soft trails that fade behind motion point to ghosting and overdrive, not tearing. Whole-screen pulsing points to flickering. Fixed cloudy patches on white and black after cleaning are pressure damage. Monitor blur softens text even when static. Document which pattern you see before changing five settings at once.
Record results in a simple log: refresh rate, FPS average, VRR on/off, V-Sync on/off, and whether the tear line was visible. That log turns forum advice into a controlled experiment on your hardware.
Monitor Screen Tear: Settings That Matter
Monitor screen tear complaints often trace to the OSD and Windows, not the game executable. Open the monitor menu and find Adaptive-Sync, FreeSync, G-Sync Compatible, or HDMI VRR. Turn it on. Some panels disable VRR in certain picture modes or when overdrive is set to extreme. If tearing returns after a firmware update or after enabling ULMB / backlight strobing, remember that many monitors cannot run strobing and VRR together. Pick one: tear-free VRR for general play, or strobing for clarity with sync managed another way.
DisplayPort usually carries high refresh and VRR more reliably than older HDMI revisions. If the OSD shows 60 Hz while the box claims 144 Hz or 240 Hz, the link is the bottleneck. Use a cable rated for your resolution and Hertz, and plug into a port that supports the full mode. USB-C docks vary widely; when VRR negotiation fails, Windows may keep a high desktop Hz while games tear because the scanout path is unstable.
Windows Variable refresh rate under Graphics settings helps borderless windowed games. Without it, some titles only get tear-free behavior in exclusive fullscreen. NVIDIA and AMD control panels both offer per-application overrides — useful when one competitive game needs uncapped FPS with Fast Sync while single-player titles use full VRR.
Refresh rate itself changes how visible a tear is. Dell notes that higher Hertz updates the image more often, so residual tears are harder to notice, but Hertz alone does not eliminate the split. A 240 Hz or 360 Hz panel still needs sync or a frame cap. Competitive players sometimes prefer slight tearing with minimum lag; everyone else should treat tear-free VRR as the default monitor screen tear solution.
Keep OSD overdrive moderate. Extreme overdrive can create inverse ghosting that users mislabel as tearing. If you see bright coronas behind dark objects after “fixing” tear settings, lower response time enhancement and retest. The goal is one complete frame per refresh without halos.
Factory game modes sometimes reset FreeSync or lock Hertz to 60. After choosing FPS, RPG, or Movie presets, reopen the Adaptive-Sync item and confirm it stayed enabled. Save a custom user mode once the tear-free stack works so a later picture-mode experiment does not silently undo your monitor screen tear fix.
Screen Tearing in Outer Wilds
Screen tearing Outer Wilds searches usually mix true tearing with judder from the game’s 60 Hz physics design. Mobius Digital documents that Outer Wilds simulates physics at 60 updates per second by default. Planets, the ship, and the player move on those steps, so high-refresh monitors can look choppy or torn when rendered frames and simulation steps disagree.
VSyncCount override. Create secretsettings.txt in C:\Users\<you>\AppData\LocalLow\Mobius Digital\Outer Wilds. Add VSyncCount=1 to sync every frame. Values 2–4 sync every Nth frame; 0 disables vsync. Mobius notes this is not officially supported but should be safe, with a maximum of 4. Players on high-refresh panels who see extreme choppiness at lower framerates are the intended audience for this tweak.
PhysicsRate override. In the same file, add PhysicsRate=120 (or 180 / 240). Doubles of 60 are preferred. Raising physics rate improves perceived smoothness at higher framerates but increases CPU load and is unsupported. If the machine stutters harder after the change, drop back toward 60 or 120.
Borderless windowed. Some users report smoother behavior in windowed mode on high-refresh monitors. Mobius provides the Steam launch option -popupwindow so choosing windowed enables borderless windowed. Combine with driver-level FreeSync or G-Sync Compatible for windowed apps when available.
Driver hygiene. Update NVIDIA drivers past known bad ranges when graphical corruption appears — Mobius documents black or purple views tied to specific driver versions and a NVidiaDriver522.25Fix flag in secret settings as a workaround. Tearing and corruption are different bugs; fix drivers first if colors break when looking certain directions.
After edits, relaunch Outer Wilds, confirm VRR or V-Sync behavior with an FPS overlay, and pan the camera across planetary horizons where horizontal seams are easy to spot. If the image is stuttery but not sliced, prioritize PhysicsRate and VSyncCount over aggressive FPS unlocks. If you see a sharp horizontal cut with uncapped frames, apply the same global VRR trio used for other PC games on top of the Outer Wilds file overrides.
How to Fix Screen Tearing on Geometry Dash
How to fix screen tearing on Geometry Dash is a frequent long-tail because FPS unlock / FPS bypass is popular and easy to misconfigure. The core rule matches every other title: FPS must align with refresh, or a sync technology must bridge the gap.
Match FPS bypass to refresh. Set bypass to 60, 120, 144, or 240 to mirror the monitor. Geometry Dash community guides treat this as the cleanest fix when you want unlocked feel without visible seams. Mismatched bypass (for example 360 FPS on a 144 Hz panel with sync off) is a classic tear recipe.
Prefer GPU V-Sync over in-game V-Sync when unlocking FPS. Geometry Dash’s built-in Vertical Sync re-caps FPS and fights unlock tools. Community write-ups recommend enabling V-Sync, Fast Sync, or Adaptive Sync in NVIDIA or AMD control panels per-application for Geometry Dash, while leaving the in-game V-Sync off if you rely on bypass. NVIDIA: Manage 3D Settings → Program Settings → Geometry Dash → Vertical Sync Fast or Adaptive. AMD: Wait for Vertical Refresh equivalents. Intel: Graphics Command Center sync options.
Borderless mode caveat. Reports around version 2.206 describe tearing even with V-Sync on in borderless mode. Switch to exclusive fullscreen and retest before changing hardware.
VRR path. If the monitor supports FreeSync or G-Sync, enable it and keep FPS inside the VRR window. That path stops tearing without relying on Geometry Dash’s internal V-Sync. Still avoid uncapped bypass far above refresh unless Fast Sync / Enhanced Sync is intentional.
Input feel vs tear trade-off. Rhythm and precision platforming punish lag. Players who hate V-Sync lag should match FPS to Hertz exactly or use Adaptive / Fast Sync rather than always-on classic V-Sync. Smooth Fix and other GD graphics toggles can change pacing; if tears appear after toggling them, revert and retest with only sync variables changed.
Work through one change at a time: match bypass → fullscreen → GPU sync → VRR. Retest on a dense wave level where horizontal scroll makes seams obvious. When the tear line is gone and jumps still feel timely, stop tuning.
If tearing only appears after long sessions, check thermal throttling and power plans. A laptop that drops from a stable 144 FPS to a swinging 90–160 range will tear more when sync is off. Prefer a balanced or high-performance plan, keep vents clear, and retest with a fixed FPS cap so frame pacing stays inside the refresh window.
Conclusion: When It Is Not Tearing — and What to Do Next
If the horizontal split never appears in a controlled screen tearing test, look elsewhere. Soft motion trails mean ghosting — raise or lower overdrive carefully. Brightness pulsing means flickering — check refresh, cables, and drivers. Fixed dark clouds after cleaning mean pressure damage on the panel stack, which sync settings cannot heal. Soft static focus problems belong with blur diagnosis.
When tearing is confirmed, the durable fix is synchronization: native Hertz, current drivers, VRR with an FPS cap below the ceiling, or classic V-Sync when VRR is unavailable. Game-specific overrides for Outer Wilds and Geometry Dash sit on top of that foundation; they do not replace it. Re-run a short pan test after every change so you know which switch actually stopped the seam.
To confirm the panel is healthy while you tune sync, open the free screen test patterns, check solid colors for stuck pixels or stains, then return to motion content with your final VRR and FPS cap applied. Tear-free motion plus clean solid colors means the display path is doing its job.
Sources
- Dell Technologies — How to Fix Screen Tearing on PC: Settings, Sync and Hardware Tips: https://www.dell.com/en-us/blog/how-to-fix-screen-tearing-on-pc-settings-sync-and-hardware-tips/
- Frame Rate Test — V-Sync vs G-Sync vs FreeSync guide: https://frameratetest.net/v-sync-vs-g-sync-vs-freesync-complete-guide-to-display-sync-technologies/
- Tier1Settings — How to Set Up G-Sync and FreeSync Correctly: https://tier1settings.com/how-to-set-up-gsync-and-freesync-correctly/
- Levvvel — What is screen tearing and how do you fix it?: https://levvvel.com/tech/what-is-screen-tearing/
- Mobius Digital — Outer Wilds support (High Frame-Rate Monitors): https://www.mobiusdigitalgames.com/supportforum.html
- Geometry Dash Level Tools — How to Fix Screen Tearing in Geometry Dash: https://geometrydashlevel.com/fix/screen-tearing