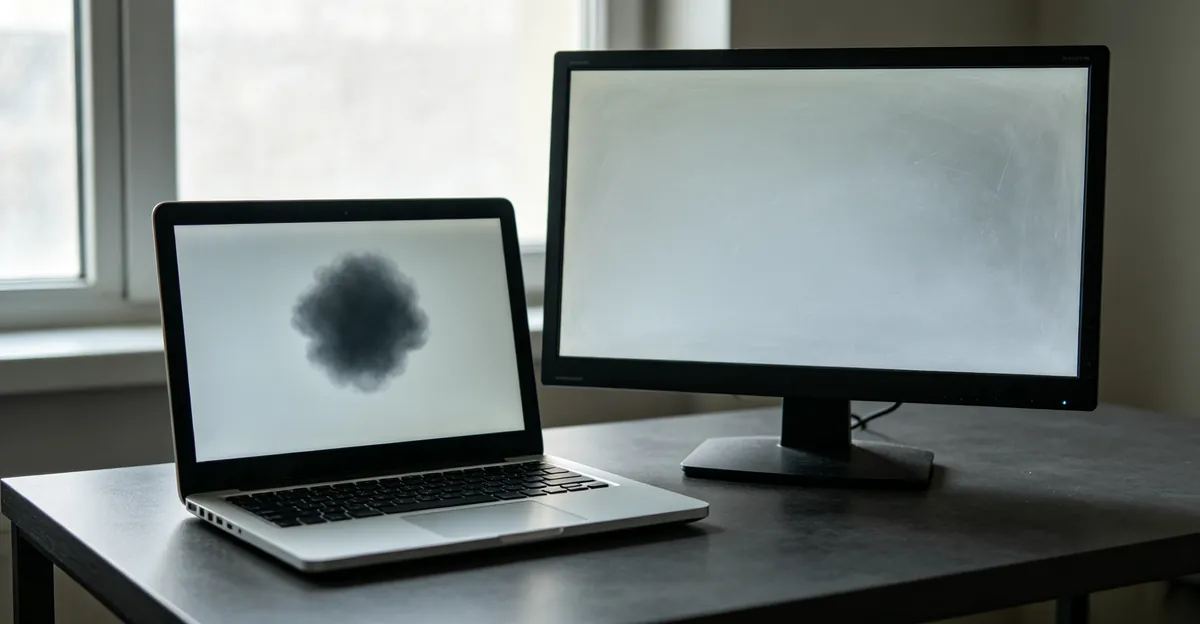
Dark spots, cloudy patches, and greasy smudges on a display are not the same problem. Monitor stains sit on the surface and usually wipe away. Pressure marks on a monitor live inside the LCD stack and often do not. Confusing the two leads people to scrub harder, use harsh chemicals, or buy useless pixel-fix apps while the real damage is already in the panel. This guide shows how to tell them apart, clean stains safely, judge whether black pressure marks on a laptop screen can recover, and decide when replacement is the only honest option.
Pressure Marks on Monitor vs Stains: Causes, Safe Cleaning & Fix Options
Monitor Stains vs Pressure Marks: How to Tell Them Apart
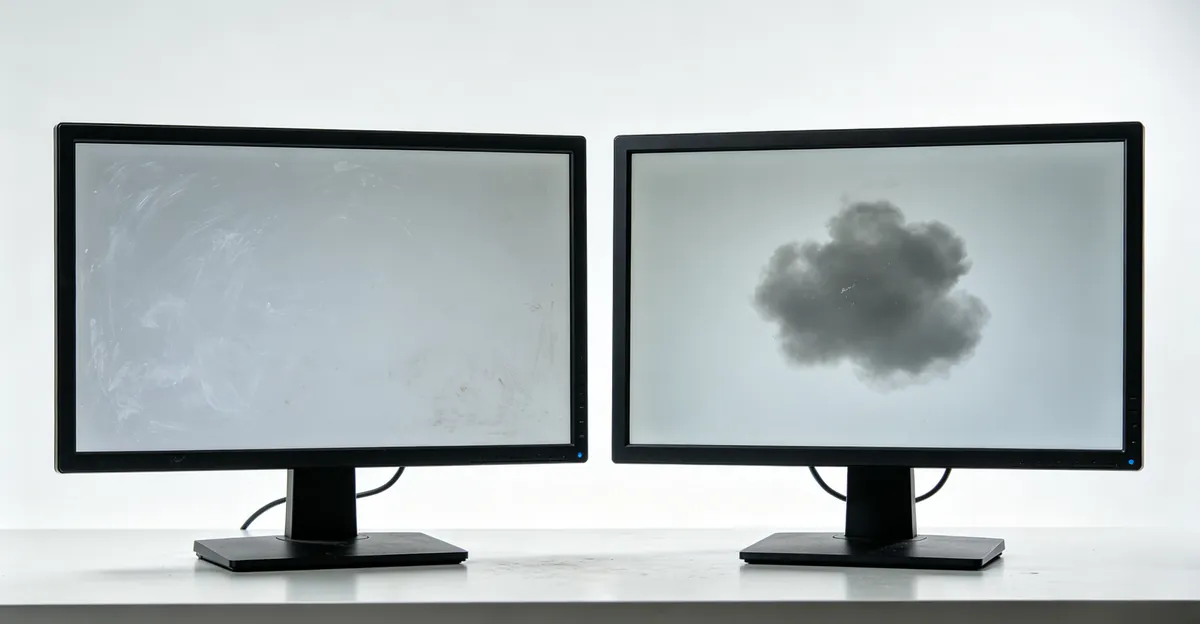
A pressure mark on screen is physical deformation of the display sandwich — polarizers, liquid crystal cells, color filters, and backlight diffuser sheets. Focused force pinches those layers so crystals misalign or the cell gap collapses. The result is a cloudy dark blotch, a bright bruise, or an irregular gray patch that stays put when content changes. Repair communities and display makers call this LCD bruising or pressure damage because the panel looks bruised even when the outer glass is intact.
A monitor stain is different. Fingerprints, skin oils, dust films, dried drinks, cleaning residue, and sticker adhesive sit on the outer coating. They reflect light oddly and look dirty, but they do not crush the liquid crystal layer. Wipe correctly and the stain leaves. Wipe incorrectly and you can create a real pressure mark on top of the original mess.
Use this comparison before you try any fix:
| Check | Monitor stain (surface) | Pressure mark (internal) |
|---|---|---|
| After gentle microfiber wipe | Improves or disappears | Unchanged |
| Visible on solid white and black | Often weaker on dark | Usually clear on both |
| Shape | Soft edges, smear-like | Irregular bruise or blotch |
| Viewing angle | Often changes with light | May shift tint or shape |
| Typical trigger | Touch, food, dust, residue | Lid crush, impact, hard cleaning |
| Changes with brightness | May wash out when dim | Remains fixed at full brightness |
| Spreads over days | No (unless new dirt) | Sometimes expands if layers keep failing |
Quick diagnostic with a screen test
Power on the display and open a free screen test that cycles solid white, black, red, green, and blue. Raise brightness to maximum in a dim room so faint bruises become obvious. Surface stains often look worse on bright backgrounds and may vanish after a careful wipe. Pressure marks stay in the same coordinates on every color. If a mark also appears in the monitor OSD menu (for external monitors) or survives a reboot and cable swap, treat it as panel damage, not dirt.
On laptops, connect an external monitor once. If the blotch vanishes on the external display but remains on the built-in panel, the GPU and cable path are innocent. That single check prevents days of pointless driver reinstalls when the real issue is LCD screen pressure marks inside the lid.
Also separate pressure marks from related defects. A single dead pixel is a tiny permanent black or colored dot from a failed sub-pixel transistor. White spots and bright patches can come from diffuser damage or backlight issues and sometimes look like pressure bruises. Irregular black spots may be dead pixels, substrate cracks, or pressure damage depending on shape and history. Broad display spots need the same solid-color test so you do not clean a hardware fault as if it were grease. When in doubt, clean once gently, then retest before assuming the panel is ruined.
What Causes Monitor Stains and Pressure Marks
Pressure marks on monitor panels and laptop screens share one root mechanism: force applied through the front of the display. Common scenarios include closing a laptop with a pen, USB drive, earbud, or paperclip on the keyboard; packing a notebook into an overstuffed bag; stacking books or a phone on a closed lid; bumping a desktop monitor face-first into a desk edge; or pressing hard while cleaning. Shipping damage without foam support can leave the same cloudy imprint after transit.
Aggressive cleaning is an underestimated cause. Manufacturers warn that repeated hard wiping deforms internal layers even when no object was trapped. Paper towels and abrasive cloths also scratch anti-glare coatings, which then look like permanent stains even though the liquid crystal may still be intact. Dell documents that improper cleaning — ammonia products, alcohol sprays, detergents, compressed air directed at the panel — can produce customer-induced damage that is not covered by standard warranty, including milky film, uneven dark shade, and coating peel.
Surface stains have simpler origins. Everyday finger oils leave prints. Cooking grease and skin lotion fog the coating. Tap-water wipe-downs deposit mineral rings. Coffee or soda drips dry into sticky patches. Tape, privacy-filter adhesive, and leftover sticker goo create cloudy residue. Pets pressing noses against a bright screen leave greasy ovals. Liquid that seeps into the bezel is no longer a stain — that becomes water damage with corrosion risk and often requires panel service.
Desktop monitors and laptop LCDs fail the same way under pressure, but laptop lids concentrate force into a small keyboard-to-glass gap, which is why black pressure marks on laptop screens are so common after travel. External monitors see more shipping and cleaning mistakes. Both need the same diagnostic split: clean first if the mark looks like dirt; stop pressing if it looks like a bruise.
A useful timeline question: did the mark appear after a known physical event? Overnight travel, a slammed lid, or a hard wipe yesterday points strongly to pressure. A gradual oily film that grew over months without impact points to stains. Sudden bright cloudy patches after sitting on a tablet or stacking weight on a closed notebook also fit pressure damage. When history is unclear, the wipe-and-retest sequence still resolves most ambiguity in under five minutes.
Pressure Marks on Monitor: Desktop-Specific Checks
Searchers looking up pressure marks on monitor, a pressure mark on monitor, or monitor pressure marks usually mean an external display on a desk—not a laptop lid crush. The bruise mechanism is the same (pinched liquid crystal or diffuser), but the triggers and decision math differ.
Common desktop causes. Pointing at the glass with a fingernail, wiping hard with paper towel, bumping the face into a wall or desk edge during a move, packing another box against the panel in transit, and over-torquing VESA screws or a twisted stand that pinches the chassis from behind. For mounting and TV-class pinch paths, see pressure marks on LCD screen; for the wider damage map, see pressure damage screen.
Quick desktop-only ladder.
- Wipe once with a dry microfiber cloth. Gone → stain.
- Open the monitor OSD/menu. If the cloudy patch is visible over the menu graphics, the GPU and cable are innocent—the panel is damaged.
- Swap HDMI/DisplayPort cable and try another input. A pressure mark stays; a cable or source glitch usually moves or vanishes.
- Rest the monitor unpowered and unstressed for 48–72 hours. Mild fresh marks sometimes soften; most do not.
- Compare a panel repair quote to a new monitor. External panel swaps often approach full-unit price, so replacement is frequently cheaper than repair.
Do not massage, heat, or suction a desktop bruise. Those tricks enlarge monitor pressure marks more often than they help. If you need mechanism depth beyond this stain-versus-mark page, the LCD-focused guide above covers remove/fix language without repeating the cleaning table here.
Black Pressure Marks on Laptop Screen: Temporary vs Permanent
Black pressure marks on laptop screen usually appear as dark smudges, ink-like blotches, or cloudy bruises after a lid-crush event. Technically, force displaces liquid crystals or damages the backlight stack. Mild displacement can look dramatic at first and then soften. Severe crushing permanently destroys alignment in that area.
Temporary marks are the exception, not the rule. Display technicians and panel makers report that very light, freshly formed marks sometimes fade over 24 to 72 hours — occasionally up to a week — if you remove all stress, leave the device powered off, and avoid further pressure. The crystals may partially reflow into a more normal alignment. Success rates are low, and improvement is often incomplete. Treat rest as a diagnostic wait, not a guaranteed cure.
Permanent marks stay fixed after cleaning and after several days of rest. Warning signs include deep black or purple areas, spiderweb cracks in the glass, spreading ink-like patches (especially on OLED), large cloudy zones across the primary viewing area, and damage that has not changed for weeks. Rocktech and other LCD specialists note that in the large majority of cases the only durable fix is full panel replacement because crushed layers cannot be un-crushed.
Warranty reality matters. Dell’s published list of damages not covered by base support explicitly includes pressure marks on LCD, cracked glass, black spots from broken substrate, and surface abrasion from external pressure. Accidental damage plans may cover those events; standard limited warranties usually do not. Document when the mark appeared, photograph solid-color screenshots from the camera (not software screenshots of GPU output), and avoid DIY suction, hard massage, or heat guns that can turn a borderline claim into clear customer-induced damage.
What not to do
Do not press a pencil eraser into the spot. Do not run a hair dryer on high heat. Do not spray alcohol directly onto the laptop lid gap. Do not keep flexing the hinge to “test” whether the bruise moves. Extra force and heat frequently expand the damaged zone. Pixel-flashing websites help stuck sub-pixels only; they cannot rebuild deformed liquid crystal cells.
Safe Ways to Clean Monitor Surface Stains
Cleaning belongs only after you confirm you are dealing with surface contamination — or as the first diagnostic step when you are unsure. Safe cleaning removes oils and residue without adding pressure damage.
| Use | Avoid |
|---|---|
| Clean dry microfiber cloth | Paper towels, tissues, toilet paper |
| Distilled water on the cloth | Tap water mineral streaks |
| 50/50 distilled water and white vinegar for stubborn film | Ammonia window cleaners (Windex-type) |
| Isopropyl alcohol 70% or less on cloth corner for adhesive | Acetone, bleach, alcohol above 70% |
| Screen-safe commercial spray applied to cloth | Spraying any liquid onto the panel |
Step-by-step:
- Power off the monitor or laptop and unplug if practical. Dirt shows better on a dark panel.
- Blow or gently wipe loose dust with a dry microfiber cloth — no pressure.
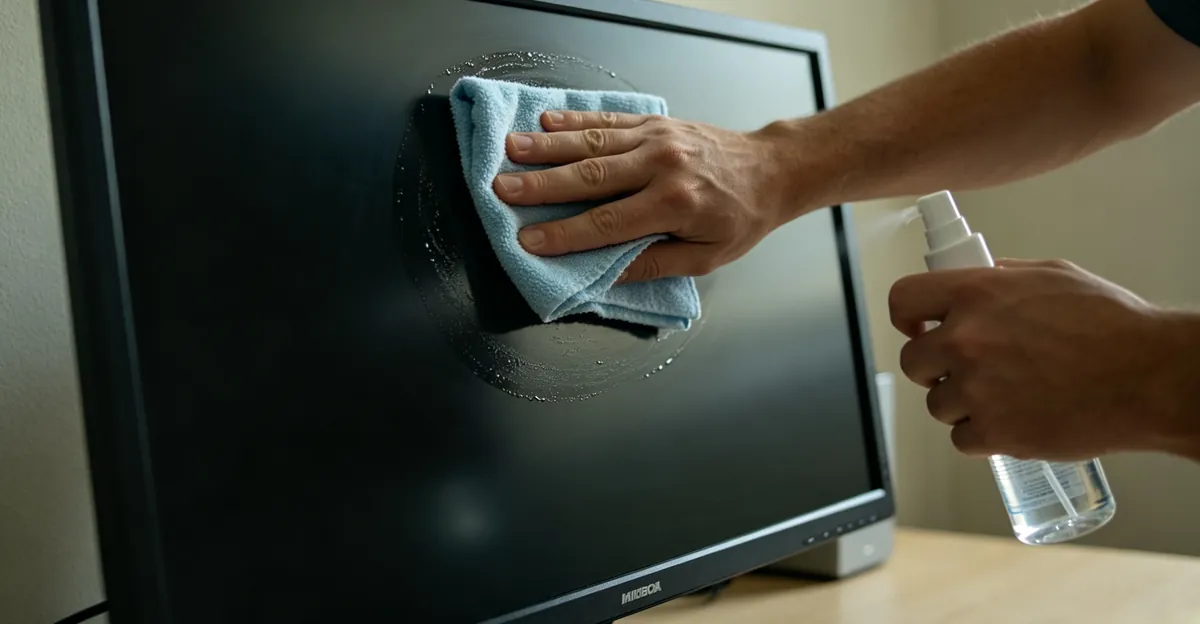
- For fingerprints and light stains, lightly dampen a second cloth with distilled water. Wipe in soft circular motions.
- For dried film, use the vinegar mix or a tiny amount of ≤70% isopropyl alcohol on the cloth, never poured onto the screen.
- Dry immediately with a clean dry microfiber section.
- Re-run the solid-color test. If the mark is gone, it was a stain. If it remains, treat it as a pressure mark.
For a longer cleaning walkthrough covering TVs and specialty coatings, see our monitor cleaning guide. Keep this page focused on diagnosis: cleaning is the filter that separates dirt from panel damage. Dell’s monitor cleaning article also warns that cleaner misuse can leave milky film and uneven dark shade that look like permanent defects even when the backlight is fine.
Can You Fix Pressure Marks on Laptop and LCD Screens?
LCD screen pressure marks rarely reverse fully. Honest options fall into three buckets.
Watch and wait (mild, fresh marks only). Power off for 48 to 72 hours. Keep the lid open or the panel unstressed. Recheck on solid white and black. If visibility drops, leave it alone — further poking often undoes any gain.
Limited DIY (low success, high risk). Gentle circular wiping with a soft cloth over a powered-off screen is sometimes suggested for very light bruising. Apply almost no force. Suction-cup “decompression” and warm-room rest appear in hobbyist guides but lack consistent manufacturer endorsement and can worsen cracks. Pixel massage that uses firm pressure is more likely to enlarge the bruise than heal it. Skip DIY entirely if you see glass cracks, spreading black ink on OLED, or a mark covering the center of the display.
Professional panel replacement (reliable fix). A technician swaps the LCD or OLED assembly. Laptop LCD replacements commonly range from about $80 to $350 for standard panels and $300 to $800+ for OLED, touch, or high-resolution screens, plus labor. External monitor panel swaps often approach the price of a new monitor, so replacement of the whole unit is frequently cheaper. Obtain a quote before authorizing work.
Software cannot fix crushed layers. Driver updates, resolution changes, and color calibration only help when the “mark” was never physical — for example GPU artifacts that also appear on an external display. If the stain or bruise is only on the built-in panel and stays fixed in the same place across colors, hardware is the answer.
Cost math should include downtime. If you need a usable display today, an external HDMI monitor often costs less than an emergency laptop panel swap and lets you defer repair. Photograph the defect on solid colors before any shop visit so the technician can compare before-and-after work. Ask whether the quote covers the full assembly (panel, bezel, and hinges) or only the glass — incomplete quotes are a common surprise on older ultraportables.
How to Prevent Screen Stains and Pressure-Mark Damage
Prevention costs nothing compared with a panel swap. Before closing a laptop, clear the keyboard of pens, cables, cards, and earbuds. Close the lid gently — slamming concentrates force through any leftover debris. Do not stack phones, chargers, or books on a closed notebook. Use a padded sleeve in bags so other items cannot press against the lid.
For desktop monitors, keep fingers off the glass when pointing at content. Clean weekly with a dry microfiber cloth before oils harden into film. Store spare monitors upright with corner protectors; never lay a heavy object on the face. During moves, use original foam or equivalent face protection.
Office and remote-work habits matter. Keep drinks and food off the desk edge above the screen. Wash hands before long typing sessions if you touch the display. Avoid ammonia-based desk sprays near the panel. If you use a privacy filter, follow the adhesive instructions so residue does not bake onto the coating.
Screen protectors help on touch laptops and tablets by taking abrasions, but they do not stop deep lid-crush force from reaching the LCD. The best protection remains mechanical: empty the keyboard zone and avoid sustained pressure.
Shared desks and hot-desking raise stain risk because more people touch the glass. Keep a labeled microfiber cloth at each workstation and a rule against spraying glass cleaner into the air above open panels. For traveling consultants, a hard-shell case with foam lid support beats a soft tote when the bag rides under a seat. These habits prevent both greasy monitor stains and the harder-to-fix pressure marks that appear after one bad commute.
Conclusion: Repair vs Replace When Marks Are Permanent
Use a simple decision path:
- Clean gently once. Stain gone → done.
- Rest 48 to 72 hours. Mark fading → leave it; recheck weekly.
- Mark unchanged, dark, spreading, or cracked → plan replacement.
- Compare repair quote to a new device. If repair exceeds roughly half the cost of a comparable replacement, buy new.
- Check accidental-damage coverage before paying out of pocket.
When marks sit in the center of the screen, distraction is high and replacement is usually worth it for daily work. Corner bruises may be tolerable. Spreading defects are not — they signal progressive layer failure.
To confirm what you are looking at before you spend money, run solid white, black, and primary color patterns on the free screen test tool, photograph the result, and compare against the stain-versus-pressure table above. Surface stains respond to safe cleaning. Screen pressure marks and LCD pressure damage usually do not. Knowing the difference saves both your coating and your wallet. Keep this page bookmarked for the next time a cloudy spot appears after travel — diagnose first, clean gently, then decide repair versus replace without guessing.
Sources
- Dell: Types of Damages Not Covered by Base Support — pressure marks listed as non-covered LCD damage
- Dell: Damage to Monitor Through Incorrect Cleaning Methods — cleaning cautions and CID notes
- Dell: How to Test Your Dell Laptop Screen — pressure marks as physical damage indicators
- BOE: How to Tell If Your LCD Has Bruising — bruising vs dirt, gentle methods
- CDTech: LCD Pressure Damage Guide — temporary vs permanent recovery windows
- Rocktech: Pressure Damage LCD Guide — replacement as primary durable fix