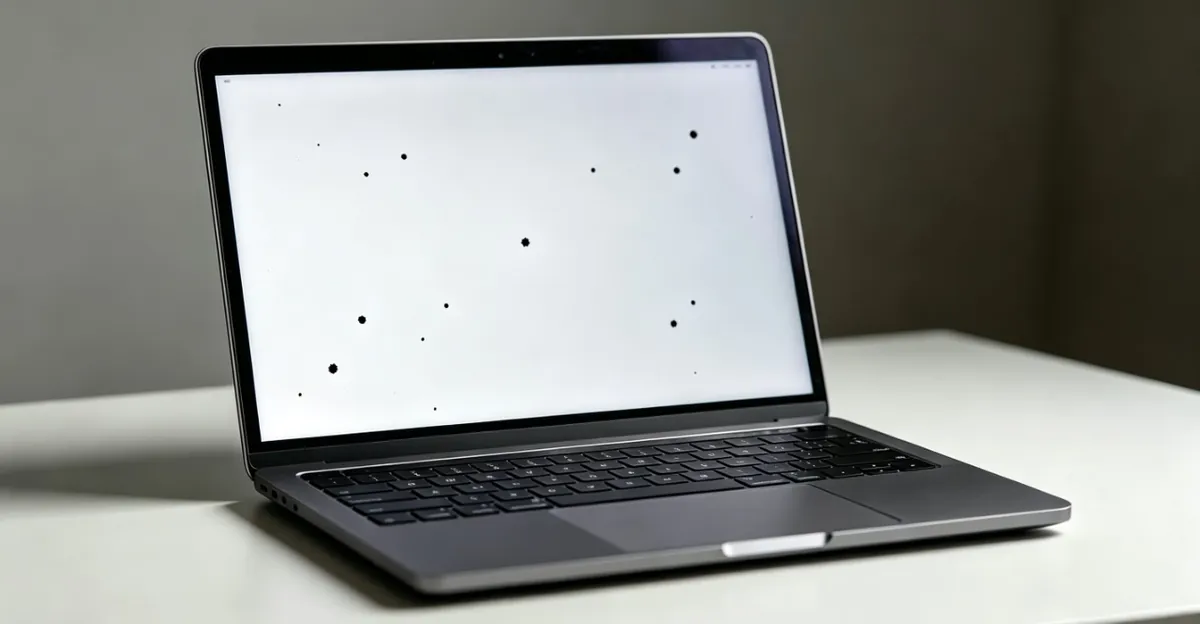
Black spots on a MacBook screen appear as dark dots or patches that persist regardless of what is displayed on the screen. They can range from tiny pinpoints (individual dead pixels) to larger spots caused by pressure damage or trapped dust. This guide covers the causes, diagnosis, and repair options for black spots on MacBook, MacBook Air, and MacBook Pro models.
Black Spots on MacBook Screen: Causes, Diagnosis and Repair
What Are Black Spots on MacBook Screens
Black spots are permanent dark areas on the display that do not emit light. Unlike smudges or fingerprints (which are on the glass surface), black spots are inside the display assembly and cannot be wiped away.
There are several types of black spots, each with different causes and repair options:
- Dead pixel spots: Tiny black dots, typically 1 pixel in size, caused by individual subpixels that have failed
- Pressure damage spots: Larger dark patches caused by damage to the display layers from force applied to the screen
- Dust/debris spots: Grayish or dark spots caused by particles trapped between display layers during manufacturing or repair
- Stuck pixel spots: Pixels that display black on some colors but may show color on others (different from dead pixels)
Identifying the type of spot helps determine whether it can be fixed or requires professional attention.
Most Common Causes of Black Spots on MacBook Screens
Dead Pixels
Dead pixels are the most common cause of black spots on MacBook screens. A dead pixel is an individual subpixel (red, green, or blue) that has stopped producing light entirely.
Dead pixels appear as:
- Tiny black dots (1 pixel in size)
- Always in the same position
- Always black regardless of screen content
- Not responsive to pressure or angle changes
Dead pixels can occur from manufacturing defects, aging of the display, or physical stress on specific areas of the screen. Apple has a dead pixel tolerance policy — typically, a certain number of dead pixels must be present before the screen qualifies for replacement under warranty.
Stuck Pixels vs Dead Pixels
Understanding the difference between stuck and dead pixels is important because stuck pixels can sometimes be fixed, while dead pixels are permanent.
Stuck pixels display a single color (red, green, or blue) constantly because one subpixel is stuck in the "on" position. They appear as tiny colored dots on a dark background. Stuck pixels can sometimes be revived using pixel-fixing software that rapidly cycles colors to unstick the transistor controlling that subpixel. Success rates range from 60-70% when caught early.
Dead pixels produce no light at all, appearing as black dots on any background. All three subpixels (red, green, and blue) have failed completely. Dead pixels cannot be fixed with software—they require screen replacement. Dead pixels are more common in older displays or after physical stress to the panel.
To test: Display a pure white background. Black dots are dead pixels. Display a pure black background. Colored dots (red, green, or blue) are stuck pixels. The distinction determines whether you should try software fixes before considering hardware replacement.
Pressure Damage
Closing the MacBook with objects on the keyboard is the most common cause of larger black spots. Even thin objects like a piece of paper, a stylus, or an earbud cable can create noticeable pressure spots over time.
Pressure damage spots appear as:
- Larger dark patches than dead pixels
- Often located in the center or near the middle of the screen
- Clearly defined edges
- Permanent and unchanging
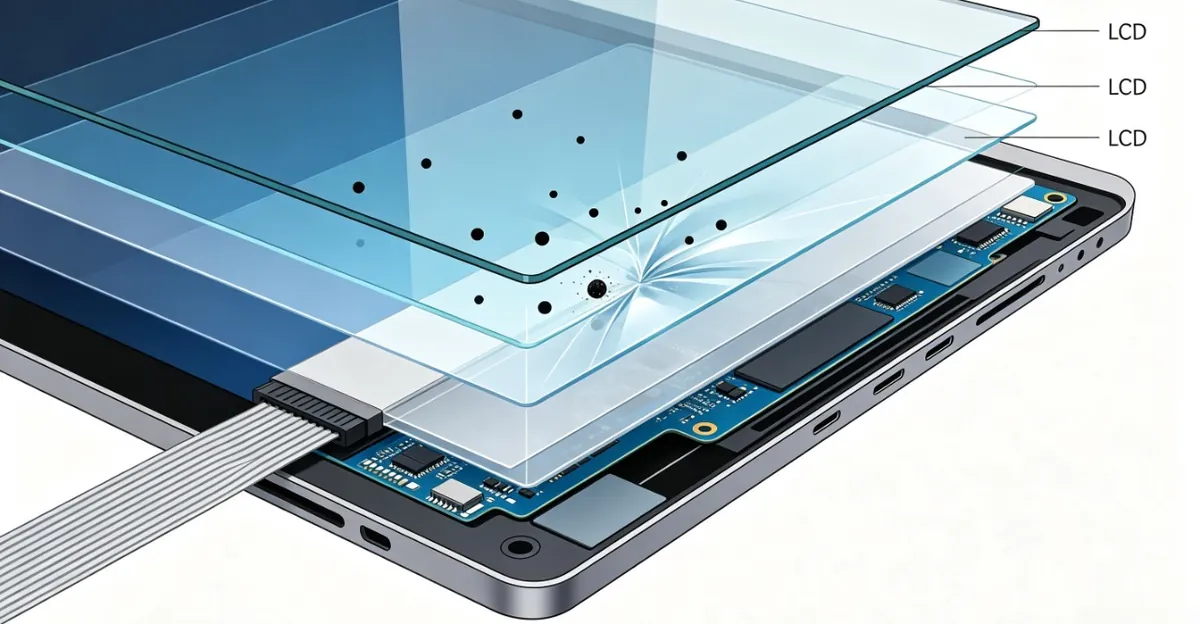
The pressure compresses the LCD layers, permanently damaging the liquid crystal alignment or the backlight diffuser in that specific area. This type of damage cannot be repaired without replacing the display.
MacBook models with Retina displays have the glass and LCD fused together, making pressure damage more visible because there is no air gap between layers to diffuse the effect.
Common Scenarios That Cause Pressure Damage
Understanding how pressure damage typically occurs helps prevent it:
Most common scenarios:
- Closing with objects on keyboard: Paper, pens, earbuds, charging cables, or even a thin cloth left on the keyboard
- Backpack compression: Placing the MacBook in an overpacked bag where books or other items press against the lid
- Accidental pressure: Sitting on a closed MacBook or placing heavy objects on top of it
- Travel damage: Overhead bin pressure during flights or compression in checked luggage
- Hinge stress over time: Repeated opening/closing can create stress points where the display flexes
The damage mechanism is consistent: any object between the keyboard and screen creates a pressure point that compresses the LCD layers. Because Retina displays have extremely thin tolerances between glass and LCD, even a 0.5mm object can create permanent damage after hours of sustained pressure.
Critical thickness threshold: Apple's engineering tolerances allow for approximately 0.2mm clearance between the keyboard and screen when closed. Anything thicker than a single sheet of paper (0.1mm) increases the risk of pressure damage, especially if left overnight or during travel.
Dust Trapped Between Display Layers
During manufacturing or after a screen repair, dust particles can become trapped between the display layers. These appear as:
- Dark or grayish spots
- Often slightly fuzzy or diffuse edges
- May be more visible at certain viewing angles
- May change appearance when you tilt the screen
Dust spots are different from dead pixels in that they may be slightly translucent and change with viewing angle. Professional cleaning can sometimes reduce their visibility, though complete removal may require a full display disassembly.
Physical Impact Damage
Dropping the MacBook or applying strong force to the screen can damage the display internally. This can create:
- Black spots alongside other artifacts (lines, color distortion)
- Larger irregular dark patches
- Multiple spots clustered in one area
- Immediate appearance after the impact event
Impact damage is typically permanent and worsens the more the laptop is used after the initial damage.
Manufacturing Defects vs Wear-and-Tear
Understanding whether black spots come from manufacturing defects or wear-and-tear affects warranty coverage and repair strategy.
Manufacturing defects include factory dust trapped between display layers, LCD layer misalignment from assembly errors, and dead pixels present from the first use. These issues typically appear within the first few weeks or months of ownership. Manufacturing defects are covered under Apple's standard warranty and most regional consumer protection laws. If your MacBook develops black spots within the first year without any physical damage, document the issue and contact Apple immediately.
Wear-and-tear causes include aging backlight components, repeated pressure over months or years, hinge stress from frequent opening and closing, and gradual LCD degradation. Wear-and-tear damage appears gradually rather than suddenly. It is not covered by warranty because it results from normal use over time rather than a defect in the product as delivered.
Apple's dead pixel policy varies by region. North American markets typically require three or more dead pixels before qualifying for warranty replacement. European Union consumer protection laws are often stricter, sometimes covering even a single dead pixel within the first 30 days. Japan's standards are among the most consumer-friendly. Before accepting "this is within normal specifications" as an answer, research your specific region's consumer protection standards.
Backlight Bleeding vs Black Spots
Black spots and backlight bleeding are both LCD layer issues, but they represent opposite problems and require different diagnostic approaches.
Backlight bleeding appears as excess light leaking from the edges or corners of the display, most visible on dark or black screens. It occurs when the backlight diffuser layer is not perfectly sealed or when pressure has pushed the LCD away from the backlight. Backlight bleeding does not always require screen replacement—sometimes it can be reduced by adjusting the display bezel tension or reseating the LCD panel.
Black spots are the opposite: areas where no light reaches the surface. They appear as dark dots or patches most visible on bright or white screens. Black spots indicate dead pixels, damaged LCD crystals, or blocked backlight, and they almost always require component replacement to fix.
Use the Screen Test Tool to distinguish between them. Display a pure black screen and look for bright spots or edge glow (backlight bleeding). Then display a pure white screen and look for dark spots (black spots). The two problems require different repair approaches, and identifying which you have prevents unnecessary repair attempts.
How to Diagnose Black Spots on a MacBook
Step 1: Dead Pixel Test
Use the Screen Test Tool to display pure white:
- Open the screen test tool in full-screen mode
- Display pure white background
- Look carefully for any dark dots
- Note the exact size and position
Dead pixels appear as tiny, sharp black dots. Larger, fuzzy spots are likely dust or pressure damage.
Step 2: Viewing Angle Test
Change the angle at which you view the screen:
- Dead pixels: Stay exactly the same regardless of angle
- Dust spots: May change in visibility or appearance with angle
- Pressure spots: Usually consistent across angles but may have some variation
Step 3: Color Test
Display pure red, green, and blue screens:
- If a black spot shows color on one of these screens, it is a stuck pixel (fixable)
- If a black spot stays black on all colors, it is a dead pixel
- If a spot changes from dark to grayish at different angles, it is likely dust
Step 4: Pressure Test
Gently press on the screen near a black spot (do not press hard):
- Dead pixels: No change
- Dust spots: May change visibility when pressure slightly flexes the display layers
- Cable/connection issues: The spot may flicker or change
Step 5: External Display Test
Connect your MacBook to an external monitor:
- Use a USB-C, Thunderbolt, or HDMI cable to connect to an external display
- Configure the external monitor to mirror or extend your MacBook display
- Open the same content on both screens
If the black spots appear only on the MacBook's built-in display and not on the external monitor, the issue is isolated to the MacBook's screen assembly. This confirms the problem is hardware-related in the display panel itself, not a graphics processing issue from the logic board or GPU.
If black spots or similar artifacts appear on both the MacBook screen and the external monitor, the problem may be with the graphics processor, graphics memory, or display cable connection to the logic board. This requires professional diagnosis, as it may involve more than just screen replacement.
How to Fix Black Spots on a MacBook
Fix 1: Pixel Fixing Software (Stuck Pixels Only)
If the spot shows color on some backgrounds (stuck pixel), try pixel-fixing apps:
- JScreenFix (jscreenfix.com): Free browser-based tool
- UDPixel: Free Windows application
- LCD Fix: Free tool with color cycling
Run the tool on the affected area for 10-30 minutes. Color cycling can sometimes revive stuck pixels by rapidly alternating colors, which stimulates the pixel circuitry.
Note: This only works for stuck pixels, not dead pixels. Dead pixels are permanently failed.
Software Tool Comparison
| Tool | Platform | Cost | Best For | Effectiveness |
|---|---|---|---|---|
| JScreenFix | Browser (any OS) | Free | Stuck pixels, accessible | 60-70% success rate on stuck pixels |
| UDPixel | Windows | Free | Windows users, batch processing | Similar to JScreenFix |
| PixelHealer | Windows | Free | Automated long-duration cycling | May work after 24-48 hours |
| Dead Pixel Buddy | macOS App Store | $2.99 | Mac-native interface | Convenient but same tech |
These tools use rapid color cycling to stimulate stuck pixel circuitry. Success rates are highest within the first week of a pixel getting stuck. Dead pixels (completely failed) will not respond to any software tool. Run the tool continuously for at least 30 minutes on the affected area. Some users report success after running the tool overnight on stubborn stuck pixels.
Fix 2: Professional Display Cleaning
For dust-related spots, a professional can:
- Carefully disassemble the display bezel
- Clean between the display layers
- Remove any trapped dust or debris
- Reassemble with clean, dust-free environment
This costs $30-80 at most repair shops. However, it is only effective for dust spots and carries a risk of introducing new dust during the process.
Cleaning Risks to Understand
Professional display cleaning carries risks that should be understood before proceeding. The disassembly process can introduce new dust particles if not performed in a controlled environment. Opening the display bezel may leave visible marks or slightly affect the seal. Some repair shops lack the proper tools to safely separate the glass from the LCD without cracking either layer.
Ask the repair shop: Do they have a clean room or filtered workspace? What is their success rate for dust removal? Do they offer a warranty if new dust appears after reassembly? If the spot is small and not in your primary viewing area, professional cleaning may not be worth the risk. Dust removal works best for larger, obviously particle-based spots rather than tiny dark dots that are more likely to be dead pixels.
Fix 3: Check Apple Warranty and Repair Programs
Before paying for any repair:
- Go to support.apple.com
- Enter your MacBook's serial number
- Check warranty status
- Check for any active repair programs
- Check Apple's dead pixel policy for your region
If your MacBook is under warranty and has dead pixels exceeding Apple's tolerance threshold, Apple will replace the display at no cost.
Regional Warranty Differences
Apple's dead pixel policy and warranty coverage vary significantly by market. In North America, Apple typically requires multiple dead pixels (usually 3 or more) before qualifying for a free screen replacement under warranty. European markets often have stricter consumer protection laws that may cover even a single dead pixel as a defect.
Japan's warranty standards are among the most consumer-friendly, sometimes covering single dead pixels within the first 30 days. Australia's Consumer Law provides additional protections beyond Apple's standard warranty for manufacturing defects. The United Kingdom's Consumer Rights Act gives buyers up to 30 days to reject faulty goods, which may include displays with dead pixels.
Before accepting "this is within normal specs" as an answer, research your region's specific consumer protection laws. Dead pixels caused by manufacturing defects are different from wear-and-tear damage, and many markets legally distinguish between the two for warranty purposes. If Apple denies a warranty claim in the EU, UK, Australia, or similar markets with strong consumer protection, you may have additional legal recourse through local consumer protection agencies.
Fix 4: Screen Replacement
For permanent black spots from pressure damage or dead pixel failures:
- Apple Store / Apple Authorized Service Provider: $400-800 depending on model
- Third-party Mac repair shops: $200-500
MacBook Retina displays (glass fused to LCD) must be replaced as a complete assembly, increasing costs. Third-party screens may use aftermarket panels that differ from Apple's genuine displays.
Cost Breakdown by MacBook Model and Repair Source
| MacBook Model | Apple Official | Apple w/ AppleCare+ | Third-Party Chain | Independent Shop |
|---|---|---|---|---|
| MacBook Air M1/M2/M3 | $449-$599 | $99 | $249-$399 | $149-$299 |
| MacBook Pro 13" | $499-$649 | $99 | $299-$449 | $199-$349 |
| MacBook Pro 14" | $549-$799 | $99 | $349-$549 | $249-$449 |
| MacBook Pro 16" | $699-$849+ | $99 | $399-$599 | $299-$549 |
| MacBook Air (pre-2020) | $379-$449 | $99 | $199-$299 | $99-$199 |
| MacBook Pro (non-Retina) | $299-$399 | $99 | $149-$249 | $79-$149 |
The cost difference between repair sources reflects part quality, labor expertise, and warranty terms rather than just price competition. Apple and Apple Authorized Service Providers use genuine OEM parts with a 90-day repair warranty. Third-party chains like uBreakiFix and Batteries Plus often use high-quality aftermarket parts that approach OEM specifications but cost less. Independent local shops offer the widest price range because part quality varies from budget aftermarket to OEM-equivalent.
Retina display models cost significantly more across all repair sources because the glass is fused to the LCD and must be replaced as a complete assembly. Non-Retina MacBooks (pre-2016) allow panel-only replacement, which is cheaper and faster.
AppleCare+ is the clear winner for anyone with active coverage—a $99 deductible applies to any model, even a $849 MacBook Pro 16" screen. Without coverage, independent shops can save you 50-70% compared to Apple, but ask about part quality, warranty length (30-90 days is standard), and whether they've worked on your specific model before. Get quotes from at least three repair sources before committing.
DIY Screen Replacement vs Professional Repair
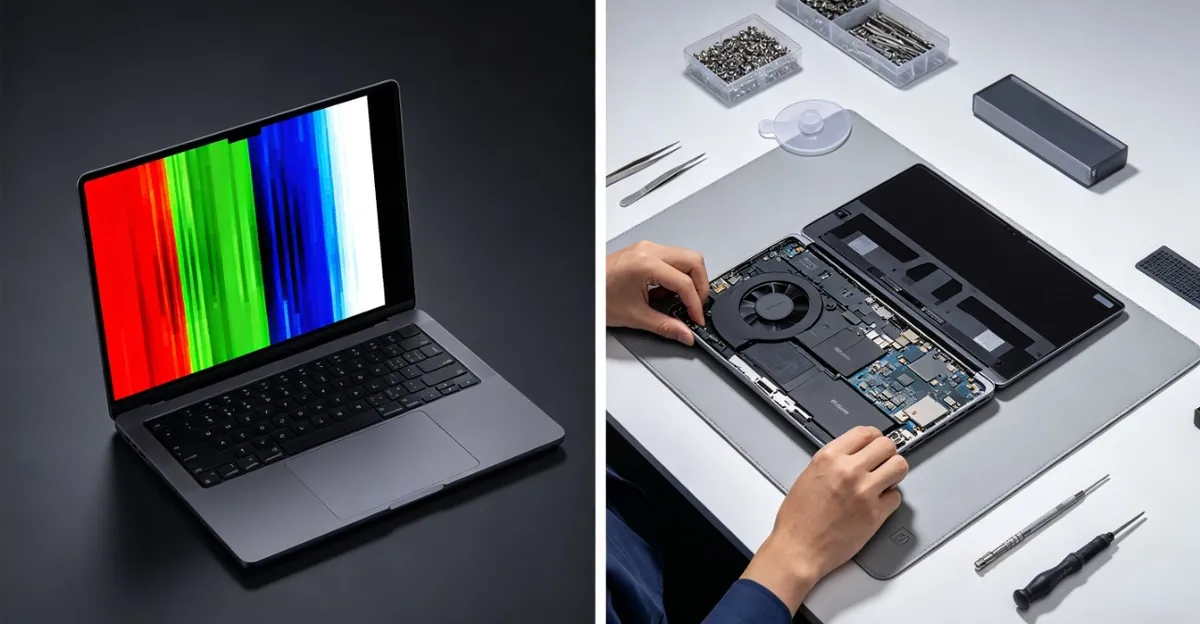
Screen replacement on a MacBook requires specialized tools, technical skill, and careful handling of fragile components. While DIY repair can save money, the risks are substantial for anyone without prior laptop repair experience.
Tools Required for DIY MacBook Screen Replacement
- P5 Pentalobe screwdriver (MacBook case screws)
- T5 Torx screwdriver (internal assembly)
- Plastic spudgers (prying tools)
- Suction cup (lifting display assembly)
- Heat gun or hair dryer (adhesive softening)
- Replacement screen assembly (OEM or compatible)
- Anti-static wrist strap
- Clean, well-lit workspace
Cost: $25-50 for tools if you don't already own them.
Skill Requirements
You need:
- Experience disassembling electronics
- Patience for 30+ small screws and fragile ribbon cables
- Ability to follow video repair guides step-by-step
- Steady hands for connector work
- Understanding of anti-static precautions
Realistic assessment: If you've never opened a laptop before, a MacBook screen replacement is not the ideal first project. The display cables are extremely delicate, and a torn cable can turn a $300 repair into a $600+ logic board replacement.
Risk Comparison
| Risk Factor | DIY Repair | Professional Repair |
|---|---|---|
| Damage to display cables | High | Low |
| Incorrect part compatibility | Medium | Low (verified before install) |
| Warranty void | Yes (unless already expired) | Depends on shop |
| Repair warranty | None | 30-90 days standard |
| Time investment | 2-4 hours first attempt | Drop off and pick up |
| Success rate (first-timers) | 40-60% | 95%+ |
| Cost if you break something | Full part cost + professional fix | Covered by shop |
When DIY Makes Sense
- MacBook is already out of warranty
- You have prior laptop repair experience
- The MacBook is an older model (easier to work on)
- You've watched the full iFixit or similar repair guide for your exact model
- You're comfortable with the risk of breaking something
When Professional Repair Is Worth It
- First-time laptop repair
- MacBook is under warranty or AppleCare+
- Modern MacBook with Touch Bar or M-series chip (more complex)
- You need the laptop back quickly
- You want a warranty on the repair work
For most MacBook owners, professional repair offers better value when factoring in time, risk, and the likelihood of a successful outcome.
Part Quality Considerations
Not all replacement screens are equal. Understanding part quality helps you make informed repair decisions:
OEM (Original Equipment Manufacturer) parts: Genuine Apple displays with identical specifications to the factory-installed screen. These come with Apple's color calibration, brightness ratings (up to 500 nits for standard models, 1000+ nits for XDR), and True Tone technology support. Only available through Apple and Apple Authorized Service Providers. Highest cost but guaranteed compatibility and quality.
OEM-equivalent aftermarket parts: High-quality third-party displays manufactured to meet or exceed Apple's specifications. Often produced by the same factories that make Apple's OEM parts but sold without Apple branding. These typically support True Tone, have accurate color reproduction, and match brightness specifications. Used by reputable third-party repair chains. Mid-range pricing with good quality-to-cost ratio.
Budget aftermarket parts: Lower-cost replacement screens that meet basic functionality but may compromise on brightness (typically 300-400 nits vs 500 nits), color accuracy, viewing angles, or True Tone compatibility. Some users report color shift or reduced sharpness compared to original displays. Used by budget repair shops to offer lower prices. Lowest cost but quality varies significantly.
How to verify part quality before repair: Ask the repair shop: Is this an OEM or aftermarket part? What is the maximum brightness rating? Does it support True Tone? What is the warranty period? Can I see a sample or photos of previous installations? Reputable shops will answer these questions transparently.
True Tone requires both hardware support in the display and calibration data tied to your specific MacBook. Some aftermarket displays physically support True Tone but require additional calibration steps that not all repair shops perform. Without proper calibration, True Tone may be disabled after screen replacement even with a compatible part.
When Hardware Repair Is Needed
Seek professional repair when spots appeared after physical impact, multiple dead pixels are visible on white backgrounds, the spot is large and in the primary viewing area, the MacBook is under warranty and the spots are manufacturing defects, or the spot is spreading or worsening over time.
Decision Flowchart
Use this decision flow to determine whether professional repair is necessary:
Start: Black spots appeared on screen
-
Does an external monitor work normally?
- Yes → Issue is isolated to display assembly → Continue
- No → Possible logic board or graphics issue → Professional diagnosis required
-
Are the spots from pressure or physical impact?
- Yes → Screen replacement required → Get quotes from 3+ shops
- Not sure → Continue
-
Are the spots small (1-3 pixels) and non-expanding?
- Yes → Try pixel-fixing software for 1-2 days
- No → Continue
-
Is the MacBook under warranty or AppleCare+?
- Yes → Contact Apple first (may be covered)
- No → Get independent shop quotes
-
Is the MacBook otherwise working well and worth repairing?
- Yes → Proceed with lowest-cost quality repair option
- No → Consider replacement
This flow helps you avoid paying for a diagnosis you can do yourself while identifying when professional help is the only practical option.
Signs the Damage Is Spreading
Black spots that expand or multiply indicate progressive damage that will worsen without repair. Warning signs include:
- A single black spot becomes larger over days or weeks
- New spots appear near the original spot
- The spot darkens from gray to fully black
- A faint spot becomes more defined
- Spots appear after the MacBook was in a bag or under pressure
Spreading damage suggests the LCD layer is continuing to fail, often from pressure on an already weakened area. Once spreading begins, software fixes and cleaning will not help. The sooner you address it, the less likely additional damage will occur to surrounding display areas or cables.
Cost vs Value Analysis: When to Repair vs Replace
Not every MacBook with black spots is worth repairing. Use this framework to decide:
Repair makes sense when:
- MacBook is less than 4 years old
- All other components work perfectly
- Battery health is above 80%
- You have AppleCare+ (repair cost is only $99)
- The repair cost is less than 40% of the MacBook's current resale value
- You need the specific configuration (RAM, storage, ports) that would cost more to replace
Replacement makes sense when:
- MacBook is 5+ years old
- Multiple components are failing (battery, keyboard, trackpad)
- Repair cost exceeds 50% of current resale value
- You're considering upgrading anyway within the next year
- The MacBook model is obsolete (no longer receives macOS updates)
Example calculation: A 2020 MacBook Air M1 with a black spot issue currently has a resale value of approximately $600. An independent shop charges $250 for screen replacement. Repair cost is 42% of value—borderline decision. If the battery is degraded and the keyboard has issues, replacement is better. If everything else works perfectly and you're satisfied with M1 performance, repair is better.
For Macs still under AppleCare+, always repair—the $99 deductible represents exceptional value regardless of the Mac's age or resale value.
Prevention Tips for MacBook Displays
- Never leave anything on the keyboard: Check before closing the lid — even a thin headphone cable can create pressure spots
- Use a keyboard cover: Prevents debris from falling onto the keyboard when closed
- Clean the keyboard regularly: Remove crumbs and debris that could press against the screen
- Use a protective case: Absorbs impact if dropped
- Transport carefully: Use a sleeve or bag with padding
- Avoid placing heavy items on top: Do not stack books or other heavy objects on the closed MacBook
Best Keyboard Covers for MacBook Prevention
Keyboard covers prevent crumbs, dust, and small objects from transferring pressure to the screen when the lid closes. However, not all keyboard covers are MacBook-safe.
Recommended keyboard cover types:
- Ultra-thin silicone covers (0.5mm or less): Flexible, conforms to keys, adds minimal thickness. Brands like Moshi and iLuv make MacBook-specific models.
- Microfiber cleaning cloths: Double-purpose—protects keyboard and cleans screen. Must be thin (single layer).
Avoid:
- Thick rubber keyboard covers (>1mm): These add enough thickness to create pressure points when the lid closes, exactly the problem you're trying to prevent.
- Hard plastic key covers: Too rigid, can crack under lid pressure.
Many MacBook models have very tight tolerances between the keyboard and screen when closed. Apple's official guidance is to use nothing thicker than a single sheet of paper. A thin silicone cover or microfiber cloth meets this standard; thicker covers do not.
Travel Safety Checklist
Before transporting your MacBook:
- Remove all objects from the keyboard area
- Close the lid gently without forcing it
- Place in a padded laptop sleeve or compartment
- Ensure the bag won't be compressed (avoid overpacking)
- Keep the laptop near the top of the bag, not at the bottom where weight accumulates
- Never place heavy items directly on top of a closed MacBook
- If traveling by plane, keep the MacBook in your personal item or carry-on, not checked luggage
Following this checklist before every trip significantly reduces the risk of pressure damage, screen cracks, and internal component stress.
Model-Specific Considerations
Not all MacBooks are created equal when it comes to screen damage, repair costs, and part availability. Understanding your specific model's characteristics helps set realistic expectations for repair outcomes.
MacBook Air vs MacBook Pro Display Differences
MacBook Air models use thinner display assemblies optimized for weight reduction. The thinner design makes them slightly more vulnerable to pressure damage but often costs less to repair because the parts are more widely available. MacBook Air screens typically lack the advanced features found in Pro models (no ProMotion, no mini-LED backlighting in most generations).
MacBook Pro displays are built for professional color accuracy and brightness. The 14" and 16" MacBook Pro models with Liquid Retina XDR displays use mini-LED backlighting with thousands of local dimming zones. These advanced displays cost significantly more to replace—often $700-850 through Apple—because the part itself is expensive and complex.
M1, M2, and M3 Generation Differences
The M-series chip generation affects repair complexity and cost:
- M1 MacBooks (2020-2021): Established repair procedures, good aftermarket part availability, moderate cost
- M2 MacBooks (2022-2023): Similar to M1 but with slightly different internal layouts, still good part availability
- M3 MacBooks (2023-present): Newest generation, limited aftermarket parts, highest repair costs due to low supply
The chip generation also determines which display technology is used. M3 Pro and M3 Max MacBook Pros have the latest Liquid Retina XDR displays with higher brightness (up to 1600 nits), making them the most expensive screens to replace.
Retina vs Non-Retina Cost Implications
Retina displays (2016-present for most models):
- Glass fused to LCD layer
- Must replace entire display assembly
- Higher resolution = higher part cost
- Typical repair: $449-849 depending on model
Non-Retina displays (pre-2016):
- Separate glass and LCD
- Panel-only replacement possible
- Lower resolution, older technology
- Typical repair: $99-399 depending on model
If you own a pre-2016 MacBook, you're in a much better position for affordable repair. The older designs allow independent shops to replace just the damaged component rather than the entire assembly, cutting both part costs and labor time.
AppleCare+ Coverage and Claim Process
AppleCare+ dramatically changes the repair economics for black spots. Understanding how to use it effectively ensures you get the best value:
What AppleCare+ covers: Black spots from any cause except intentional damage are covered under the accidental damage protection. This includes pressure damage (closing with objects on keyboard), drop damage, and impact damage—all scenarios that standard warranty excludes. You pay a flat $99 deductible regardless of the actual repair cost.
Claim process:
- Document the issue: Take clear photos of the black spots on a white background
- Back up your data: Apple may need to keep your MacBook for 3-5 business days
- Contact Apple Support: Via phone (1-800-APL-CARE), Apple Support app, or in-person at Apple Store
- Diagnostic confirmation: Apple will verify the screen damage and confirm coverage
- Payment and repair: Pay the $99 deductible; repair typically takes 3-5 days at Apple Store, 5-7 days if mailed in
Claim limits: AppleCare+ for Mac covers two incidents of accidental damage per 12-month period. Screen damage counts as one incident. If you've already used both incidents in the current coverage year, you'll need to wait or pay full out-of-pocket repair costs.
Does making a claim affect future coverage?: No. Unlike insurance that raises premiums after claims, AppleCare+ pricing remains constant. Your two-incident limit resets every 12 months from your purchase date.
Transfer value: If you purchased AppleCare+ and later decide to sell your MacBook, the remaining AppleCare+ coverage transfers to the new owner, increasing resale value by approximately $150-300 depending on time remaining.
Related Guides
- Dead Pixel Diagnosis: Comprehensive guide to dead pixel identification and fixes
- Black Spot on Screen: General guide to black spot issues across all device types
- Mac Screen Line Issues: Related line issues on Mac screens
- Screen Flickering on MacBook: Related MacBook display issues
- Screen Test Tool: Free tool to test your MacBook display
Conclusion
Black spots on MacBook screens are most commonly caused by dead pixels, pressure damage from closing the lid with objects on the keyboard, or dust trapped between display layers during manufacturing. The diagnostic process—white screen test, viewing angle test, color test, and pressure test—identifies the spot type and whether any fix is possible.
Stuck pixels may respond to pixel-fixing software running for 30+ minutes. Dust spots can sometimes be reduced through professional display cleaning, though this carries risk of introducing new particles. Dead pixels and pressure damage are permanent and require screen replacement.
Repair costs vary widely by model and repair source: Apple charges $449-849 without AppleCare+, third-party chains charge $249-599, and independent shops charge $149-549. MacBook Air and older non-Retina models sit at the lower end; MacBook Pro 14" and 16" with Liquid Retina displays sit at the higher end. AppleCare+ coverage reduces any repair to a $99 deductible.
Model-specific factors matter. M3-generation MacBooks, Touch Bar models, and Retina displays all cost more to repair due to integrated components and limited aftermarket part availability. DIY screen replacement saves money but requires specialized tools, experience, and tolerance for risk—professional repair is worth the cost for most users.
Prevention focuses on never closing the MacBook with anything on the keyboard, using ultra-thin keyboard covers (under 0.5mm), and protecting the laptop during transport. A thin microfiber cloth between the keyboard and screen is one of the most effective preventive measures.
For warranty-covered devices, contact Apple before seeking third-party repair—manufacturing defects like early dead pixels or factory dust may be repaired at no cost. Regional consumer protection laws in the EU, UK, Australia, and Japan often provide stronger coverage than Apple's standard warranty. Once the warranty expires, independent shops offer the best value for screen replacement on MacBooks that are otherwise in good condition.