Horizontal lines on a laptop screen run from left to right, persisting across all content. They indicate row electrode failures — the horizontal pathways that drive each pixel row have stopped working. Most cases are caused by hinge cable damage, and cable reseating or replacement resolves the issue without panel replacement.
How to Fix Horizontal Lines on Laptop Screen: Causes & Solutions (2026)
What Horizontal Lines Mean
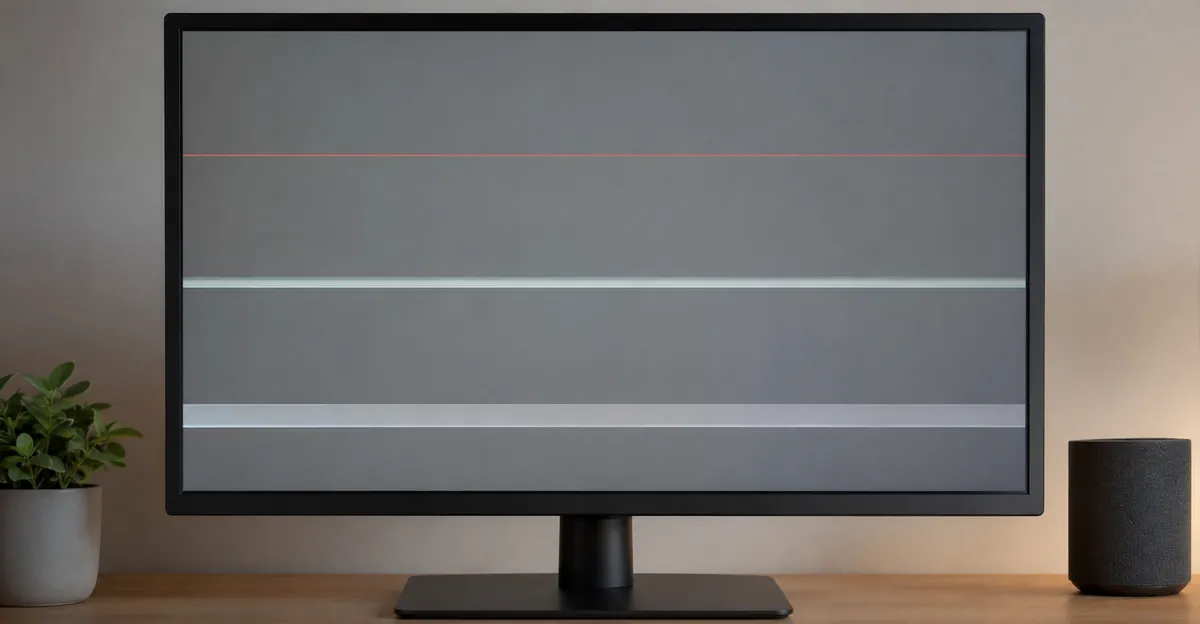
Horizontal lines indicate row electrode failure. Each pixel row on an LCD panel has a dedicated electrode running from left to right. When that electrode fails, every pixel in that row displays the same incorrect value — creating a visible horizontal line.
Key diagnostic clues:
- Lines run left to right (not top to bottom)
- Lines are visible on all backgrounds and all inputs
- Lines are often located in the middle of the screen
- Lines may be black, white, or colored
- Lines persist after restarting, entering BIOS, or running safe mode
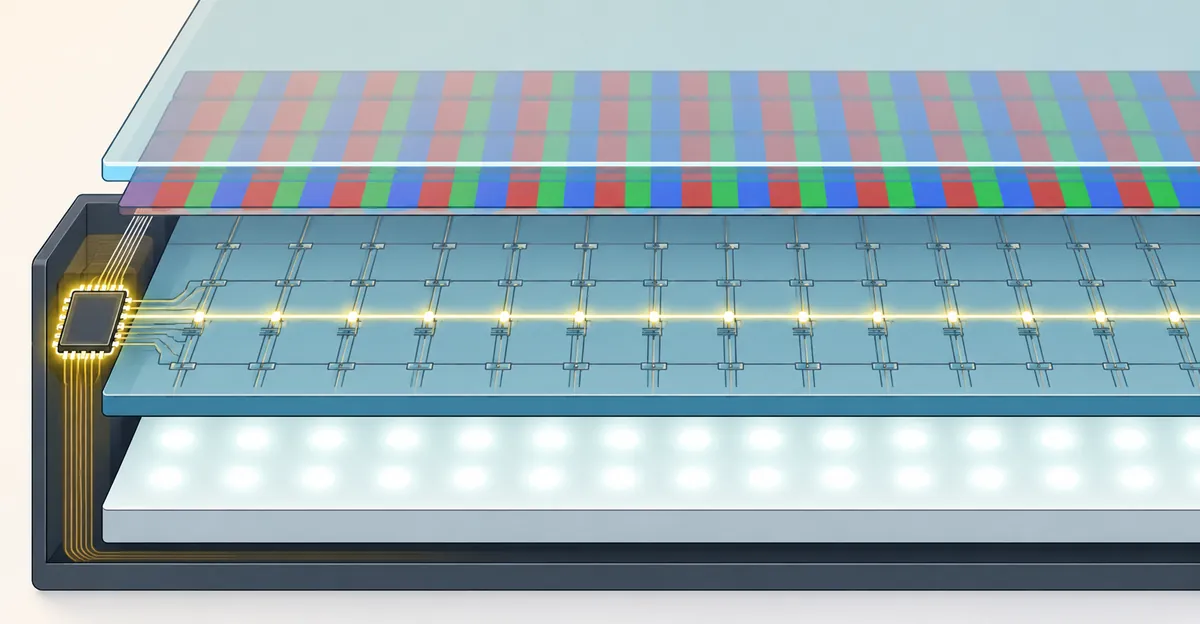
Row electrodes are driven by the panel's gate driver circuitry, which is controlled by the T-con (timing controller) board. The data travels from the motherboard, through the eDP or LVDS ribbon cable, into the T-con, and finally out to the gate drivers on the panel glass. Any break in this chain produces horizontal lines. Identifying where the break occurs is the entire job of diagnosis.
What Causes Horizontal Lines on a Laptop Screen
Horizontal lines come from three main failure points in the display signal chain: the ribbon cable, the T-con board, and the LCD panel's row electrodes themselves. Driver and GPU issues can produce similar-looking artifacts, which is why software fixes always come first.
1. Ribbon Cable Damage at the Hinge (Most Common)
The internal display cable passes through the hinge and flexes every time the lid opens or closes. After hundreds or thousands of cycles, the thin copper conductors inside the cable develop micro-cracks. When enough conductors fail on the same row, the row's data signal is lost — creating a horizontal line. This is the single most common cause and the cheapest to fix.
2. Loose Cable Connector
Even without physical damage, the cable connector at the motherboard end or the panel end can work loose from vibration, thermal cycling, or a manufacturing defect. Reseating the connector — disconnecting and firmly reconnecting it — often resolves the issue without any new parts.
3. T-Con Board Failure
The T-con (timing controller) board generates the precise timing signals that refresh each pixel row in sequence. When the T-con or one of its gate driver outputs fails, the affected row(s) stop receiving valid data. T-con boards can fail from heat, capacitor aging, or physical shock.
4. Row Electrode Failure Inside the Panel
Each LCD row has a thin electrode trace embedded in the glass. If that trace is damaged by pressure, impact, or manufacturing defect, the row will not display correctly regardless of cable or T-con health. This is the most expensive failure mode and requires full panel replacement.
5. Graphics Driver or GPU Fault
In a smaller number of cases, horizontal lines are caused by the GPU or its driver rather than the display panel. GPU faults typically show lines on both the laptop screen and an external monitor. Driver issues may produce lines that shift position or change color when windows are moved.
Why Cable Damage Creates Horizontal Lines in the Center
The ribbon cable bends most sharply around the hinge. For most laptops, this bend point aligns with the center of the display — which is why horizontal lines on laptop screens so commonly appear in the middle of the screen.
When cable conductors crack at the hinge bend point, the row electrode signals become intermittent or fail entirely. The result: horizontal lines running across the center of the display. In some designs, the cable enters from the bottom rather than the side, in which case lines appear in the upper or lower third instead.
The bend radius matters. A cable routed too tightly around the hinge fatigues faster; a cable routed with a generous bend radius lasts longer. Manufacturers specify a minimum bend radius in their service manuals, and exceeding it is the leading cause of premature cable failure on hinges.
How to Diagnose Horizontal Lines
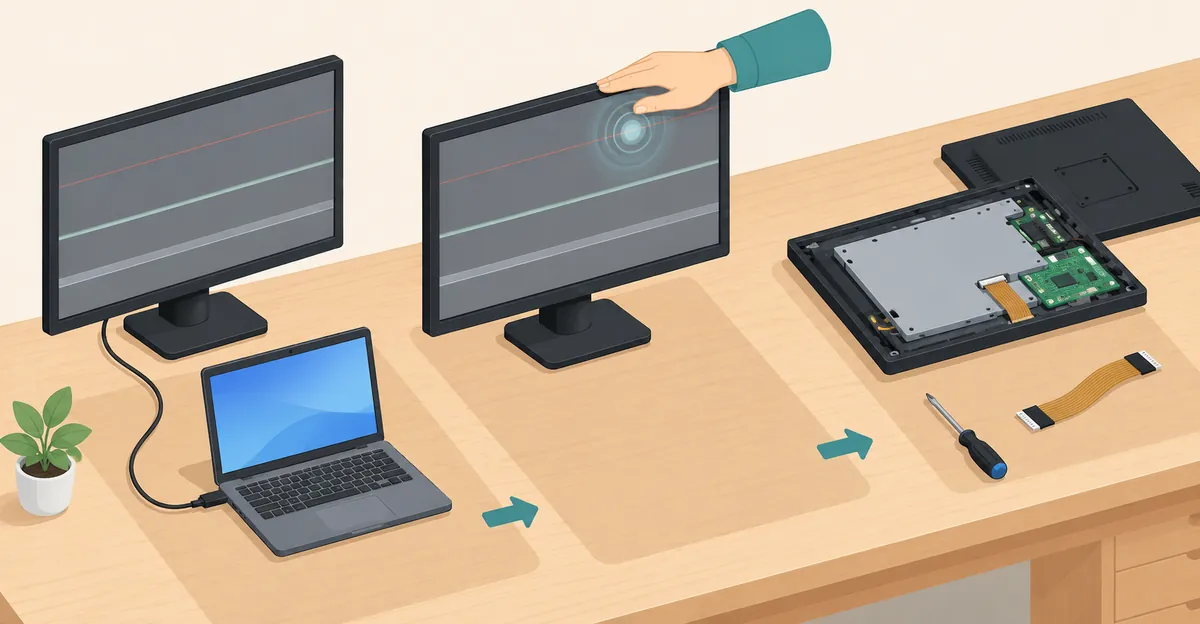
Diagnosis follows a fixed order. Each step rules out one cause before you spend money on parts. Skip a step and you risk replacing the wrong component.
Step 1: External Monitor Test
Connect your laptop to an external monitor or TV via HDMI, DisplayPort, or USB-C. Open the screen test tool on the external display.
- Lines appear on both screens → Graphics card or driver is the issue, not the panel
- Lines only on laptop screen → Display panel, cable, or T-con is the issue
Step 2: BIOS / UEFI Check
Restart the laptop and enter the BIOS (usually F2, F10, F12, or Del at startup, depending on manufacturer). If horizontal lines are visible in the BIOS, where no operating system has loaded, the issue is confirmed hardware. This rules out every possible software cause in one step.
Step 3: Safe Mode Test
Boot into Windows Safe Mode (or macOS Safe Boot). The OS loads with minimal drivers. If lines disappear in safe mode, the issue is a normal-mode driver conflict — usually the graphics driver. Update or roll back the driver.
Step 4: The Lid Flex Test
The lid flex test identifies whether cable or panel is the cause:
- Open the screen test tool
- Display a solid color that makes your lines visible (white, red, or green work best)
- Slowly open and close the lid while watching the lines
- If lines change, flicker, or disappear during flexing → Cable is loose or damaged → Reseat or replace cable
- If lines remain perfectly stable → Panel-level failure → Panel replacement may be needed
Step 5: Pressure Test
Press gently with your fingertip on the bezel around the screen, near where the lines appear. If pressing changes the lines, the cable connector at that location is loose. If pressing the lid from the back of the screen changes the lines, the panel itself is physically damaged — usually from being sat on, stepped on, or compressed in a bag.
How to Fix Horizontal Lines
Always work from cheapest and least invasive to most expensive. Most horizontal lines resolve at step 2 or 3 without any new parts.
Fix 1: Update or Roll Back the Graphics Driver (Free)
Driver issues account for a meaningful minority of horizontal-line reports. The most common pattern is lines appearing after a Windows update or GPU driver update.
- Press Win + X and open Device Manager
- Expand Display Adapters and right-click your GPU
- Choose Update driver first; if that fails, choose Uninstall device, restart, and let Windows reinstall a clean driver
- For persistent issues, download the previous stable driver directly from Intel, AMD, or NVIDIA
Fix 2: Reseat the Internal Display Cable (Free, 30-60 Minutes)
Cable reseating resolves most laptop screen lines and costs nothing except your time. This is the fix many guides skip — do not pay for a new cable before trying this.
- Power off completely and disconnect the power adapter
- Ground yourself to discharge static electricity
- Remove the bottom panel or keyboard (depending on model — search your specific model on iFixit for the exact teardown)
- Locate the display ribbon cable — it connects to the motherboard near the hinge and runs through the base
- Disconnect the cable by gently lifting the retention clip on the connector
- Inspect the cable end and the connector for dust, bent pins, or dark marks
- Reconnect firmly by inserting the cable fully and closing the retention clip
- Repeat at the panel end if accessible (may require removing the screen bezel)
- Reassemble and test
Fix 3: Replace the Display Cable ($15-40, 30-60 Minutes)
If reseating does not resolve the lines and you see visible cable damage (cracks, dark marks, fraying near the hinge), replace the cable.
- Order the exact part for your laptop model — search the manufacturer's service manual or iFixit parts store
- Match the cable's connector count, length, and pin count exactly. A visually similar cable from a different model will not work
- Route the replacement cable along the original hinge path without sharp bends or pinching
- Use the manufacturer's original cable routing channel where one exists
Fix 4: Replace the T-Con Board ($30-80, 1-2 Hours)
If cable reseating and replacement do not resolve the lines, the T-con board may be failing. T-con boards are usually located at the bottom edge of the LCD panel, behind the screen bezel, or sometimes integrated into the motherboard.
- The T-con on a laptop is usually smaller than a desktop monitor's and is often a separate small board connected by a flat flex cable
- Match the exact T-con part number for your panel model — T-cons are not interchangeable across panel revisions
- This is a moderate-difficulty repair; if you have not opened a laptop before, consider a professional technician
Fix 5: Replace the LCD Panel ($80-250, 2-4 Hours Pro)
If all previous steps fail, the LCD panel itself has a row electrode failure and the entire panel must be replaced. Panel replacement is the most expensive option and is usually not cost-effective on laptops more than 3-4 years old.
- Order an exact-compatible replacement panel using your laptop model and the identification label on the original panel
- Match panel size, resolution, connector type and position, refresh rate, and mounting configuration
- For touch-screen models, transfer the digitizer carefully or order a panel with the digitizer pre-installed
- Most users should have a professional do this repair — the bezel removal and connector handling are easy to damage
Fix Priority
- External monitor test — rules out graphics card
- Driver update/rollback — rules out software
- Lid flex test — identifies cable vs. panel issue
- Cable reseat (free) or replace ($15-40)
- T-con board replacement ($30-80)
- Panel replacement ($80-250)
When to Replace vs. When to Repair
Whether repair makes economic sense depends on the laptop's age, value, and the failed component.
Repair usually makes sense when:
- The laptop is less than 3 years old
- The cost of repair is under 40% of the laptop's replacement value
- Only the cable or T-con needs replacement ($15-80 total)
- The laptop has sentimental value or custom hardware (specialized workstation, custom Linux setup)
Replacement usually makes more sense when:
- The laptop is more than 4 years old
- Repair cost approaches the laptop's resale value
- The panel itself needs replacement and the laptop has outdated specs (under 8 GB RAM, mechanical hard drive, no SSD)
- Multiple components have failed simultaneously (lines plus keyboard issues plus battery swelling, for example)
The break-even threshold rule of thumb: if a single repair costs more than half the price of an equivalent replacement laptop on the used market, replace the laptop instead. New mid-range laptops start around $400-500 in 2026; a used equivalent can be found for $200-300. A $200 panel replacement on a $300 laptop is not economical.
When Hardware Repair Is Needed
Software fixes work only when lines are caused by driver or OS issues. Once you have confirmed lines appear in BIOS, the problem is hardware and requires one of the repairs above.
Seek professional repair if:
- You have completed the diagnosis steps but are not confident opening the laptop
- The panel replacement cost approaches or exceeds the laptop's resale value (typically: if the laptop is worth less than $400, consider replacement instead of repair)
- The lines are accompanied by physical damage — cracked bezel, dented lid, liquid residue — which suggests multiple components may be affected
- You cannot find a service manual for your specific model and the cable routing is unclear
Repair cost by device class:
| Device | Typical Cable Repair | Typical Panel Replacement |
|---|---|---|
| Budget Windows laptop | $15-40 DIY | $80-150 DIY / $150-280 pro |
| Mid-range Windows laptop | $20-50 DIY | $120-200 DIY / $200-350 pro |
| MacBook (any year) | $50-100 pro | $250-600 pro |
| Premium / Gaming laptop | $30-60 DIY | $150-300 DIY / $300-500 pro |
Source: repair cost ranges compiled from iFixit, uBreakiFix, and authorized service centers as of 2026.
How BIOS Testing Confirms Hardware Failure
Many users waste hours on driver updates when the actual fault is hardware. The BIOS check eliminates this wasted effort in under a minute.
Restart your laptop and press the BIOS key during boot:
- Dell: F2
- HP: F10 or Esc
- Lenovo: F1 or F2
- Acer: F2 or Del
- ASUS: F2 or Del
- Apple: Hold Option during boot (older Intel MacBook) — modern Apple silicon does not surface BIOS artifacts the same way
If horizontal lines appear in the BIOS screen, where no operating system and no third-party drivers are loaded, the fault is unambiguously in the display signal chain. From this point, every fix is hardware: cable, T-con, or panel. BIOS testing alone rules out GPU driver, Windows display settings, browser zoom artifacts, and every other software-level cause.
Prevention Tips
Most horizontal-line failures are preventable with basic handling discipline.
- Open and close the lid with two hands when possible. One-handed opening puts asymmetric stress on the hinge and the cable that runs through it
- Do not carry the laptop by the lid. The cable fatigues faster when the lid carries weight
- Avoid leaving the laptop in a hot car. Heat accelerates cable insulation breakdown and T-con capacitor aging
- Use a padded sleeve in any bag. Pressure on the lid from other items can crack panel electrodes
- Update drivers through official channels (Intel, AMD, NVIDIA, Windows Update) rather than third-party driver updaters, which sometimes install unstable beta versions
- Replace the cable proactively on any laptop older than 4 years that has been opened and closed daily — the cable is the highest-failure component by a wide margin
- Do not place items on the closed laptop. Even a phone on the keyboard during transport can flex the lid enough to fatigue the cable or damage panel electrodes
Related Guides
- Laptop Screen Lines Hub: All laptop line types
- Vertical Lines on Laptop Screen: Vertical line issues
- Black Lines on Laptop Screen: Black line issues
- Laptop Screen Lines Fix Guide: Complete fix walkthrough
- LCD Screen Horizontal Lines: LCD monitor horizontal lines
- Screen Test Tool: Test your display
Conclusion
Horizontal lines on a laptop screen indicate row electrode failure. The most common cause is ribbon cable damage at the hinge bend point, followed by T-con board failure and panel-internal electrode defects. The lid flex test and the BIOS check identify the cause with high confidence. Cable reseating or replacement ($15-40) resolves most cases without panel replacement. If your lines remain after reseating and replacement, run our screen test tool to confirm the line pattern, then proceed with T-con or panel replacement as needed.