Horizontal Lines on iPad Screen: What They Mean
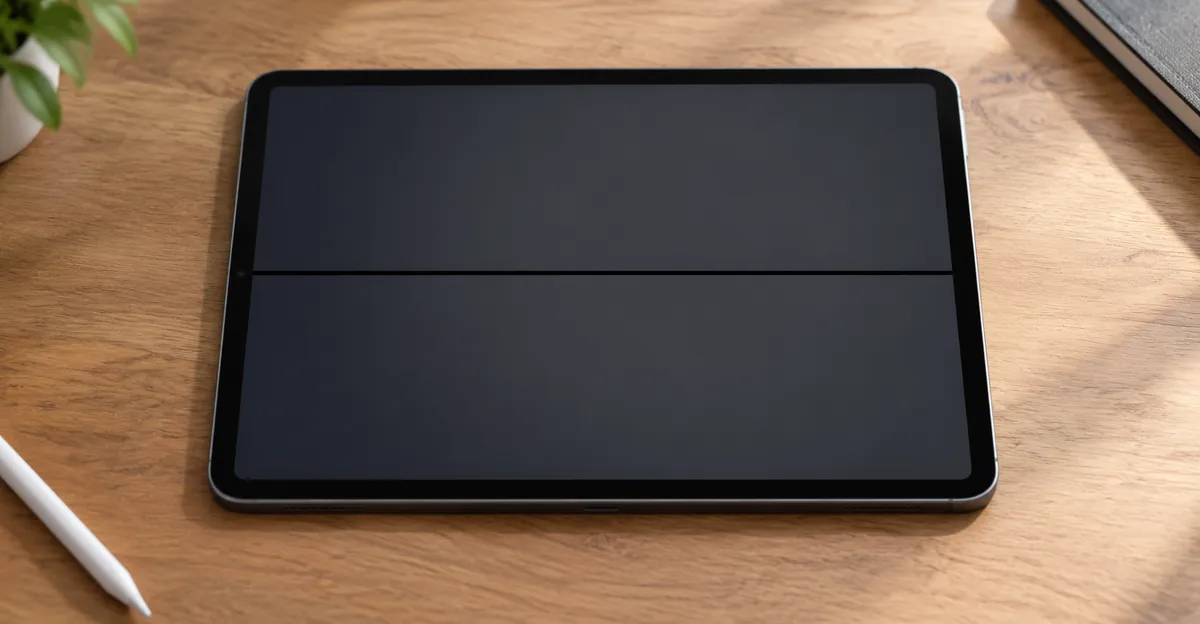
Horizontal lines on an iPad screen are left-to-right streaks where entire rows of pixels misfire. They can be thin hairlines or thick bars, black or white, steady or flickering. This guide explains what those patterns mean on iPad, iPad Air, iPad mini, and iPad Pro, how to separate software glitches from hardware faults, and which repair path actually matches the failure.
What Horizontal Lines on an iPad Screen Actually Are
A display draws every frame through a grid of row and column traces. Vertical lines map to column failures. Horizontal lines map to row failures. When a row driver, flex conductor, connector pin, or internal panel trace stops delivering a clean signal, that entire row lights wrong — or not at all. That is why a single hairline can sit at a fixed height no matter which app you open.
Key traits that identify true horizontal lines on iPad:
- Fixed on the glass: physically rotate the iPad and the line moves with the panel, not with the room
- Independent of UI rotation: when only on-screen content rotates, the line stays locked to the same glass rows while apps and UI turn underneath
- Coverage ranges from one thin stripe to multiple stacked bars
- Behavior may be permanent, intermittent, or pressure-sensitive
Horizontal lines are not the same as white spots, pressure clouds, or general screen flickering. A white spot is a backlight or diffuser patch. Flicker is usually refresh, power, or software instability. A horizontal line is a row-path fault. Mixing those labels leads people to try pixel-fixer videos or brightness tricks that never touch the real failure.
On tablets, lines are usually an LCD or OLED panel-path symptom, not a digitizer (touch glass) symptom. If touch still works and the glass looks intact while the image shows bars, the imaging layer or its cable is the suspect, not the glass you touch. That distinction matters later when shops quote LCD-only versus full laminated assemblies.
Software vs Hardware: How to Tell Before You Spend Money
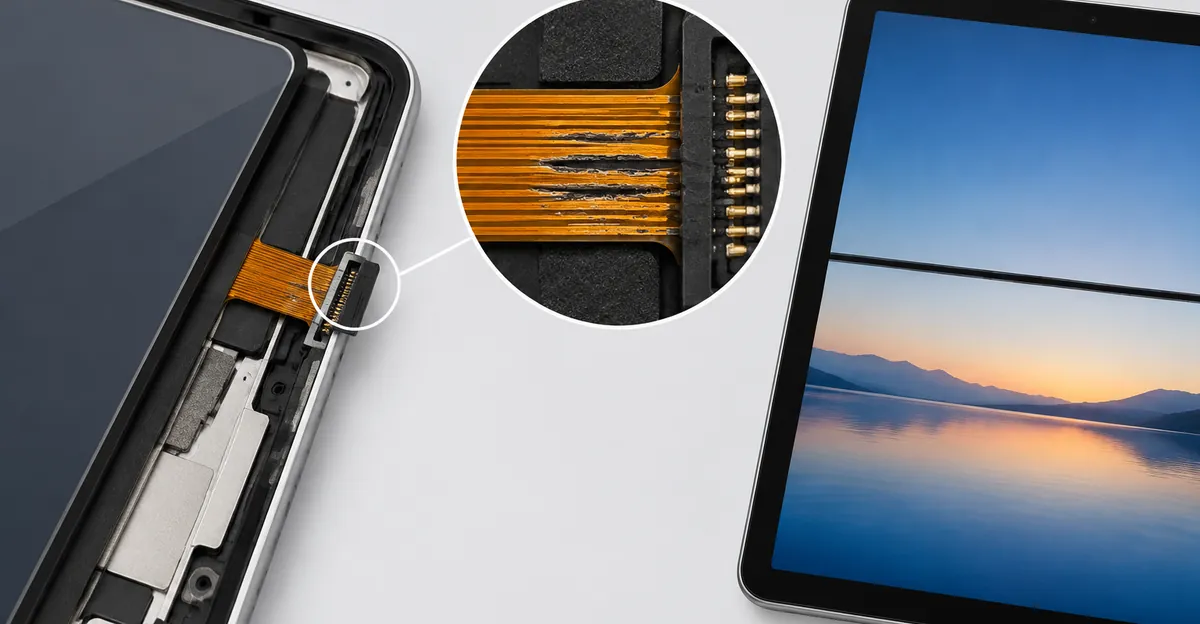
Most ranking guides list force restart, update, and restore as the opening moves. Those steps are the floor, not the article. Use them as a five-minute filter so you do not pay for a panel you do not need — and so you do not waste a clean restore chasing a cracked row.
Work through this order:
- Force restart. On Face ID models, press Volume Up, then Volume Down, then hold the top button until the Apple logo appears. On Home-button models, hold Home and Power together. If the line vanishes and never returns, treat it as a one-off graphics glitch.
- Watch the boot logo. Lines visible on the Apple logo before iPadOS finishes loading are almost never an app bug. That observation alone eliminates most software explanations. Lines that remain after a factory reset, or that move slightly after erase but refuse to disappear, are treated as hardware in repair forums for the same reason.
- Remove the screen protector once. Misapplied film can cast a straight reflection that looks like a hairline. If the mark vanishes with the protector off, stop there. If it stays on the glass, keep diagnosing.
- Check Software Update. Settings → General → Software Update. Display bugs after a major iPadOS release are sometimes patched quietly in a point update. Temporary streaks after extreme cold or a hot car session can also clear once the tablet returns to normal temperature — warm or cool the room, do not cook the glass with a hair dryer.
- Take a screenshot while the line is visible. View the screenshot on another device. If the screenshot is clean, the fault is downstream of image generation — connector, flex, or panel (the usual case). If the screenshot shows the same lines, corruption is happening earlier in the GPU or system pipeline, which is rarer but changes the repair target.
- Optional external display test. Mirror or cable-connect to a monitor or TV. Lines on the external image too point away from the built-in panel. Clean external output with lines only on the iPad points at the display path.
| Observation | Likely category | Next move |
|---|---|---|
| Line gone after force restart and stays gone | Temporary software / thermal glitch | Update iPadOS; monitor for recurrence |
| Line only in one app | App or rendering conflict | Update or remove the app; then retest |
| Line on boot logo; screenshot clean | Panel, flex, or connector | Skip endless software loops; plan hardware diagnosis |
| Line in screenshot or on external display | System / board-level path | Specialist diagnosis; screen swap alone may fail |
| Line shifts when edge is gently flexed | Intermittent connector or fatigued flex | Professional reseat before full assembly quote |
A full computer restore (Finder or iTunes Restore, not only Erase All Content on-device) can clear corrupted display-related system state that a normal restart misses. It is worth doing for intermittent post-update streaks. It does nothing for a damaged ribbon or fractured LCD row. If you restore expecting a hardware cure, you will only get a wiped iPad with the same bar.
Black Horizontal Line on iPad Screen vs White Lines
Color is a diagnostic clue, not a different disease family. Both black and white horizontal lines are usually hardware. The useful split is what the row is doing electrically.
Black horizontal line on iPad screen behavior:
- Rows look dead or heavily darkened
- Often means no drive reaching those rows
- Growing solid black bars over days usually mean spreading panel damage
- Common after drops, chassis bend, or failed prior screen work
Horizontal white lines on iPad screen behavior:
- Rows look bright, washed, or stuck light
- Rows still have power but wrong or stuck data
- Faint connector or panel lines are often invisible on dark video and suddenly obvious on white Notes or Safari pages, because light fields expose small brightness and color errors
- Can appear with greyish multi-line bands after a botched battery or digitizer job
| Pattern | What it usually means | Reseat likely? | Panel replacement likely? |
|---|---|---|---|
| Single thin black hairline, fixed | Dead or open row trace / driver path | Low if never moves | High |
| Flickering white or multicolor horizontal bands | Flex or connector intermittency | Higher | Medium if reseat fails |
| Seven-plus grey-black bars after recent repair | Damaged LCD or poorly seated flex | Try reseat once | Often yes |
| White line only at top after battery swap | Assembly damage during opening | Inspect cables | Often full screen |
| Lines change when pressing near Home / edge | Temporary contact restoration | Yes — stop pressing; get reseat | If contact area is torn |
Forum and repair threads show a recurring trap: owners press near the Home button or bezel until a black line disappears for a day, then celebrate. That pressure briefly remakes a bad contact. It is evidence for a connector or cable fault, not a cure. Repeated pressing can widen a tear in the flex or crack more traces.
If your pattern looks more like laptop column faults than tablet row faults, compare notes with guides on lines across a laptop screen and LCD horizontal lines — same electrical idea, different chassis and repair economics.
Horizontal Lines on iPad Pro Screen vs Air, Standard, and Mini
Horizontal lines on iPad pro screen get special attention because Pro and newer Air models use laminated displays: glass, digitizer, and panel are fused. You do not get a cheap “LCD only” path the way many older standard iPads and some mini generations allow. A hardware line on a laminated Pro usually means a full front assembly quote, not a glass-only job.
Model-aware rules that change cost and difficulty:
- Laminated (many iPad Pro, newer Air): full assembly replacement; higher part cost; advanced adhesive work
- Non-laminated (many standard iPad and older mini/Air): LCD and digitizer can be separate; lines with intact glass often mean LCD-only
- Bent chassis (reported on Pro 11-inch and similar): panel under tension can create flickering horizontal bands even without cracked glass; flattening must be gentle or the LCD cracks further
- Post-battery or post-digitizer work: lines appearing in the top band after careful heat opening are frequently LCD flex damage, not “the battery caused lines”
iPad mini does not invent a unique horizontal-line mechanism. Searches for “why horizontal lines on iPad mini screen” still resolve to the same row-path faults. What changes is handling risk: a compact tablet flexes more easily in a stuffed bag, and older mini units often have non-laminated stacks where LCD-only replacement is still realistic. Always match the A-number on the back or in Settings → General → About before ordering parts.
Magic Keyboard and folio use can add mechanical stress near attachment edges on Pro models. That does not prove the keyboard causes lines, but repeated case attachment and bag compression around those edges show up often in hardware-line timelines. Use that history when describing the problem to a technician.
Safe Home Checks That Will Not Make the Lines Worse
Shared advice often says “flex the iPad” or “press the edge” to test a loose connection, then later warns that pressing makes things worse. Readers are left without a safe protocol. Use this bounded version instead.
Allowed at home
- Force restart and update checks listed above
- One careful screen-protector removal and recheck
- Screenshot and external-display comparison
- Solid-color viewing with a screen test tool at moderate brightness to count lines and note color — include a bright white field, because many faint hardware lines hide on dark content
- One gentle, brief flex test: support the iPad in both hands and apply light torsion near the bezel closest to the line while watching whether the line shifts. Stop immediately after you see a change
- Photo documentation of the line on white, black, and red full-screen fields for repair quotes
Not allowed as DIY “fixes”
- Repeated firm presses on the line or Home-button area
- Hair-dryer heating aimed at the glass to “settle” the panel
- Prying the screen yourself without experience, heat control, and battery disconnect procedure
- Ignoring a bent chassis and forcing it flat on a hard surface
- Assuming a third-party “system repair” tool or a full battery drain will heal a cracked row or torn flex
Why the boundary matters: intermittent flex symptoms are the subset most likely to benefit from a professional connector reseat. Over-flexing at home can convert that salvageable case into a cracked panel that only a full assembly can fix. Battery-drain tricks and third-party system-repair apps appear in some software-focused guides; they do not reseat a connector or heal a torn flex, so treat them as optional experiments only after you have already classified the fault.
If lines appeared immediately after you or a shop opened the iPad for battery work, say so up front. Technicians will inspect ribbon cables and the LCD connector area under magnification before condemning the panel. Known-good donor screens are the gold standard for separating LCD damage from logic-board drive faults, but that test happens on a bench, not in a kitchen.

Repair Paths: LCD-Only, Laminated Assembly, or Replace the Device
Once software is ruled out, you are choosing among reseat, partial parts, full assembly, Apple channel, or device replacement. Costs below are ranges reported by independent parts and repair sources for typical tablet line jobs; your city and model will differ.
| Path | Typical cost range | Best when | Risk / tradeoff |
|---|---|---|---|
| Diagnosis + connector reseat | $30–$60 shop / $0 DIY tools | Intermittent, pressure-sensitive lines; post-drop with intact glass | DIY voids warranty; easy to tear cables |
| Non-laminated LCD only | DIY parts ~$30–$90; shop ~$120–$220 | Standard/mini/older Air; glass and touch OK | Adhesive work; pry damage can create new lines |
| Digitizer only | DIY ~$15–$50; shop ~$90–$180 | Image perfect, glass broken — not a line fix | Wrong path if lines are the complaint |
| Laminated Pro / newer Air assembly | DIY ~$120–$300; shop ~$250–$450+ | Hardware lines on fused displays | Advanced job; True Tone / calibration quirks possible |
| Apple / authorized out of warranty | Roughly $300–$800 on Pro-class | Want genuine parts and channel record | Price may approach replacement value |
| AppleCare+ screen service | Flat fee often ~$29–$49 | Active coverage and hardware fault | Confirm coverage before paying a shop |
Decision rules that save money:
- If the line is intermittent and mechanically sensitive, pay for reseat/diagnosis before approving a full assembly
- If a known-good screen still shows identical lines, stop buying panels — look at the LCD connector zone and drive circuitry on the board
- If the iPad is several generations old and the quote is near half the price of a current model, compare repair versus replacement honestly
- For phones with similar bars, patterns overlap with white horizontal lines on phone screens, but iPad laminated vs non-laminated rules still dominate cost
DIY kit reality check: laminated Pro assemblies are a full repair, not a five-minute glass swap. First-timers should budget proper heat, picks, suction, and adhesive, plus two to three hours. Shops earn their premium on fused tablets and on any unit that needs careful connector work without collateral LCD damage.
Warranty, AppleCare+, and Evidence Worth Keeping
Manufacturing defects can be covered under Apple’s limited warranty or AppleCare+. Accidental damage from drops, bends, and bag crush usually is not covered under standard warranty, though AppleCare+ screen service may still apply for a fee. Apple and shops may classify ambiguous cases as accidental even when you never saw a crack. Your job is to document timeline and handling, not to argue electronics theory at the counter.
Build a small evidence pack before any appointment:
- Date you first noticed the line
- Whether it followed a drop, bag crush, heat event, update, or prior repair
- Photos on solid white, black, and primary color fields
- Screenshot test result (clean vs lines present)
- Short note if a gentle flex changes the line
- Model number and coverage status from Apple’s coverage checker
Ask for a free or low-cost diagnosis confirmation before authorizing parts. If coverage is active, start with Apple or an authorized provider so you do not void remaining benefits with an unauthorized teardown. If coverage is gone, independent shops are often cheaper for non-laminated LCD work; for Pro laminated assemblies, compare genuine-channel pricing against reputable independents and against the cost of a refurbished replacement unit.
Apple sometimes fulfills iPad repairs as whole-unit exchange for refurbished devices rather than component repair on older models. Ask which path applies before you pay. That answer changes whether you care about keeping the exact logic board and storage you already own.
Prevention and When to Stop Using the Device
You cannot bulletproof a thin laminated panel, but you can remove the common mechanical and thermal triggers that show up before hardware lines:
- Use a case with raised edges so corner impacts hit the frame first
- Do not stack keyboards, chargers, or books on top of the iPad in a bag
- Avoid leaving the tablet on a hot car dashboard; heat triggers temporary glitches and accelerates adhesive and cable stress
- Attach and remove Magic Keyboard / folio accessories without twisting the chassis
- Update iPadOS within a reasonable window after release when display bugs are being patched
- After any bend or hard bag compression, check a solid white and solid black screen for new hairlines over the next few days
Stop normal use and prioritize backup when:
- Lines are spreading day by day
- Touch becomes unreliable in the band of the lines
- The chassis is clearly bent and the image is tearing
- You see signs of battery swelling (lifted screen, hot idle device, bulging case)
A single faint hardware line does not mean the whole iPad is dying. Most line faults stay in the display path. Still, a worsening connector or panel can eventually take touch with it. Back up to iCloud or a computer before the display becomes hard to navigate.
Conclusion
Horizontal lines on an iPad screen are row-path failures until a short software filter proves otherwise. Black bars usually mean undriven rows; white or bright bars usually mean powered rows with bad data; flickering bands that move with gentle flex point at cables and connectors. Laminated iPad Pro and newer Air units need full assemblies when the panel is gone; many non-laminated standard and mini models can still take LCD-only service if glass and touch remain healthy.
Run the boot-logo, screenshot, and update checks first. Skip ritual pressing and heat hacks. Document what you see, then choose reseat, LCD, laminated assembly, AppleCare+ service, or device replacement based on model construction and quote math — not based on whichever tip promised a free miracle. Use our free screen test to capture clean solid-color evidence before you walk into a repair counter.
Sources
- Tenorshare: Fix horizontal/black/glitching lines on iPad
- ScreenProblems: iPad Pro screen line guide
- SoftHandTech: Causes of lines on iPad screen
- PhonePartPro: Phone and tablet line repair
- iFixit Answers: Black lines on iPad mini
- iFixit Answers: Horizontal lines after battery replacement
- iFixit Answers: Lines on bent iPad Pro
- MacRumors Forums: Dead pixel line across iPad
- iPad Forums: Black line pressure symptom