A green line on your laptop screen can appear suddenly or develop gradually, but it always signals something is wrong with how your display receives or processes image data. The good news: most green lines are fixable, and many don't cost anything at all.
Green Line on Laptop Screen: Causes and Fixes (2026)
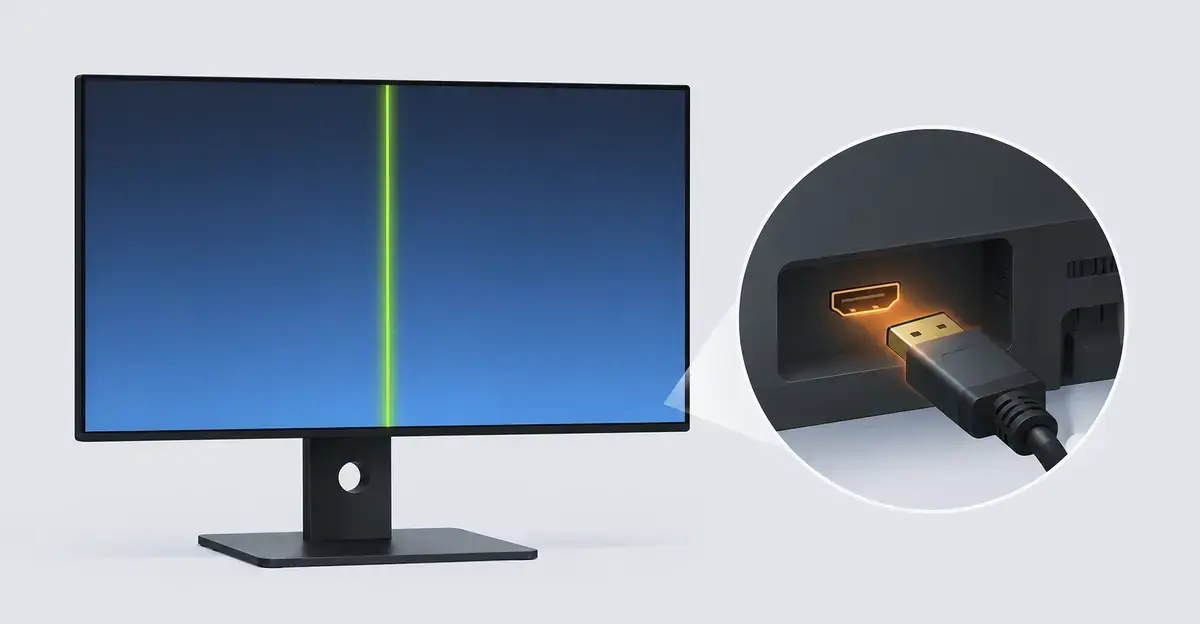
Why Do Green Lines Appear on Laptop Screens?
Green lines on laptop screens fall into two categories: software issues and hardware issues. Identifying which category you have takes minutes and determines your entire repair strategy.
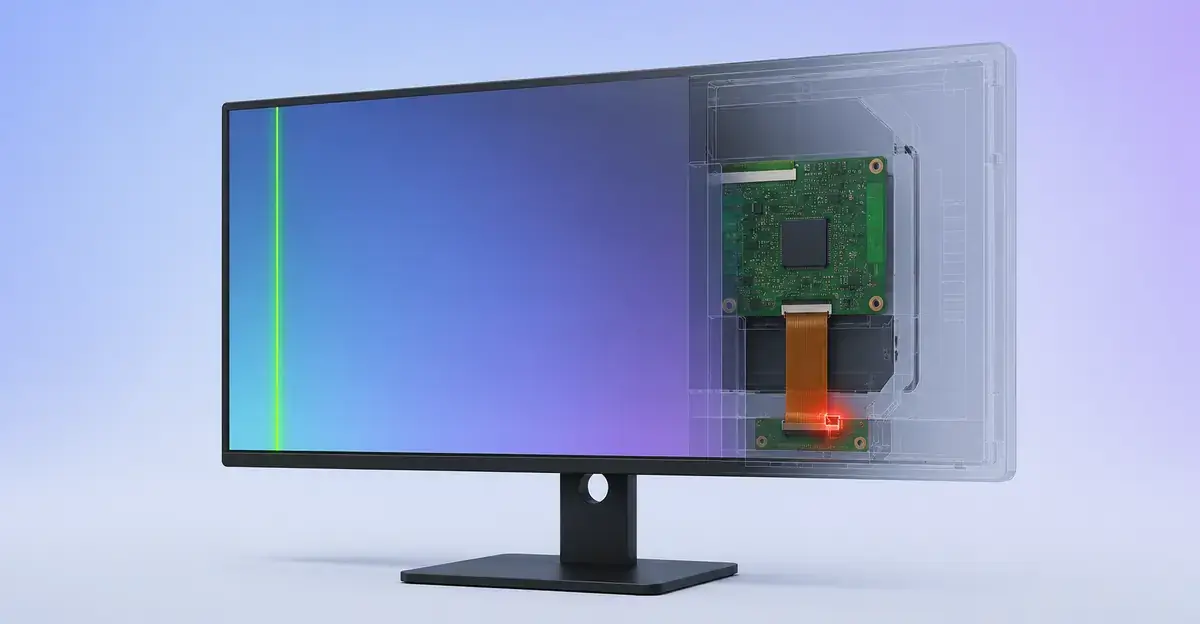
Understanding why the line is green and not another color is the first clue. Each LCD pixel contains three independent sub-pixels — red, green, and blue. When the red and blue sub-pixel transistors fail in a column of pixels, only the green sub-pixels continue to display their color. The visible result is a green stripe (vertical for a column failure, horizontal for a row failure). This sub-pixel explanation is documented across repair guides from screenissues.com and screenproblems.com, which both attribute the green color specifically to red and blue channel failure.
Laptop displays are uniquely vulnerable because the internal display cable must route through the hinge and flex every time the lid opens or closes. Desktop monitors rarely develop this defect because their internal cables are fixed. The mechanical stress at the hinge is why laptop-specific fixes dominate green-line troubleshooting.
Primary Causes of Green Lines on Laptops
1. Loose or Damaged Display Flex Cable
The flex cable carries video signals from the motherboard to the display panel through the hinge. Every lid open/close cycle stresses this cable. Over time, micro-cracks develop in the internal traces, causing signal corruption that manifests as green lines. Each color channel — red, green, and blue — has its own independent conductors within the cable. When the red and blue conductors break while the green conductor survives, you see a green line.
Key sign: The line flickers or shifts when you open and close the lid at different angles.
2. Failing LCD Panel
When the panel's internal circuits fail — particularly the column drivers controlling green sub-pixels — a persistent green line appears in a fixed position. Physical impact, pressure, or manufacturing defects can cause panel failure. On OLED panels, persistent green lines are an indicator of sub-pixel damage and are not repairable through software (UMA Technology).
Key sign: The line stays in exactly the same position regardless of lid movement.
3. Graphics Driver Corruption
An outdated, corrupted, or incompatible graphics driver can cause the GPU to misrender certain display regions, producing green artifacts. This commonly happens after Windows updates. The clearest indicator is behavioral: if the line disappears in BIOS setup but reappears inside Windows, the GPU driver is almost certainly responsible, as screenproblems.com notes.
Key sign: The line only appears after waking from sleep, restarting, or after a system update.
4. GPU Hardware Failure
A failing graphics processor can send corrupted color data to the display. GPU failures often worsen under load (gaming, video editing) and may be accompanied by random crashes or artifacts in other applications. If the green line appears simultaneously on the built-in screen and an external monitor, the fault originates on the motherboard or GPU, not the display assembly.
Key sign: Green lines appear on both the laptop screen AND an external monitor.
Quick Diagnosis: External Monitor Test
Before trying any fix, run this 2-minute test:
- Connect your laptop to an external monitor via HDMI or DisplayPort
- Watch the external display as it initializes
- Press Windows + P and select Duplicate first, then Second screen only
- Interpret the results:
| External Monitor Result | What It Means |
|---|---|
| Green line also appears on external | GPU or motherboard issue |
| External monitor is perfectly clean | Problem is in laptop screen, cable, or panel |
| Line not present in external but in laptop | Display flex cable or LCD panel failure |
This single test eliminates half of the possible causes and points you directly to the right solution path. It is the first check recommended by both screenproblems.com and UMA Technology.
Supplementary Tests You Should Run
Screenshot test: Press Windows + PrtScn to capture the screen. Open the screenshot in Pictures > Screenshots. If the green line appears in the screenshot, the issue is software (driver, GPU rendering, or Windows display settings). If the line does not appear in the screenshot, the issue is the physical panel, display cable, or hinge area. This method is documented by UMA Technology as one of the quickest ways to separate a Windows problem from a physical display fault.
BIOS / UEFI test: Shut down completely, power back on, and repeatedly press F2, F10, F12, Esc, or Del to enter BIOS. If the green line is visible on the BIOS screen, the problem is hardware (panel, cable, GPU, or motherboard). If the BIOS screen is clean and the line only appears after Windows loads, the cause is software.
Lid-flex test: With a solid white browser page open, open and close the lid slowly through its full range. If the line changes position, flickers, or disappears at certain angles, the flex cable at the hinge is the culprit. If the line stays perfectly fixed regardless of lid angle, the panel's internal transistors have likely failed.
Software Fixes to Try First
Always start with software solutions — they're free and take only 15 minutes.
1. Update Graphics Drivers
- NVIDIA laptops: Visit nvidia.com/Download, select your GPU model
- AMD laptops: Visit amd.com/support
- Intel laptops: Visit intel.com/support or use Intel Driver & Support Assistant
- All Windows: Right-click Start → Device Manager → Display Adapters → Update driver
For laptops, the safest display driver is often the one from the manufacturer because it may include custom power, brightness, color, MUX switch, or hybrid graphics support. Visit your laptop maker's support website (Dell, HP, Lenovo, ASUS, Acer, MSI, Samsung, Microsoft Surface, Razer) and search by model or serial number.
2. Restart the Graphics Driver Without Rebooting
Press Windows + Ctrl + Shift + B. The screen will flash black for a second and you may hear a beep. This is normal. If the green line disappears immediately, the cause was a temporary graphics pipeline issue. If it comes back, continue with the next steps.
3. Roll Back Recent Driver Updates
If the green line appeared after a Windows update:
- Open Device Manager
- Expand Display Adapters
- Right-click your graphics card → Properties
- Go to Driver tab → Roll Back Driver
- Restart your laptop
If the Roll Back Driver button is greyed out, Windows does not have the previous driver stored. Download an older known-good driver from your laptop manufacturer's support page and install it manually.
4. Check for Windows Display Troubleshooter
Windows includes built-in diagnostic tools:
- Press Win + I to open Settings
- Go to System → Troubleshoot → Other troubleshooters
- Run Display troubleshooter
- Follow any recommendations
5. Adjust Display Settings
Sometimes incorrect resolution, refresh rate, HDR, or scaling causes artifacts:
- Right-click desktop → Display settings
- Ensure Resolution is set to Recommended
- Try changing Refresh rate from 144Hz to 60Hz (or vice versa) — high refresh rates can expose panel timing issues that disappear at 60Hz
- Turn off HDR and adaptive color features, especially on OLED and mini-LED models
- Apply and test
6. Boot Into Safe Mode
Safe Mode loads Windows with basic drivers and minimal startup programs. If the green line disappears in Safe Mode, the cause is a driver, app, overlay, or graphics setting rather than hardware. To enter Safe Mode in Windows 11: Settings → System → Recovery → Advanced startup → Restart now → Troubleshoot → Advanced options → Startup Settings → Restart, then press 4 or F4.
7. Disable Hardware Acceleration in Specific Apps
If the line only appears in a browser, video player, or design program, hardware acceleration may be the cause. In Chrome and Edge: Settings → System and performance → turn off Use graphics acceleration when available. In Firefox: Settings → Performance → uncheck Use hardware acceleration. In Teams, Zoom, or Discord, look for hardware acceleration or GPU rendering toggles in app settings.
Hardware Fixes: When Software Doesn't Work
If software fixes didn't resolve the green line, the issue is physical. Here's the repair sequence, ordered from easiest to most invasive:
Fix 1: Reseat the Display Flex Cable
Time: 30-60 minutes | Cost: Free | Success rate: 65% (screenproblems.com)
This is the fix most guides skip, but it resolves the majority of laptop screen green lines.
Steps:
- Power off completely and unplug the charger; remove the battery if accessible
- Remove the bottom panel (usually 5-8 Phillips screws; use a plastic pry tool, never metal near the bezel)
- Locate the display ribbon cable — it connects near the hinge on the motherboard
- Gently disconnect the cable by lifting the locking tab (ZIF connector) — do not pull the wire
- Inspect the pins for bent contacts or corrosion
- Reconnect firmly — push until the clip locks
- Repeat at the panel end if accessible
- Reassemble and test before fully closing
Pro tip: While the laptop is open, gently flex the lid open/close 10 times while watching the display cable routing. If the line changes during flexing, the cable routing needs adjustment. On HP Pavilion and Lenovo IdeaPad models, the cable routes directly through the hinge assembly — patience is required to avoid damaging the hinge housing (screenproblems.com).
Fix 2: Replace the Display Flex Cable
Time: 30-60 minutes | Cost: $15-40 (parts) | Success rate: 80%
If reseating doesn't work and you see visible damage (cracks, dark marks near the hinge), replace the cable. Per the screenissues.com green-line hub, flex cable replacement typically costs $10-30 for the part and is one of the most common DIY laptop repairs.
Finding the right cable:
- Search by exact laptop model number (not series)
- Keywords: "display cable", "LVDS cable", or "eDP cable"
- Compare connector shapes and pin counts against the existing cable
Replacement context: On most modern laptops, the display cable is integrated into the display assembly. iFixit's Lenovo IdeaPad Flex 5 guides show that accessing the cable requires removing the back cover, unlocking four ZIF connectors, and removing the hinge screws before the assembly can be separated from the base.
Fix 3: Replace the T-Con Board
Time: 1-2 hours | Cost: $30-80 | Success rate: 75%
The T-con (timing controller) board translates signals for the LCD panel. On some laptops, it's inside the screen bezel. Partial T-Con failure produces consistent artifacts along one specific horizontal line — the line appears at a fixed position regardless of screen brightness, content color, or refresh rate, which distinguishes it from pressure damage that shifts with display angle (screenproblems.com).
Finding the right board:
- Search by laptop model + "T-con board"
- Match the part number printed on the existing board
- For external monitors, replacement T-con boards cost $15-50 depending on the model
Fix 4: Replace the LCD Panel
Time: 2-4 hours (professional) | Cost: $100-300 | Success rate: 95%
Panel replacement is the last resort. The LCD panel itself has failed.
Finding the right panel:
- Measure screen size diagonally (e.g., 15.6")
- Note resolution (1920x1080, 1366x768, etc.)
- Search by the part number on the panel label (most reliable match)
- Confirm the connector type matches before purchasing — not all panels are compatible with all chassis versions of the same laptop model
How Manufacturers Define Acceptable Defect Thresholds
Before paying out-of-pocket, check whether your laptop's warranty covers the green line. Manufacturer pixel policies vary considerably, and what looks like a defect may legally fall within "acceptable."
Dell laptops (Dell Display Pixel Guidelines):
| Screen Resolution | Bright Pixels / Subpixels Allowed | Dark Subpixels Allowed | Total Combined Defects Allowed |
|---|---|---|---|
| HD+ (1600 × 900) and above | 0 | Up to 5 | Up to 5 |
| HD (1366 × 768) and below | Up to 2 | Up to 5 | Up to 5 |
A persistent green line covering an entire column or row is far above these thresholds and is not a "small number of stuck pixels" — it qualifies as a structural defect warranting replacement. Dell's Premium Panel Exchange applies to Dell Consumer, Professional, UltraSharp, and Gaming (including Alienware) monitors with a 3-year zero-bright-pixel guarantee. It does not apply to laptop LCD panels.
HP laptops (HP Support Community guidance): HP's internal pixel policy explicitly states that it does not apply to notebook displays. A single stuck pixel on a notebook is generally not covered unless it forms part of a larger defect pattern. HP does not directly govern notebook pixel defects under ISO 13406-2.
Apple laptops: Apple charges $300-600 USD for out-of-warranty MacBook display repairs depending on model (screenproblems.com). If the green line appeared within the AppleCare coverage window, service is free.
Practical warranty claim advice: Manufacturers do not publish exact failure rates, but repair communities such as iFixit and Reddit frequently report that laptops under three years old with panel or cable faults are routinely honored under standard warranty terms. Document the issue with clear photos or video, run the manufacturer's built-in diagnostics (Dell F12, HP Esc+F2, Lenovo Vantage) and capture the error code — warranty support will often ask for it.
OLED vs LCD Green Lines: Differences That Matter
Green line behavior differs significantly between OLED and LCD panels:
LCD panels use a backlight shining through liquid crystal layers. Vertical or horizontal lines on LCDs are usually caused by:
- Failed row/column driver transistors
- Flex cable damage at the hinge
- T-Con board malfunctions
- Pressure damage cracking the glass substrate
LCD failures are often repairable by replacing the panel ($80-180 USD per screenproblems.com) or the flex cable.
OLED panels generate light at each individual sub-pixel. When OLED sub-pixels fail, they tend to fail off (black) rather than stuck on (green). However, persistent green lines on OLED screens often indicate:
- Sub-pixel degradation from heat or burn-in
- Driver TFT (thin-film transistor) failure in the panel's backplane
- Physical damage from pressure
OLED panel replacement is significantly more expensive than LCD — high-refresh, OLED, mini-LED, touchscreen, or 2-in-1 panels can cost several hundred dollars more than standard LCD panels. Software fixes are usually ineffective for OLED green lines.
Repair Cost Ranges by Device Type
Repair pricing for green lines varies widely. The figures below reflect US market averages in 2026 and are consistent with screenproblems.com's repair survey cross-referenced against community repair reports.
| Device Type | Likely Cause | DIY Cost | Professional Cost |
|---|---|---|---|
| Windows laptop (Dell, HP, Lenovo, ASUS) | Flex cable at hinge | Free – $40 | $80 – $200 |
| MacBook (any model) | Flex cable or display assembly | $50 – $150 (parts) | $300 – $600 (Apple Store) |
| Gaming laptop (high-refresh / OLED) | Panel pressure damage | $100 – $250 (panel) | $250 – $500 |
| Budget laptop under 3 years old | Driver or cable | Free – $40 | $80 – $150 |
Repair-vs-replace threshold: For laptops over five years old currently worth under $300 USD on the resale market, the repair cost often exceeds 60-70% of the device's value (screenproblems.com). A refurbished replacement laptop frequently makes more financial sense in that scenario. Laptops under three years old with panel or cable faults are almost always worth repairing.
How to Document the Spot for a Warranty Claim
Strong documentation is the difference between a successful and denied warranty claim. Follow this sequence before contacting the manufacturer:
- Take clear photos and a short video of the green line against multiple backgrounds — solid white, solid black, and a typical desktop. Photograph the line in the same position at different times of day to prove it is persistent and not a software glitch.
- Capture screenshots showing the line in Windows. If the line appears in screenshots but is invisible in BIOS, that supports a software/driver argument. If it appears in both, that supports a hardware argument.
- Run the manufacturer's built-in diagnostics and capture the error code:
- Dell: F12 at boot → Diagnostics
- HP: Esc at boot → F2 for System Diagnostics
- Lenovo: Lenovo Vantage in Windows or boot-menu diagnostics on supported models
- Microsoft Surface: Surface app + Windows Update
- Record the laptop's serial number, exact model, and warranty status. Contact the manufacturer's warranty line with the documentation ready. Do not disassemble the laptop before the warranty claim is processed — opening the display assembly yourself can void coverage.
- Note any recent events (drop, pressure, liquid exposure, hinge damage) that could complicate the warranty assessment. Physical damage from drops or pressure is not covered under standard manufacturer warranties, even within the warranty period.
Prevention: Keep Your Laptop Screen Healthy
After fixing the green line, protect your display:
- Open and close lids gently — avoid twisting force. Grip the center of the lid, not the corners — corner grips stress the flex cable routing through the hinge.
- Never close your laptop with objects on the keyboard (pens, earbuds, USB drives)
- Support the screen with two hands when moving
- Use a padded bag during transport — never carry the laptop with heavy items pressing against the lid
- Keep vents clean — heat accelerates cable degradation and pixel row failures on LCD panels
- Keep the laptop on a flat, stable surface during use — uneven pressure on the base stresses the panel frame
- Update GPU drivers every 60-90 days to prevent driver-caused display artifacts from accumulating
- Avoid leaving the laptop open in direct sunlight for extended periods — heat accelerates pixel row degradation
- Consider an external monitor for stationary use, especially if your laptop is over three years old
Cost Comparison Table
| Fix | Cost | DIY? | Time |
|---|---|---|---|
| Driver update | Free | Yes | 15 min |
| Driver rollback | Free | Yes | 10 min |
| Graphics driver hot-restart (Win+Ctrl+Shift+B) | Free | Yes | 5 sec |
| Cable reseating | Free | Yes | 30-60 min |
| Cable replacement | $15-40 | Yes | 30-60 min |
| T-con replacement | $30-80 | Moderate | 1-2 hrs |
| Panel replacement | $100-300 | No | 2-4 hrs (pro) |
| Apple out-of-warranty panel repair | $300-600 | No | 3-5 days |
Common Mistakes to Avoid
- Pressing or massaging the screen near the line. It can worsen the damage, crack the panel, or create more lines. If pressure changes the line, that is evidence of a physical connection or panel issue — not a safe repair method (UMA Technology).
- Replacing the LCD panel before reseating the flex cable. The cable is the actual fault in many cases and costs nothing to check first.
- Reinstalling Windows to fix a hardware-caused line. An OS reinstall has zero effect on physical display damage.
- Applying isopropyl alcohol or screen cleaner to the line. The fault is inside the panel and unreachable from the surface.
- Ordering a replacement panel without confirming the exact panel part number. Not all panels are compatible with all chassis versions of the same laptop model.
- Waiting weeks on a physical damage case. The damaged pixel row widens slowly but consistently over three to eight weeks, making eventual repair harder and more expensive.
- Ignoring BIOS visibility of the line. A line visible in BIOS is strong evidence of a hardware fault — software fixes will not resolve it.
Related Guides
- How to Fix Laptop Screen Lines — Complete step-by-step guide for all line types
- Green Lines on Screen — General green line troubleshooting
- Green Line at Bottom of Laptop Screen — Specific guide for bottom-edge green lines
- Laptop Screen Flickering — Related display issues with similar causes
- Dead Pixel Guide — Individual pixel defects vs. line defects
- Screen Test Tool — Diagnose your specific display issue
Conclusion
A green line on your laptop screen is most often caused by a loose or damaged display flex cable at the hinge — a free fix that resolves the majority of cases. Run the external monitor test first to narrow the cause, then try the software fixes (driver update, hot-restart with Win+Ctrl+Shift+B, Safe Mode check) before attempting hardware repairs. If the line is still visible after reseating the display cable, the cable or panel may need replacement at a typical cost of $15-300 USD depending on the part. Check your warranty coverage before paying out-of-pocket, and confirm whether the repair cost is justified relative to your laptop's age and resale value. Use the Screen Test Tool to confirm the type of defect before you begin.