Display issues encompass a wide range of problems that affect computer monitors, laptops, and tablets. From subtle color tinting to visible lines and spots, understanding these issues is the first step toward finding the right solution. This guide covers the most common display problems and provides diagnostic steps to help you identify and address them.
Display Issues: Common Screen Problems and How to Fix Them
What Are Display Issues
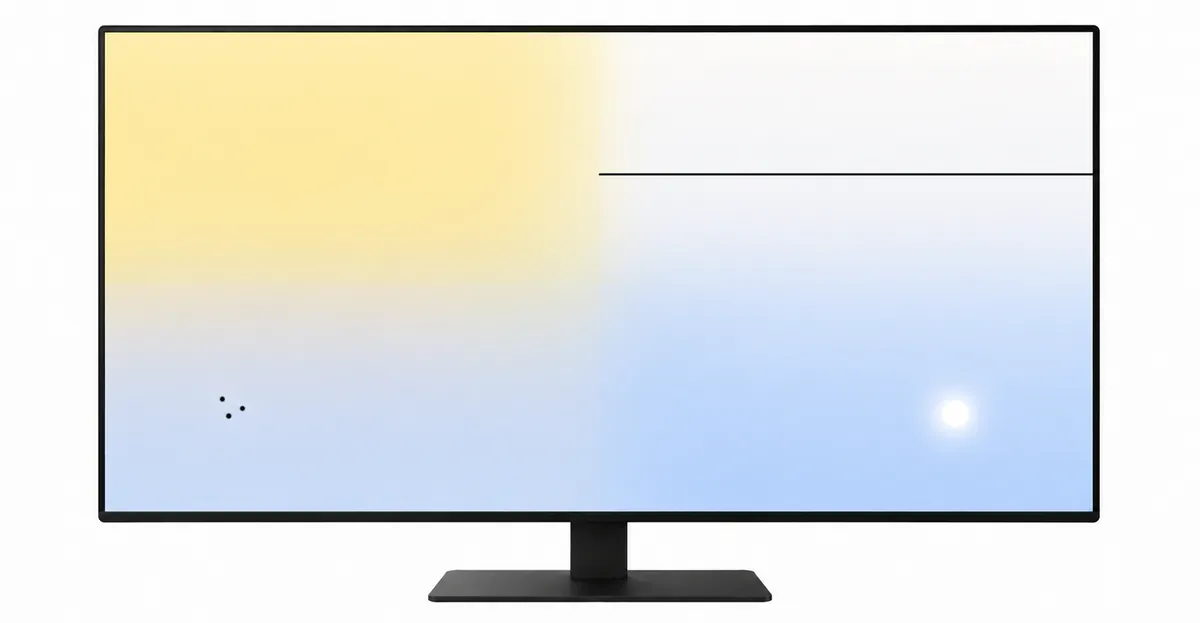
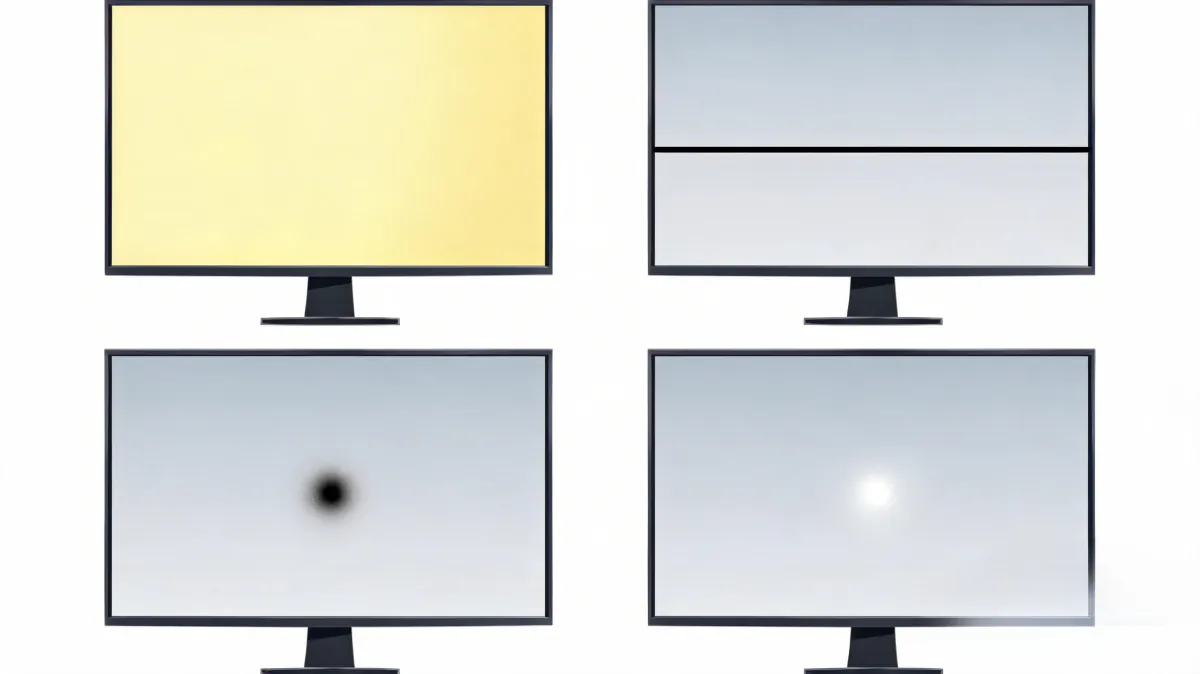
Display issues refer to any abnormality in how your screen renders images, text, or colors. These problems can range from subtle color shifts that are barely noticeable to severe physical defects that make the screen unusable. Common types include color tinting (yellow, pink, or other hues), blurry or out-of-focus images, lines appearing across the screen, and spots or marks that persist regardless of what is displayed.
Understanding the nature of your specific display issue is essential because different problems have different causes and solutions. A yellow tint from Night Light settings is a quick software fix, while a line caused by ribbon cable damage requires professional repair.
Common Types of Display Issues
Color Tint Problems
Color tint issues cause your screen to display an unwanted color cast. Yellow tint and pink tint are among the most common complaints. These can range from mild (barely perceptible) to severe (making colors completely inaccurate). Color tint problems may affect the entire screen or only certain areas.
Blurry Display
A blurry display makes text and images appear out of focus, even when the screen resolution is set correctly. This can affect the entire screen or specific areas. Blurry displays are often caused by incorrect resolution settings, outdated graphics drivers, or scaling issues in Windows.
Lines on Screen
Lines on screen can appear as horizontal or vertical bands, single thin lines, or multiple lines. They may be black, white, or colored. Lines are often caused by ribbon cable damage, graphics card issues, or display panel failure.
Spots on Display
Spots on the display can appear as black spots, white spots, or colored spots. They may be caused by dead pixels, pressure damage, backlight issues, or physical defects in the display panel.
How to Test for Display Issues
The most effective way to diagnose display issues is using a dedicated screen test tool. Our screen test tool displays full-screen solid colors that make it easy to spot problems:
- Open the Screen Test Tool on your device
- Display solid white background - look for any tint, spots, or lines
- Display solid red, green, and blue backgrounds - check for color accuracy and persistent spots
- Display pure black background - reveals backlight issues and bright spots
Run through all color tests and note any abnormalities you observe. This will help you identify the specific type of display issue you are experiencing.
Related Guides
Display issues often overlap with other common screen problems. Explore related topics to find more specific guidance:
- Yellow Tint Display: Persistent yellow or pink color tint on your screen - caused by settings, drivers, or hardware
- Blurry Display: Text and images appear out of focus - usually resolution or driver related
- Lines on Screen: Horizontal or vertical lines across the display - ribbon cable or panel issues
- Spots on Display: Black, white, or colored spots on the screen - dead pixels or physical damage
- Dead Pixel Detection: Single pixels that produce no light - appears as tiny black dots
- Screen Flickering: Display flickers or dims intermittently - often driver or cable related
Yellow Tint and Pink Tint
A yellow or pink tint across the entire display is one of the most commonly reported display issues. The tint can range from subtle (barely perceptible in normal use) to severe (making colors look completely wrong). The cause falls into a few well-defined categories.
Night Light, Night Shift, and Blue Light Filters
The single most common cause of a yellow or warm tint is an enabled blue light reduction feature. Windows Night Light, macOS Night Shift, f.lux, and similar tools shift the display toward warmer tones to reduce eye strain in the evening. When these features run, the entire display takes on a yellow or orange hue — which can be mistaken for a display defect.
How to confirm: Turn the feature off. If the tint disappears, the feature was the cause. If the tint persists, the issue is hardware or driver-related.
The fix: Turn the blue light filter off, or schedule it only for evening hours rather than all day. If you prefer warmer tones for eye comfort, use a manual color temperature setting rather than an automatic one.
Color Profile Corruption
Operating systems can apply ICC color profiles that shift color output. A corrupted or incorrectly applied profile can dramatically alter display colors. This is most common after a graphics driver update, after connecting to a new external display, or after restoring from a backup that includes display settings.
How to confirm: Open Color Management (Windows) or Displays → Color Profile (macOS). Reset to the default profile and see if the tint disappears.
Loose Display Cable
A loose or damaged display cable can cause color shifts including yellow or pink tints. The cable's conductors carry the red, green, and blue signals separately, and damage to one or more conductors reduces that channel's contribution.
How to confirm: Open and close the laptop lid slowly while watching for changes in the tint. If the tint varies with lid movement, the cable is loose.
Hardware Damage to Color Channels
In some cases, hardware damage to the display panel's color filter or backlight affects one or more color channels. This is uncommon but typically produces a permanent tint that does not respond to software changes.
How to confirm: Boot into Safe Mode or BIOS. If the tint persists in those low-level environments, hardware is the cause.
Blurry Display
A blurry display makes text and images appear out of focus even when the resolution is set correctly. Blurry displays can affect the entire screen or specific areas, and the cause is usually one of a few common issues.
Incorrect Resolution or Scaling
The most common cause of a blurry display is the resolution or scaling being set incorrectly. Modern displays have a native resolution at which each pixel corresponds to one physical pixel on the panel. Setting the resolution to anything other than the native resolution causes the GPU to scale the image — producing a slightly blurry or fuzzy result.
The fix: Set the display resolution to its native value. This is typically labeled "Recommended" in Windows Display Settings and in macOS Displays. On Windows, also verify the scaling is set to 100% (or the recommended value for your display).
Outdated Graphics Drivers
Outdated graphics drivers can produce blurry text and icons, especially after major Windows updates. Driver updates include fixes for rendering bugs and improved support for high-DPI displays.
The fix: Update graphics drivers from NVIDIA, AMD, or Intel directly. If the blurriness began after a driver update, roll back to the previous version.
Damaged or Dirty Display Surface
A scratched, dirty, or damaged display surface can produce a blurry appearance. Micro-scratches on the protective glass scatter light and reduce sharpness. Dirt, oil, and smudges from fingerprints also reduce clarity.
The fix: Clean the screen with a microfiber cloth and a screen-safe cleaning solution. Avoid paper towels, tissues, and household cleaners, which can leave residue or damage the coating.
Display Panel Failure
In rare cases, a blurry display indicates a failing panel. This is most common on older LCD monitors with aging backlights that produce uneven output.
The fix: Test on an external monitor. If the external monitor is sharp, the built-in panel is failing. Panel replacement or device replacement is the only solution.
Lines on Screen
Lines on screen can appear horizontally, vertically, as thin single-pixel strips, or as thicker bands. They may be black, white, colored, or flickering. Each presentation indicates a different underlying cause.
Horizontal or Vertical Black Lines
A thin black line running across the screen typically indicates a dead pixel line — an entire row or column of dead pixels caused by failure of the gate driver circuitry. The line stays fixed in position regardless of content, lid movement, or software changes.
Colored Lines (Pink, Green, Red, Blue)
A colored line that remains the same color regardless of content typically indicates a ribbon cable issue where one color channel is shorted or partially disconnected. Pink and red lines are particularly common when the blue channel is affected. Green lines frequently indicate a failing display cable or T-con board.
Flickering Lines
A line that flickers, shifts, or changes appearance when the lid moves almost always indicates a loose or damaged flex cable. Reseating or replacing the cable typically resolves the issue.
White or Glowing Lines
A glowing white line on a dark background often indicates a stuck pixel line — a row or column of pixels stuck at maximum brightness. This is the opposite of a dead pixel line and is sometimes fixable with pixel-fixing software.
Spots on Display
Spots on the display can be black, white, or colored, and the cause and fix depend on which type you see.
Black Spots
A black spot that remains dark on every background color is a dead pixel — a single pixel whose electronics have failed. Larger black patches may indicate pressure damage, backlight failure, or LCD spot damage.
White Spots
A white spot that glows brighter than surrounding pixels typically indicates backlight bleeding, pressure damage, or a stuck pixel. The cause determines whether the spot can be fixed.
Colored Spots
A colored spot — blue, green, red, or purple — usually indicates a sub-pixel transistor failure. Colored spots are less common than black or white spots but are sometimes mistaken for tint issues.
When to Seek Professional Repair
Consider professional repair when:
- The display issue persists after exhausting software fixes (driver updates, settings changes, Safe Mode tests)
- The issue is on a device still under manufacturer warranty and may qualify for free repair
- The issue involves hardware components (panel, cable, T-con board, GPU) that require disassembly
- The issue worsens over time, indicating progressive hardware failure
- The cost of repair is justified relative to the value of the device
How to Prevent Display Issues
While not all display issues are preventable, you can reduce your risk:
- Use a surge protector to prevent electrical damage
- Avoid placing heavy objects on laptops or pressing on screens
- Keep graphics drivers updated
- Use Night Light or blue light filters through software rather than relying on always-on filters
- Handle portable devices carefully to avoid physical damage
- Regularly test your screen to catch issues early
Step-by-Step Display Issue Diagnosis
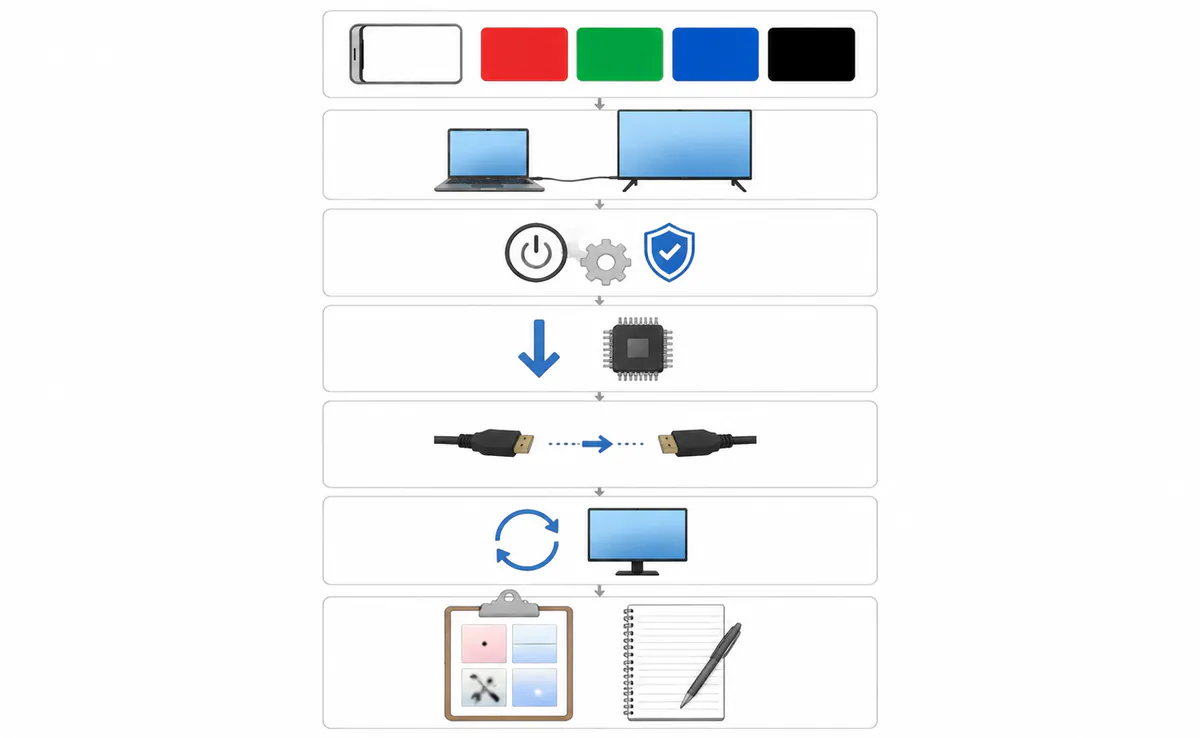
When you notice any display issue, follow this order:
- Reproduce the issue consistently. Run the screen test tool and cycle through solid colors. Document exactly what you see on each color, with photos if possible.
- Test on an external display. Connect to a TV or monitor. If the external display shows the same issue, the GPU or driver is at fault. If the external display is clean, the built-in panel is at fault.
- Boot into Safe Mode or BIOS. These low-level environments disable third-party software and most drivers. If the issue disappears, software is the cause.
- Update or roll back graphics drivers. Try the latest driver first; if the issue began after a recent update, roll back to the previous version.
- Reseat cables if accessible. For external monitors, unplug and reconnect the cable. For laptops, this requires opening the chassis and is best left to technicians.
- Reset display settings. Reset color profiles, refresh rate, and scaling to defaults. Reintroduce changes one at a time to identify which one is responsible.
- Document the issue for warranty or repair. Photos, video, and written descriptions help support technicians diagnose the problem and confirm warranty eligibility.
Common Display Issue Misconceptions
A few widely-believed myths about display issues are worth clearing up:
- Myth: Restarting fixes dead pixels. Restarting does not affect dead pixels — they are hardware failures that software cannot repair. Pixel-fixing software may help stuck pixels but not dead pixels.
- Myth: Massaging a spot fixes it. Applying pressure to a display does not fix spots and may cause additional damage. Pressure can turn a single dead pixel into a larger pressure-damaged area.
- Myth: New screens never have defects. Manufacturing defects are common enough that every new device should be tested within the return window. Use the screen test tool immediately upon unboxing.
- Myth: Display issues always require replacement. Many display issues are software-related and fixable without hardware intervention. The diagnosis matters more than the symptom.
- Myth: Closing a laptop gently prevents all pressure damage. Closing a laptop with anything on the keyboard, even gently, can damage the screen. The fix is to keep the keyboard clear before closing — not to close more carefully.
Free First Aid: The Windows Display Reset Shortcut
Before diving into deeper diagnostics, try one of the fastest known fixes for transient display glitches: the Windows keyboard shortcut Win + Ctrl + Shift + B. Pressed together, this combination forces Windows to restart the Desktop Window Manager (DWM) — the component that draws the desktop and most visual effects. Your screen will briefly flicker, the system will play a short beep, and the desktop will re-render.
This shortcut is documented by Microsoft developers and is widely recommended because it clears a surprising number of visual problems without restarting the computer or losing unsaved work. It is especially useful when:
- The screen is frozen on a strange color or stretched layout
- A laptop has just woken from sleep and the display looks scrambled
- Dual-GPU laptops (Intel + NVIDIA or Intel + AMD) switch GPUs and the display fails to refresh
If the shortcut fixes the issue, the underlying cause was software-related — usually a stale DWM state, a recent GPU switch, or a graphics driver hiccup. If the issue returns within minutes or hours, the next step is to update or reinstall the graphics driver, because persistent recurrence usually signals a deeper driver or hardware instability. If the shortcut has no effect at all, move directly to the step-by-step diagnosis section above.
A small caveat: this shortcut is Windows-only. macOS users experiencing frozen displays can use Cmd + Option + Escape to force-quit the Finder, or simply log out and back in.
Repair Cost Ranges by Device Type
When software fixes do not resolve the issue, professional repair or panel replacement is the next step. Real-world repair costs vary widely by device category and brand. Below are the typical price ranges reported by independent repair shops and documented by replacement-parts vendors (manufacturers do not publish standard service prices, so these figures reflect common market rates observed across U.S. repair shops):
- Standard laptop panels (Dell Inspiron, Lenovo IdeaPad, HP entry-level): $80–$180 for the panel, with $180–$240 installed including a 30–90 day parts-and-labor warranty. Common on mainstream 14-inch and 15.6-inch IPS LCD panels without touch.
- Premium laptop panels (Dell XPS, HP EliteBook, Lenovo ThinkPad, Apple MacBook Pro): $200–$550+ for high-resolution, IPS, or mini-LED panels. Apple Silicon MacBook panels are consistently at the top of this range due to part availability.
- Touchscreen and convertible laptops: $250–$650+. The added digitizer layer, reinforced glass, and 2-in-1 hinge complexity push costs above plain clamshell replacements.
- OLED laptop panels: $400–$900+. OLED panels are part-specific, lower in supply, and require careful calibration after installation. Most manufacturers treat them as whole-unit replacements.
- External desktop monitors: $150–$450 for consumer 24–27 inch IPS panels; $350–$800+ for 32 inch 4K, ultrawide, or pro-grade displays. The desktop monitor market has the widest pricing spread because of monitor-specific part numbers and limited cross-compatibility.
- Smartphone and tablet displays: not in scope here, but follow a similar premium-tier logic — OLED panels on flagship phones are typically the most expensive single component to replace.
A useful diagnostic shortcut before paying for a panel replacement: gently flex the laptop lid while the issue is visible. If the symptom changes when the lid reaches certain angles (a flicker appears, a line vanishes, a tint shifts), the cause is almost always a loose or pinched display cable, not a failed panel. Cable reseating is a much cheaper repair than full panel replacement, and a technician who diagnoses correctly can save several hundred dollars.
When Each Manufacturer Will Replace Your Screen Under Warranty
Warranty eligibility for display defects varies dramatically by brand, and the rule most users do not know is that accidental damage is rarely covered under standard warranties. The details below come from the major OEMs' published support policies:
- Dell: Dell's Premium Panel Exchange program covers even a single bright pixel on eligible monitors purchased directly from Dell. For laptops, Dell's standard warranty covers manufacturing defects but not Customer Induced Damage (CID). Accidental drops, spills, and pressure marks are excluded unless the device is covered by Accidental Damage Protection (ADP).
- HP: HP's standard warranty explicitly excludes Customer Induced Damage (CID). Like Dell, most damaged LCDs are classified as CID and are not eligible for free replacement unless the device was registered with Accidental Damage Protection at purchase. Diagonal or jagged lines on the panel are treated as panel damage and are typically CID.
- Lenovo: Lenovo generally follows industry-standard pixel-defect thresholds for warranty replacement. A small number of dead pixels is usually not enough to qualify; the device must meet or exceed Lenovo's documented defect-count threshold (typically based on ISO 13406-2 class II). ThinkPad warranties vary by service tier; IdeaPad consumer warranties are the most restrictive.
- Apple: Apple covers one or more defective pixels on MacBook displays if they meet the company's published criteria, which depend on screen size and resolution. AppleCare+ extends coverage to accidental damage for a deductible per incident. Out-of-warranty MacBook panel replacements are at the high end of the market.
- Industry baseline: ISO 13406-2 class II is the most commonly cited defect threshold for LCD panels. Class II permits a small number of bright and dead pixels per million; manufacturers interpret this differently in practice.
You can check warranty status using your device's serial number or service tag on the manufacturer's support site. If the device is out of warranty or the defect is classified as accidental, a third-party repair shop is typically cheaper than the manufacturer's official service — often by 30–50% for the same panel part. Always confirm in writing whether the third-party repair covers its own parts and labor warranty (commonly 30–90 days) and whether it uses OEM, OEM-equivalent, or refurbished panels, since this affects color accuracy and longevity.
Conclusion
Display issues are common problems that can range from minor inconveniences to serious hardware failures. By understanding the type of issue you are experiencing and using diagnostic tools like our screen test, you can determine whether the problem is software-related (often fixable at home) or hardware-related (may require professional repair). Regular screen testing helps catch problems early and maintain optimal display quality. Use the screen test tool to identify any abnormalities on your display, then work through the diagnosis steps above before considering professional repair.