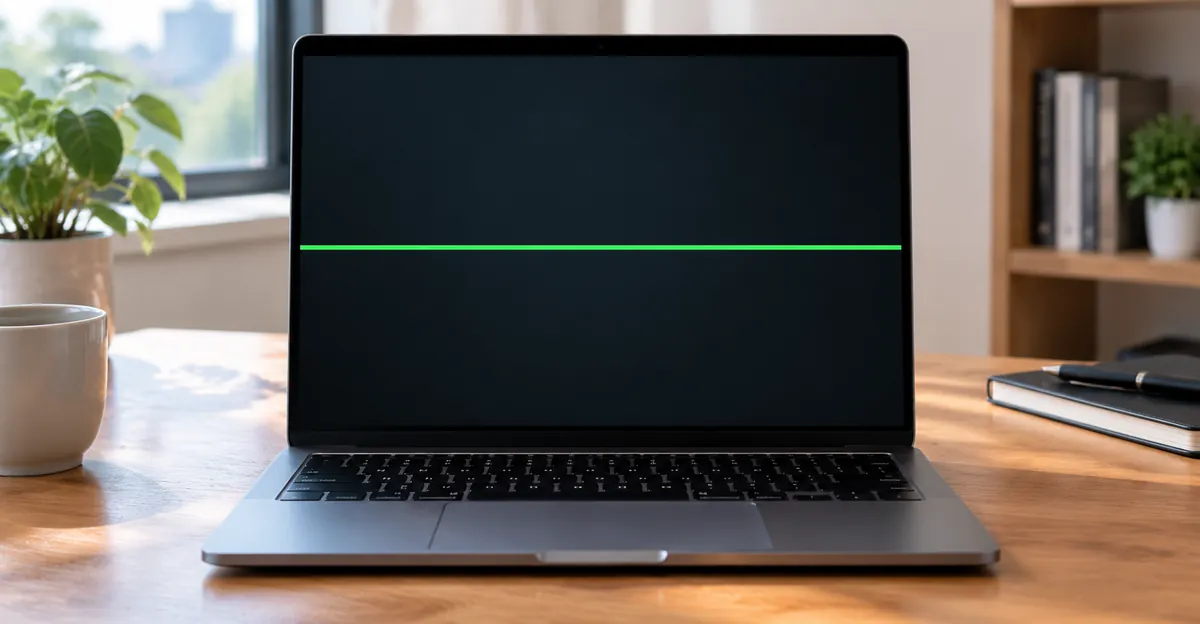
A green horizontal line on a laptop screen is a row-level signal failure, not a random cosmetic glitch. Horizontal means a row path is wrong; green means that row’s green channel is stuck or corrupted. This guide shows how to separate cable, panel, driver, and GPU faults, then how to fix or escalate without wasting money on the wrong part.
Green Horizontal Line on Laptop Screen: What It Means
What a Green Horizontal Line Actually Means
A green horizontal line on a laptop screen runs left to right across one or more pixel rows. Unlike a vertical stripe (column path), a horizontal band implicates the row-drive chain: gate timing from the T-con, the eDP/LVDS flex cable conductors that carry row data, or the row electrodes bonded to the glass.
Why the line looks green matters. LCD pixels are RGB sub-pixels. When green sub-pixels on a row stay forced on, you see a bright green stripe on dark backgrounds. When green data is missing while red and blue still fire, some users describe a pinkish band instead — that dual-color pattern is a different diagnostic branch covered on our pink and green lines guide. This article stays on a single green horizontal line so the repair path stays narrow.
Hardware forums consistently treat a single fixed line as physical display-path damage once it appears before Windows. On HP Support Community threads for a sudden horizontal green line, volunteers ask for an external monitor and BIOS check first, then treat a lone persistent line as screen hardware rather than a GPU-wide artifact field (HP thread 8115695). Microsoft Q&A cases that still show lines on the manufacturer logo or BIOS screen are steered to shop or warranty service, not another Windows reinstall (Microsoft Q&A 4262189).
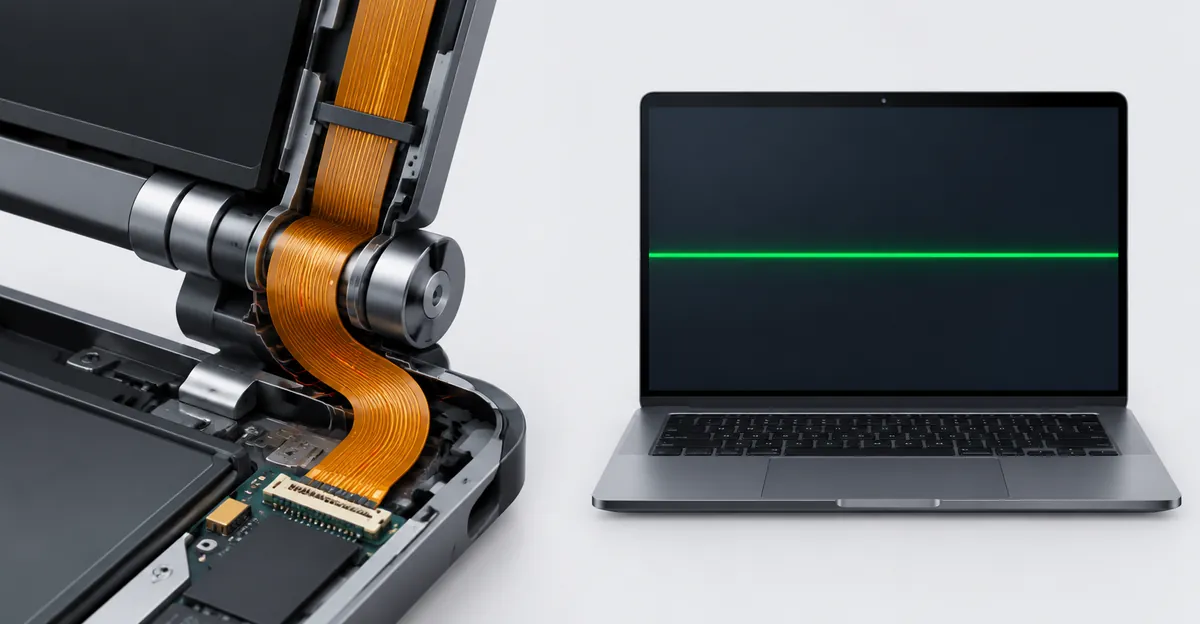
The signal path is short: GPU → motherboard connector → hinge flex cable → panel connector → T-con → row drivers. A crack at the hinge bend often hits the conductors serving mid-screen rows, which is why many horizontal lines sit near the middle (horizontal lines overview). Driver faults sit earlier in that chain and usually vanish in BIOS. GPU faults typically paint the same artifact on an external display.
Takeaway: treat “green + horizontal + laptop” as a diagnostic code. Orientation narrows the circuit family; color narrows the channel; presence in BIOS and on screenshots tells you which side of the GPU framebuffer failed.
How to Diagnose a Horizontal Green Line on Laptop Screen
Before you buy a cable or panel, run four low-cost tests. Together they answer cable vs panel vs GPU vs software for a horizontal green line on laptop screen with high confidence.
1. Screenshot capture test. Display a solid black or white page, then capture with Win + PrtScn or Snipping Tool. Open the file on another device. HP owners reporting a sudden horizontal green line repeatedly note that Print Screen does not capture the line even though it is visible by eye (HP thread 8115695, HP thread 6815863). AllThings.How frames the same rule for Windows 11 green-line cases: line in the file points to software; clean file with a visible live line points to hardware after the framebuffer (allthings.how).
2. External monitor test. Connect HDMI or DisplayPort, press Win + P, choose Duplicate or Second screen only. If the green line appears on the external display as well, treat GPU or motherboard graphics as the primary suspect. If the external image is clean, the laptop panel assembly or its cable is the fault domain — the pattern repair shops rely on in iFixit and HP answers (iFixit Answers 208104, HP 8115695).
3. BIOS / logo screen check. Restart and enter BIOS/UEFI (common keys: F2, F10, Del, Esc). HP support agents explicitly ask Pavilion owners to check whether the green line remains in BIOS; if it does not, they recommend BIOS and graphics driver updates before hardware exchange (HP thread 6815863). Microsoft advisors use the same logo-screen gate for green horizontal lines that appeared after connecting a TV (Microsoft Q&A 3220542).
4. Lid flex test. On a solid color background (white, black, or green fill), slowly open and close the lid between roughly 45° and 120°. Flicker, shift, or disappearance at certain angles implicates the hinge flex cable. A perfectly static line during flex leans toward panel row failure (swalayankomputer diagnosis guide).
| Test result | Most likely domain | Next move |
|---|---|---|
| Line missing from screenshots | Panel / cable / T-con | Hardware path |
| Line present in screenshot | Driver / OS overlay | Software path |
| Line on external monitor too | GPU / motherboard | Warranty / board-level |
| Line only on laptop, changes with lid | Flex cable | Reseat or replace cable |
| Line only on laptop, rock-steady in BIOS | Panel row drivers | Panel or claim |
| Clean in BIOS, dirty in Windows | Driver / firmware | Update or roll back |
Run the full set even if the first test “looks obvious.” A driver-corrupted line can still flicker with lid motion after wake, and a cable fault can look dead-steady until thermal expansion moves the hinge. Photograph the BIOS screen and the external-monitor result — those two images decide most warranty tickets.
Cable vs Panel: Reading a Single Green Line
Competing advice on single lines is contradictory if you read forums literally. One HP volunteer argues that a single line is almost always the screen itself, while GPU or cable problems supposedly spray artifacts across the whole viewable area (HP 8115695 follow-up). Other technicians — including iFixit responders — treat intermittent green bands as a loose LCD connector that clears when pressure is applied near the bezel or after reseating the cable (iFixit Answers 208104). Both can be true; the discriminator is behavior over time and under flex.
Use this decision rule for one green horizontal line:
- Cable-favored: line flickers when you change lid angle; pressing the bottom bezel near the hinge temporarily clears or thins the line; the line appeared gradually after travel or after the laptop sat in a bag with the lid half-closed; external monitor is clean; screenshots are clean.
- Panel-favored: line is geometrically perfect and never moves; visible in BIOS and on the logo screen; lid flex does nothing; pressure on the bezel does nothing; sometimes additional faint companion lines appear on adjacent rows over days.
- GPU-favored: same green line (or related artifacts) on an external monitor; may vanish in hybrid graphics mode or when the discrete GPU is forced off — a pattern reported on gaming laptops when the dGPU path fails while iGPU stays clean (anecdotal community reports; still confirm with the external-monitor test).
Repair economics follow the rule. A replacement eDP/LVDS cable is typically a low-cost part and a 30–60 minute job when the bottom cover is accessible. Panel replacement is a larger part and labor bill and is the default when the line is BIOS-visible and flex-invariant. Opening the chassis for a “press test” can void warranty; if coverage remains, skip DIY pressure tricks and send the BIOS photo to the OEM instead.
Brand pattern from public cases: HP Pavilion and HP 14s owners describe sudden single green horizontals that do not appear in Print Screen images, with support pushing BIOS checks first (HP 6815863). Asus notebook threads on iFixit more often resolve with connector reseating after temporary pressure fixes. Treat brand stories as priors, not proof — always re-run the four tests on your unit.
If you already know the line is horizontal but not specifically green, start from the broader laptop horizontal lines overview linked earlier. If green lines appear in multiple orientations, use the green line on laptop hub.
Software Checks Before You Open the Chassis
Only spend time here when the line is absent from BIOS/logo, or when it appeared right after a Windows or GPU driver update. MakeUseOf and Tenorshare-style guides lead with driver update, rollback, resolution/scaling resets, and occasional BIOS firmware updates for green horizontal lines that behave like software faults (MakeUseOf, 4DDiG / Tenorshare). Microsoft advisors likewise start with roll back / clean reinstall of the display adapter when a green horizontal line appeared while hot-plugging a Smart TV and the logo-screen status was still unknown (Microsoft Q&A 3220542).
Practical sequence (15–30 minutes):
- Press Win + Ctrl + Shift + B to reset the graphics stack; note whether the line vanishes even briefly (allthings.how).
- Device Manager → Display adapters → Update driver, or Roll Back Driver if the option is active.
- If rollback is greyed out, uninstall the adapter (optionally delete the driver package), reboot, then install the OEM-recommended package from the laptop maker — not always the newest GPU-site build.
- Set recommended resolution and 100% scaling; wrong scaling rarely creates a true hardware-looking line, but it is a cheap exclusion (MakeUseOf).
- Only if BIOS is clean and drivers fail: check OEM BIOS notes for display-related fixes before touching hardware.
Do not reinstall Windows as a first step. Forum posters who wiped drives while the line remained on the startup logo simply delayed the hardware call (Microsoft Q&A 4262189). If BIOS already shows the green line, skip this section and go to cable-vs-panel.
When Connecting HDMI or a TV Triggers the Line
A recurring edge case: the laptop was fine, you plugged into a TV or monitor, and a green horizontal line appeared on the laptop panel during or after the handshake. Microsoft Q&A documents exactly that sequence — connecting to a Smart TV, then a green horizontal line on the laptop with no prior drop (Microsoft Q&A 3220542). Advisors split between driver rollback, uninstalling the monitor device, checking the HDMI cable/adapter, and later asking whether the line exists on the manufacturer logo screen.
What that sequence usually means:
- Driver renegotiation glitch: Windows rebuilt the display topology and left a bad GPU driver state. Logo screen clean → software path above.
- Transient GPU stress: the dGPU woke for the external display and exposed a marginal GPU path. External monitor shows artifacts → treat as GPU risk.
- Coincidence reveal: the flex cable was already cracked; the lid angle you used while plugging HDMI made the intermittent fault permanent. Lid flex positive → cable path.
- Cable/adapter side issue on the TV link: can cause problems on the external image, but should not paint a permanent line on the internal panel unless the GPU is involved.
Action checklist after a hot-plug trigger:
- Unplug the external display; reboot once with only the internal panel.
- Check logo/BIOS immediately.
- If clean in BIOS, roll back the GPU driver and uninstall the Monitors entry for the TV, then reboot (MakeUseOf monitor-driver step).
- If dirty in BIOS, stop cycling docking stations; document and open a warranty case or plan cable/panel work.
- Avoid stacking docks, cheap HDMI adapters, and forced 4K@high refresh on older GPUs until the internal panel is diagnosed.
This chapter exists because ranking pages list “update drivers” and “replace screen” but rarely explain what to do when the line starts mid-docking. The docking event is a clue, not proof of TV damage.
Keep Using It, Document Warranty, or Replace
After diagnosis, you still need a usage decision. Shared guides stop at “replace the screen.” Real owners need to know whether tonight’s work is safe and whether DIY will burn warranty.
Keep using short-term when: one thin green line; external monitor clean; machine temperature normal; no rapid multiplication over 24–48 hours. Prefer an external display for long sessions so you are not staring through the defect.
Stop relying on the internal panel when: lines thicken or multiply (iFixit users describe pink/green bands getting wider after leaving the laptop on overnight); violent flicker; same artifacts on external output; laptop under active warranty and you were about to pry the bezel.
Warranty documentation kit (photograph these):
- Line visible on the manufacturer logo or BIOS page.
- Clean external monitor next to the laptop showing the internal line.
- Screenshot file that does not contain the line (proves post-framebuffer hardware).
- Lid angle where the line changes, if applicable (short video helps).
- Exact model string from the underside sticker or BIOS.
HP agents who see a BIOS-visible line move users to private warranty workflows rather than public DIY steps (HP 6815863). Microsoft threads note that full panel replacement can approach the cost of replacing an older machine (Microsoft Q&A 3220542 comments). Use that cost reality in the table below.
| Path | Typical parts cost | DIY difficulty | Warranty risk | Best when |
|---|---|---|---|---|
| Driver / BIOS only | Free | Low | None | Clean in BIOS |
| Cable reseat | Free | Medium | Voids if seals broken | Lid-flex positive |
| Cable replace | Low | Medium | Same | Reseat helped briefly |
| Panel replace | High | High | Same | Steady BIOS line |
| OEM warranty | Covered if eligible | None | None if no DIY | In-coverage + BIOS line |
| Retire / replace PC | Device value | N/A | N/A | Old GPU + high panel quote |
Pressure-on-bezel tricks from community posts can temporarily clear a loose connector, but they are diagnostic only. Do not tape permanent pressure onto the LCD; that can crack the glass and convert a cable claim into an accidental-damage denial.
Fix Path: Reseat Cable, Replace Cable, or Replace Panel
Once software is ruled out and the external monitor is clean, work the hardware ladder in order. Broader step photography lives in our how to fix laptop screen lines guide; here is the green-horizontal-specific ordering.
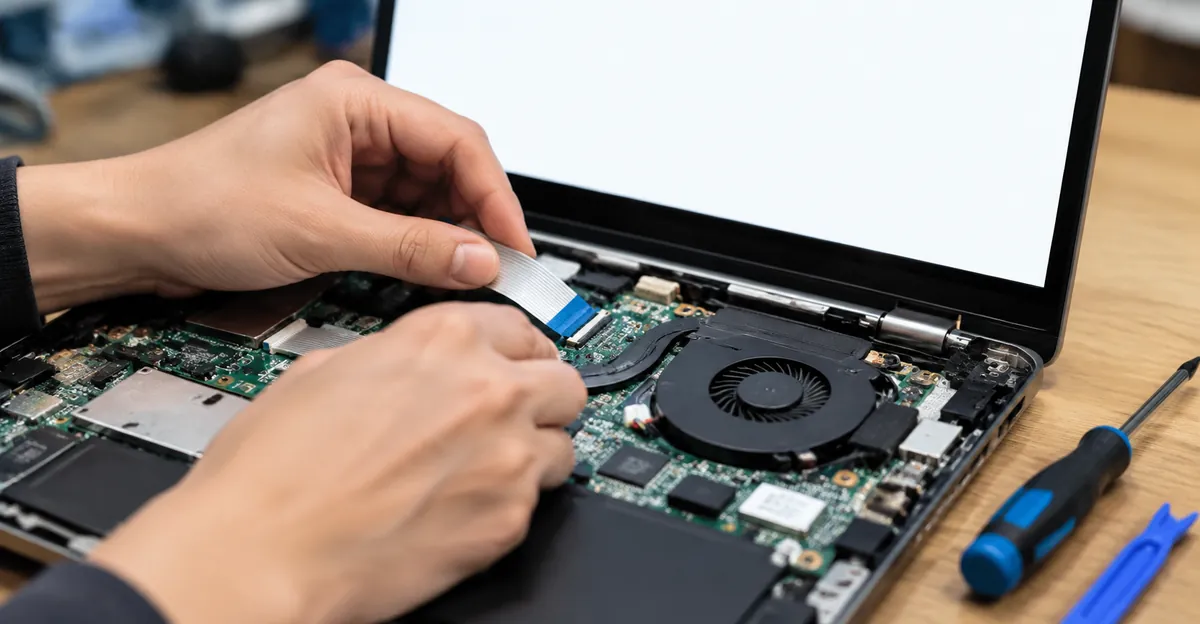
Reseat the display flex cable. Power off, unplug, remove the bottom cover, locate the display ribbon near the hinge, release the retention clip, inspect for dark fatigue marks at the bend, reconnect firmly, and test before full reassembly. Success rate is highest when the lid flex test was positive. After reassembly, open and close the lid repeatedly on a solid white field; any return of the green line means the cable itself is cracked, not merely unseated.
Replace the cable. Order by full laptop FRU/model, not marketing name. Match eDP vs LVDS, connector width, and camera-wire breakouts. Install, then repeat the flex endurance check. This is the sweet spot when reseating helped for minutes or hours then failed.
T-con or panel. If the cable path is pristine and the line never responds to flex, the row driver or glass electrode has failed. Panel replacement is then the durable fix. On some designs a separate T-con board is serviceable; on thin consumer lids it is laminated to the panel and replaced as a unit.
Prevention after repair: open the lid with two hands, avoid twisting the chassis, do not close with objects on the keyboard, and keep extreme lid angles (nearly flat) for short periods only. Hinge binding accelerates cable fatigue — if the lid feels uneven, fix the hinge before the new cable inherits the same stress.
For mixed-color symptoms after a green-only start, re-check the pink-and-green guide linked in the opening section once — multi-channel damage changes parts selection. For all green-line variants on notebooks, return to the laptop green line hub linked above.
Conclusion
A green horizontal line on a laptop screen is a structured failure: row path plus green channel, sorted by screenshot, external monitor, BIOS, and lid flex. Software fixes belong only to BIOS-clean cases. A single line that flexes with the hinge is usually a cable; a single line that never moves and survives into BIOS is usually the panel. Hot-plug events are clues, not excuses to skip those tests. Document first if warranty is alive, then reseat, replace cable, or replace panel in that order.
Run a solid-color pass in the free screen test tool before and after any cable work so you can prove whether the green row is gone.
Sources
- HP Support Community — Horizonal green line on my laptop screen
- HP Support Community — horizontal green line appearing on the screen of my laptop
- Microsoft Q&A — Green horizontal line on the screen
- Microsoft Q&A — Green/Pink Lines on my laptop screen
- MakeUseOf — Windows green horizontal lines
- AllThings.How — Green line on screen in Windows 11
- iFixit Answers — Pink/Green horizontal lines
- SWALAYAN KOMPUTER — Laptop screen lines horizontal or vertical
- 4DDiG — Fix green line on screen laptop